 Day One Fixes
SolvedHow-toUpdated
MECCHA CHAMELEON: How to Import a Map from Gmod/Source Engine
Short answer
A tutorial focused on importing a map from gmod, can also be applied to other source engine games. Mostly focused on troubleshooting the issues that come with doing this, but gives a general rundown on how to go through the process as well.
Steam Community guide by Kerma.
Intro
Hello! I wanted to try porting some cool maps to Meccha Chameleon, and wondered if it would be easy to do. I thought the game was made in Unity or something, and that porting maps from other games would be pretty easy. Both of those things were wrong.
Well, porting maps isn't that bad. There's just a lot of issues that crop up when you end up taking something from Source and put it in Unreal. What started as a project that I thought would take me 2-3 hours ended up being something that took me 2-3 days (for my first map, anyways). But most of this was troubleshooting, looking through forum posts and stackexchange questions, trying to fix issues instead of just letting them stick around. So hopefully this guide can help make those issues easier to deal with!
I am writing this guide mostly to have documentation for myself later, in case I forget any of this. I figure that I might as well share it with people instead of just having it in a document somewhere on my computer that I forget exists. That being said, the very first time I opened Unreal was to make a map, and my experience with Blender is fairly limited. This is both to say that I think anyone with a little bit of technical knowhow can do this, and also that I am not a pro at this by any means. If you know these tools well and know how to go about things better, feel free to leave a comment.
Resources/Links
I am not going to go over the fine details of how to import things, but there are some great tutorials and other resources that helped me a bunch. I will link to those as they are relevant.
As for things you should grab in advance:
Firstly, you should of course be looking at the official MecchaChameleon mapping guide:
https://docs.google.com/document/d/1zlUQIVTHxSTJm-OXH2WIfEjv95T4bwv4NFx5nQOSAyo/edit?tab=t.0
There are a few inaccuracies or things I would recommend doing differently in it, but i'll go over those later.
Download the zip file included in it for later.
To actually get the file converted to a usable format, you'll need Crowbar:
https://steamcommunity.com/groups/CrowbarTool
There's other tools out there, like GMAD, but I like this one.
You'll need blender:
https://www.blender.org/download/
I used to absolutely hate blender and refused to use it, but that was before the user interface overhaul. It's pretty good and accessible now, IMO.
You might be able to use other 3d editor software of your choice, but we are using a plugin to help with source games, so you might have to do different steps along the way.
You will also be downloading a blender plugin called SourceIO[github.com], but this is shown in a tutorial I will be linking, so don't worry about it too much right now.
You will unfortunately need to download Epic Games Launcher to get Unreal Engine 5.6.1:
https://store.epicgames.com/download?lang=en-US
If you know what you're doing you can bypass the EGL by compiling the binary from source yourself, but that still requires an epic account and is probably more trouble than it's worth. From the epic launcher you want to specifically download 5.6.1, newer versions may work but that is the version recommended by the official guide.
You will need SteamCMD, to upload the workshop file:
https://steamcdn-a.akamaihd.net/client/installer/steamcmd.zip
This is an official command line version of steam that allows you to upload workshop maps. It is also found in the Meccha Chameleon Custom Mod Manual (the first link in this section) but its important enough to also link here.
And of course, you will need your map:
For this tutorial I will be using a GMOD map I found. If you're using somebody else's map please be nice and at least credit them/link to it. I am not sure how other games maps will differ, and i'm sure every map has its own unique problems. This guide does not have the goal of solving every problem, but I hope to at least get people started and fix some common issues I ran into.
Importing the map to Blender
First we need to decompile the map. I will be using instructions assuming it is a Gmod map, but Crowbar handles a lot of different map types.
Open Crowbar. Go to "Unpack". To find the map, navigate to Steam\steamapps\workshop\content\4000. It will be in one of these subfolders, the ID should match the workshop ID. It will be "gmpublisher.gma".
Open it. Inside you are looking for a .bsp file. You can just unpack the entire thing as the .bsp file will be included, or you can navigate to it here and unpack it by itself.
For doing stuff inside blender, there is a pretty good tutorial basically doing exactly what we are doing, but for unity instead. What we need from it is about six minutes long:
Something not mentioned but super helpful: Shift + ` makes you enter a view mode where you can fly around the 3d space with WASD. Helps navigate and fix your map a lot easier.
If timestamp does not work, I started it at 1:56. Watch it up to when he opens Unity, or 8:05. Unreal also accepts .fbx files, so we will be using that. It's worth noting that the map I used did not have any white textures, so it was a fairly easy conversion.

Finishing up in Blender
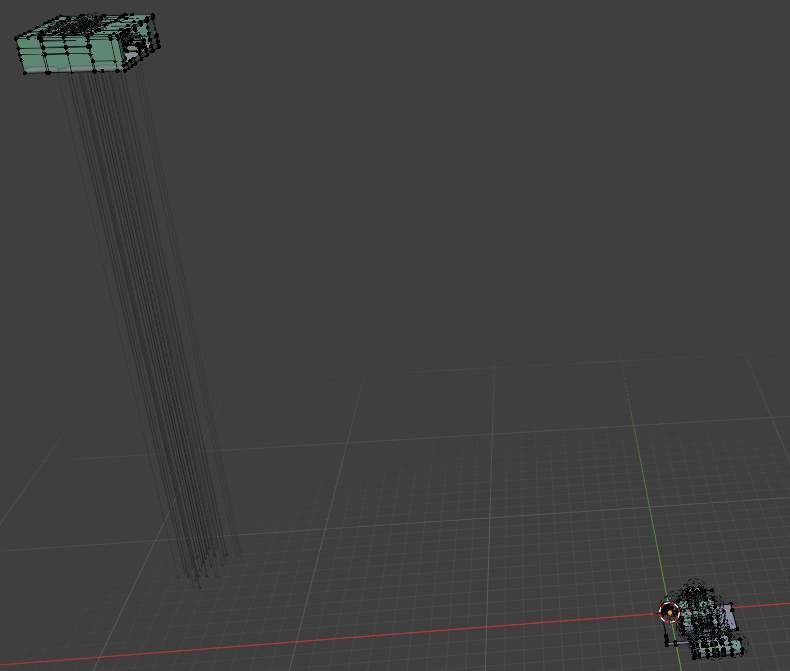
Something else you might want to do in blender is edit the doors and stuff that will get in the way of players. As far as I know there is no way to interact with any objects or buttons or anything in Meccha Chameleon, so you will need to make every door either opened, destroyed, deleted, or generally out of the way. You can use this to your advantage if the map is too large by using the doors to block off parts of the level. If you don't choose to edit the doors in Blender, you can still do it in Unreal- I just find Blender a lot easier to use and move around in.
Also, I had to make a change to the mesh of my map. Fear & Hunger 2: Termina is a great game that you should definitely play if you enjoy weird RPG games and dark fantasy. Shilling aside, the levels in it occasionally have otherworlds otherplaces connected to them and choosing to include it would make the map way too huge. It's also connected to the base map with a teleporter, which probably wouldn't work in our mod anyways. I think you can edit mesh in Unreal, but Blender is more or less made for it, so I recommend doing that here.
Putting the .fbx into Unreal
Before continuing to the Unreal import, I want to make a Personal Opinion PSA and impart some of my own experiences to save you some time. Do most of your basic level editing in Blender. There are some things you can only do in Unreal, like specialized lighting and anything to do with game design (I've seen some people do fancy things with UI elements, for example). But Unreal is also a really cumbersome and freezy program that I have quickly grown to be frustrated by. On my second map project Unreal would freeze for a solid minute every time I did anything to the blueprint file, and I would get the habit of doing something then alt tabbing and doing something else while waiting for Unreal to process it. For your first map it's probably best to try just importing it into Unreal right away, but as you get more used to the process I highly recommend learning Blender more and using that as much as possible.
Now we put the .fbx file into Unreal. Before we do that though, we need to make the Project first. We're going to be using the project file given to us in the Meccha Chameleon Custom Mod Manual[docs.google.com], because it has some preconfigured settings we can use.
Before you unzip it, you should probably do it in a new directory. Make something like C:\MecchaChameleon or whatever you want to name it, then unzip it there. Why bother making it so close to the root of the C drive? When we import the fbx, the files inside of it might have a particularly long filename. In my case, having it be in the "Unreal Engine" directory in My Documents cause it to go over the filename length limit, causing issues. Even with the setting to ignore filename length, my level wouldn't build. Feel free to rename the folder to anything you want, if you're going to make a bunch of other maps too.
Open Unreal 5.6.1, and open MecchaCModKit_Load.uproject. The mod manual has a sort of quick start guide on how to make your first map, but honestly its a lot more work than it really needs to be. It goes through making a new plugin, configuring a bunch of settings, and setting it up, but instead we're going to just use their sample plugin, delete everything, and have it all preconfigured for us.
Using the bottom left panel, go to Plugins/SampleMyUGC/Maps. In the bottom middle tab you should be seeing a file that's called "MyMap". Double click on it.
Then in the top right area, you'll see a panel called "Outliner". Select everything with Shift on the list (except MyMap (Editor) ), and hit delete. You will now have a clean slate to work on. You can also delete every folder that isn't "Maps" in the SampleMyUGC plugin folder, as they contain the resources used by the demo maps.
Let's import the .fbx we made now. It's very important you don't just drag the .fbx onto Unreal, in case you accidentally drag it into the content browser. The reason for this is that there is a completely different import menu with different import settings if you place it in content browser. Instead, use File -> Import Into Level. For the destination, you can use the plugin folder SampleMyUGC.
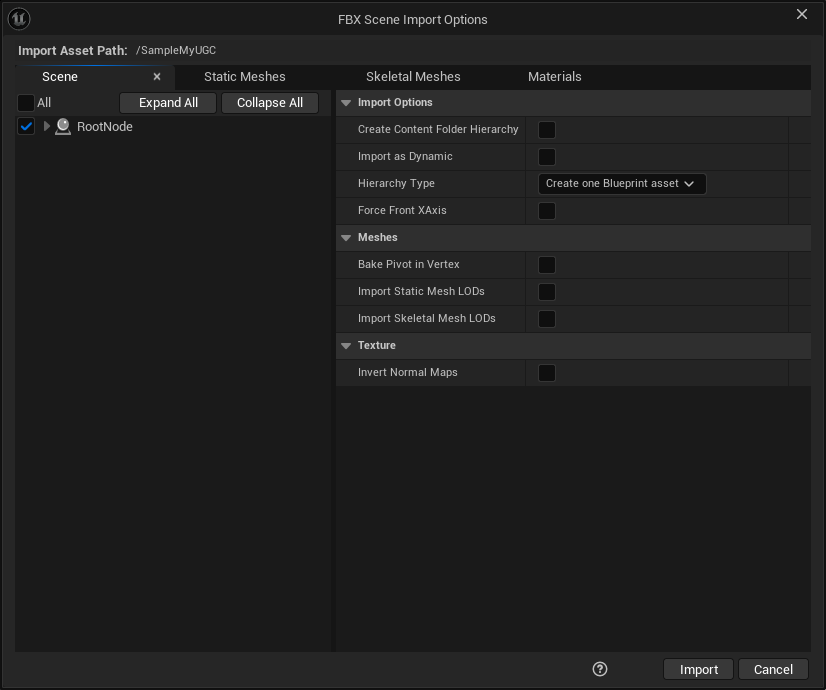
You will see this popup. The only setting you should change is in "Static Meshes", with "Generate Missing Collision". Make sure that is turned off. We'll explain why later. After you've toggled that off, you're good to hit Import.
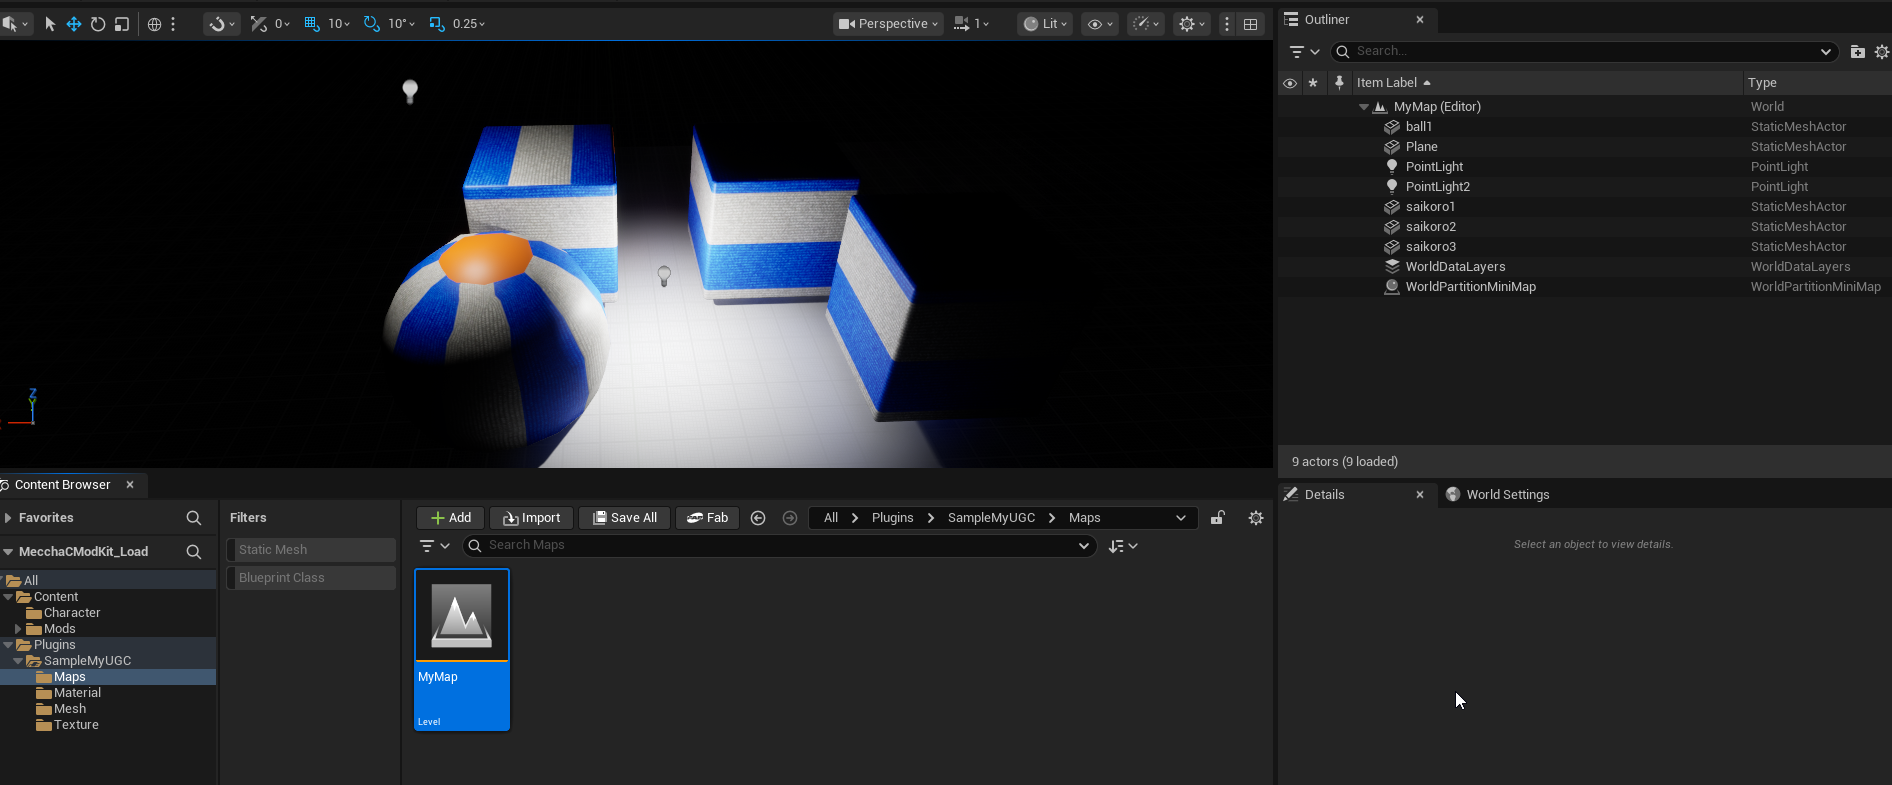
You have imported the .fbx into Unreal! There will be a popup saying a bunch of texture naming errors, that can be completely ignored. Unreal will rename them all for you. Additionally, you will notice a bunch of things immediately wrong with the level, but we will fix those one by one.
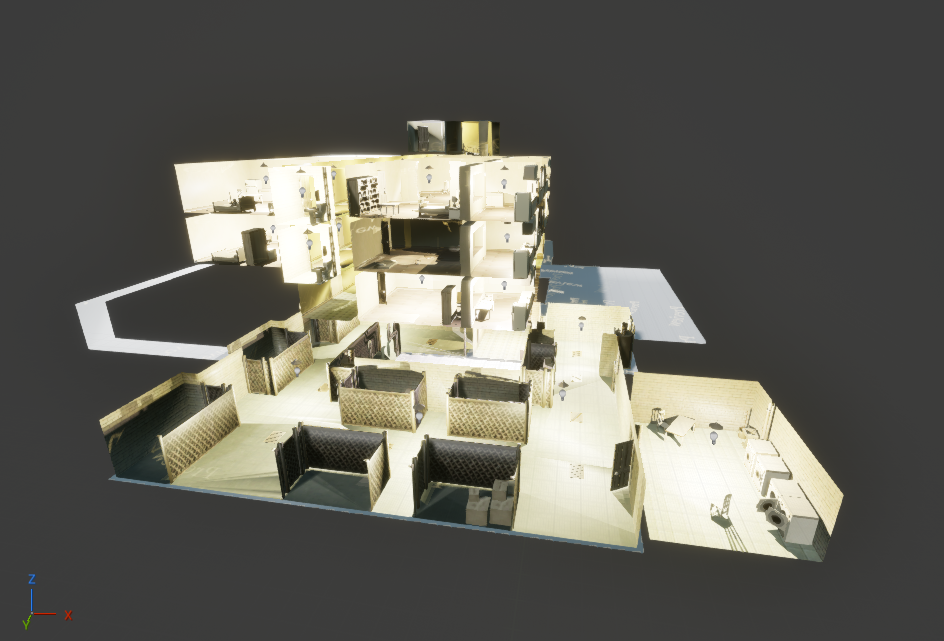
Fixing the Issues: Collision
First things first, you will be put immediately into a second window that you don't need to be in. We will come back here later, this is the "Blueprint" window. For now you can close it. If the top left corner says "MyMap", you aren't in the blueprint window- don't close the main Unreal window!
Alright, the most obvious issue with the map is that all the lights look blown out to hell, but lets make it so the map is actually playable first. There's no point if the map looks good or bad if you just fall through the floor instantly. What we will do is fix collision, upload the map as a workshop file, test it, and then go back and fix the rest after.
When we first imported the .fbx, we turned off a setting that auto generates collision. This is something that took me a while to figure out, and caused a lot of frustration. Even if a map has collision to begin with, Unreal will sometimes decide to generously put a huge square collision box around it anyways. This might be OK for things like huge open fields or basic open areas, but if your map is indoors it won't work at all. You'll immediately clip out of bounds on spawn over and over.
Well, good thing we turned that off. We have a different problem though: the presets for collision in Unreal are wrong, and we will either fall through the floor anyways or not be able to climb on anything. The camera will also most likely clip through all the geometry. We're going to bulk edit all of the meshes to fix this.
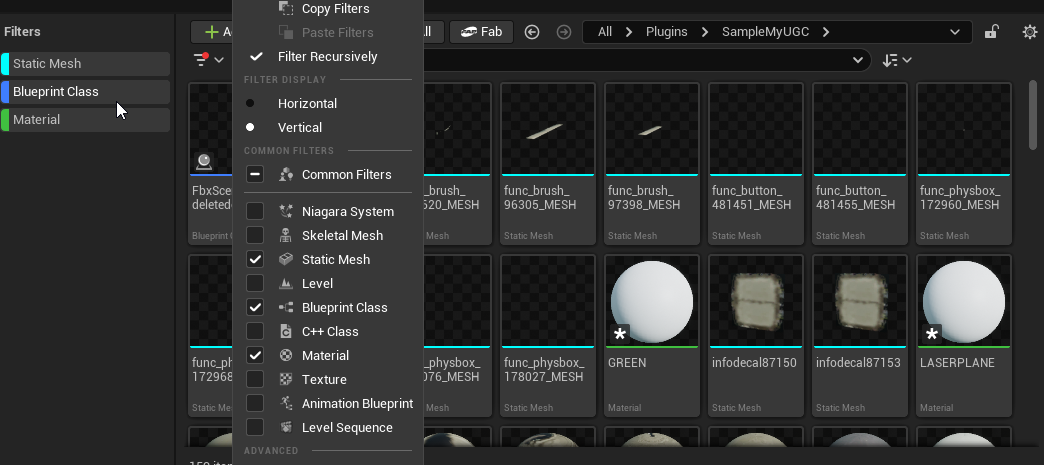
In the content browser (the tab at the bottom), you can click the inverted pyramid icon to filter things. I recommend enabling "Static Meshes", "Blueprint Class" and "Materials". We only need Static Meshes right now, but enabling these filters allows you to quickly turn them on and off on the side.
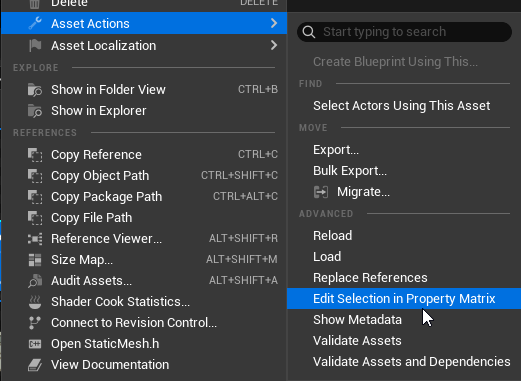
Turn off Blueprint Class and Materials, so you only have the static meshes. Hit CTRL + A to select all of the meshes, right click one of them, then do "Asset Actions -> Edit Selection in Property Matrix".
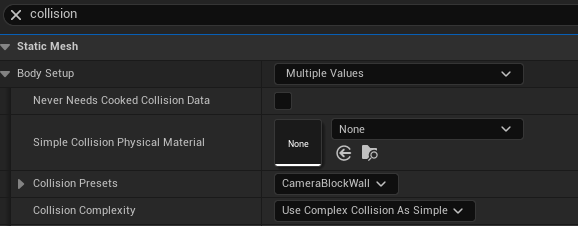
A huge window should pop up with a list of all your meshes. You don't need to worry about anything in the huge pane on the left, just focus on the search bar on the far right. Search for "Collision" to find what we're looking for. Then under "Body Setup" there should be a tab called "Collision Presets", set that to "CameraBlockWall". Just underneath that there should be another setting called "Collision Complexity". Set that to "Use Complex Collision As Simple". Hit Ctrl + S. The changes should now be saved, and you are free to close this window.
Unfortunately there is one last hitch to this. The blueprint itself is using some of the old collision data. The "Collision Complexity" is properly set now and should work as expected, but if you play the map the camera will still clip through everything. Truthfully, there wasn't really a reason to set the collision presets of all the meshes to CameraBlockWall because of this, but still good to do just in case.
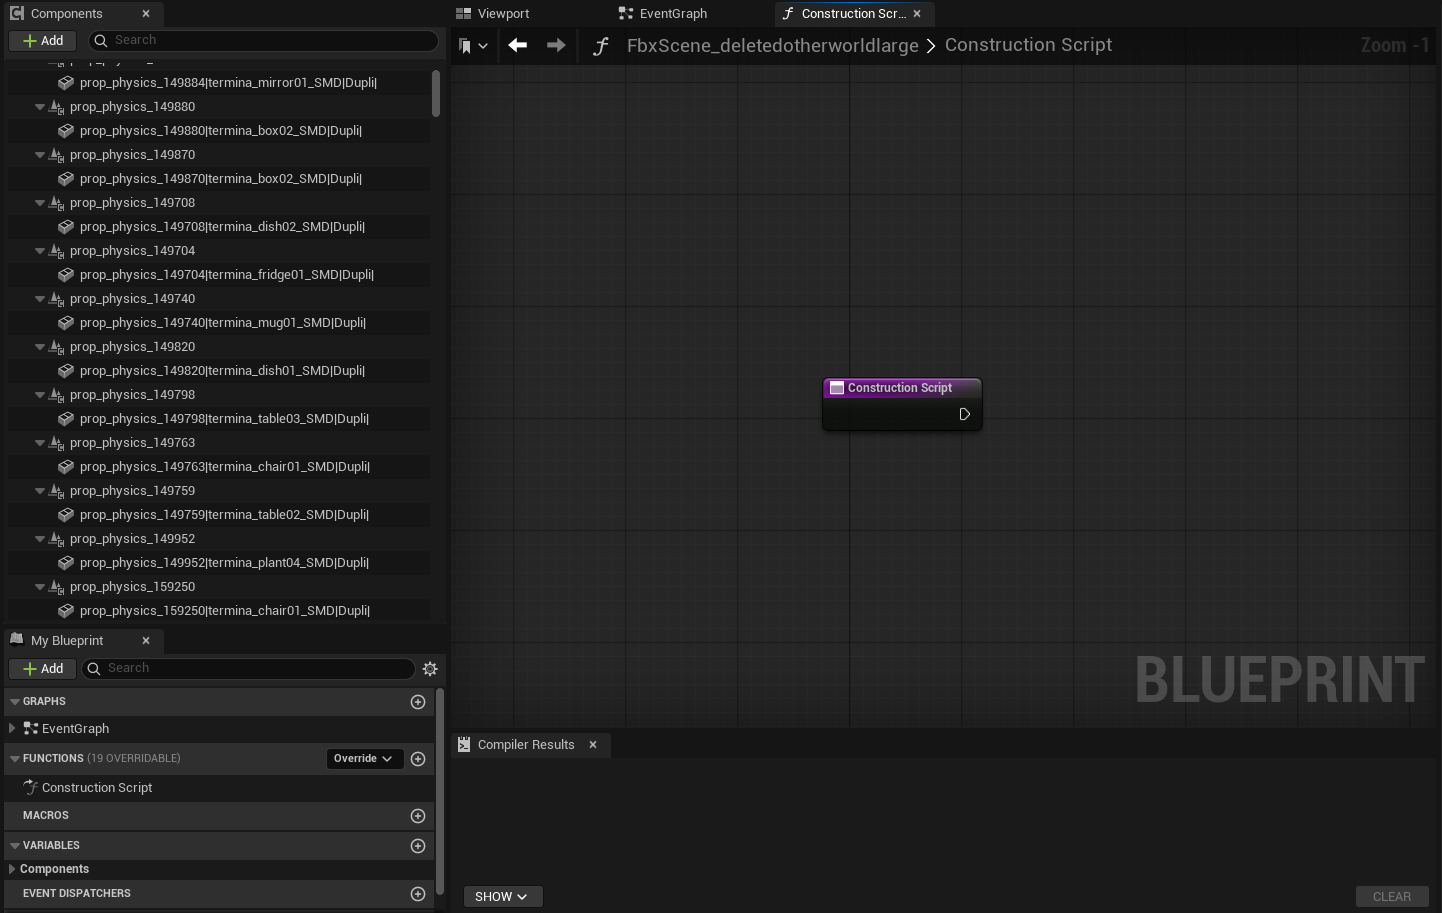
We're going to be doing some programming. Don't worry, its relatively simple and you won't have to actually type out any code. On the right in the "Outliner" tab, you will see one item that has a blue link in the "Type" section, saying "Edit [name of object]". This is your blueprint. Click that link.
You're now back in the blueprint window you started in! I'm not sure what tab you will spawn in. If you see a box in the middle that says "Construction Script", you're in the right place. If not, you can click the "Functions" dropdown in the bottom left corner, then double click "Construction Script". It should hopefully put you in the Construction Script Tab.
The construction script section is more or less what the blueprint does when it is placed in world. Basically, this will live edit the blueprint without actually changing anything inside of the blueprint. Why did we choose to make a blueprint instead of selecting an import option where all the objects are directly in the level? Personally I think its cleaner, and also we can make changes to the blueprint without editing things directly. The construction script is also pretty handy for some things.
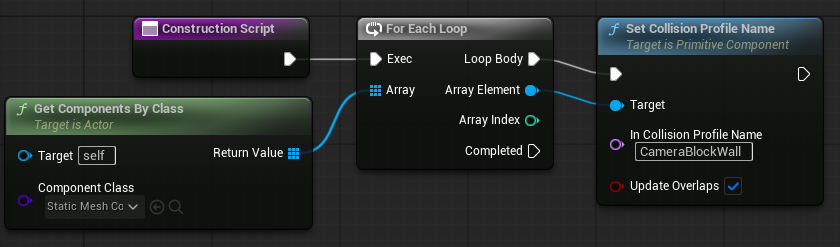
Right click anywhere on the tab that isn't the purple box that says "Construction Script". A search box will pop up. Uncheck "Context Sensitive". Construction scripts work through nodes, and we're going to have to add a few nodes before hooking them up. Add these following nodes into the scene:
- Get Components By Class
- For Each Loop
- Set Collision Profile Name
In the "Get Components By Class" node, change "Component Class" to "Static Mesh Component".
In the "Set Collision Profile Name" node, change "In Collision Profile Name" to "CameraBlockWall".
Then hook them up like this:
(If you can't connect two nodes like "Array Element -> Target" in For Each Loop to the thing we're modifying, it might be due to a caching bug. You might have to start with "Get Components By Class", set the Component Class, then drag out from "Return Value" to empty space. Then you can search for "For Each Loop". This should hopefully let you connect it to the proper modifications.)
If you're curious what this exactly does, we're looking for every Static Mesh Component inside the blueprint, putting them into an Array, then making a For Loop that iterates through them and applies the preset. If you didn't understand any of that, don't worry, you don't need to. The important part is that we're done with collision. Click "Compile" in the top left- don't forget to do this!! Then hit Ctrl + S and close the blueprint window. We will be coming back to use the construction script for some more things later.
Making sure your map is saved and in the right position
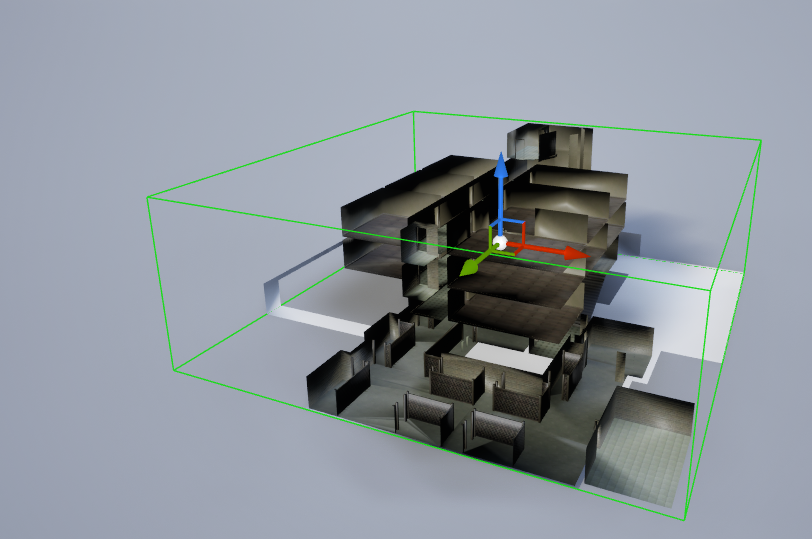
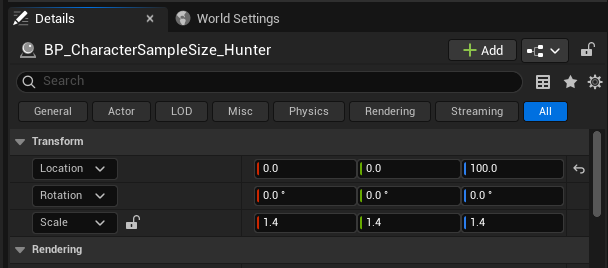
First things first, lets make sure you're going to spawn in the right position in the first place. Meccha Chameleon spawns you at (0,0,100)[X,Y,Z] when you load into the map. My map was centered pretty much exactly how I wanted it so I almost completely forgot about this step, but your map might differ.
Luckily, the mod tools include some Meccha Chameleon Homunculuses™ for us to put in as a test. In the content browser, navigate to "Content -> Character" folder, and open it. Drag "BP_CharacterSampleSize_Hunter" into the viewport. On the "Details" panel on the bottom right, set the location to 0, 0, 100.
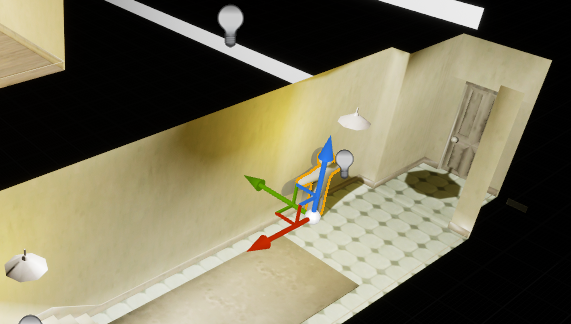
OK, maybe not perfect. Let's adjust the position of the map.
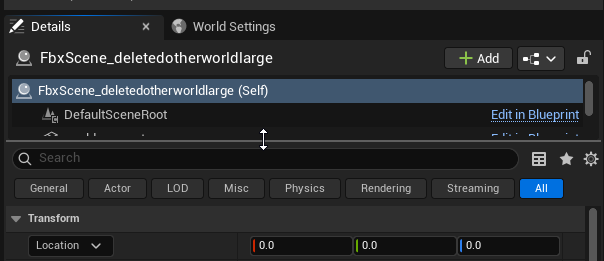
On the "Outliner" on the right, click the Blueprint that your map is in again. For whatever reason, moving the blueprint did nothing for me. You can try moving it around in the viewport and see if it moves properly, but here's a fix I found. The "Details" pane is actually two windows, one showing the hierarchy of objects of what you've selected, and one showing the options. For me, the hierarchy view was completely collapsed. So let's expand it a bit...
Once you've expanded it by dragging it down, select everything by clicking on the section then Ctrl + A, but deselect the (Self) root object. The movement cursor should then snap to the centre of all objects in your scene and for whatever reason you can now move everything around. This will most definitely be laggy, slow small movements are best.
Saving
I find saving surprisingly inconsistent in Unreal, no matter how many times I slam Ctrl + S I'll always exit the window and be prompted that things are still unsaved... or even worse, export it to workshop then find nothing was changed. One workaround I found is to reopen the exact same map you're in. In the content browser, go to "Plugins -> SampleMyUGC", then click on MyMap. You should get a save content window to pop up, confirm it to save. I'm sure this is just down to general inexperience in Unreal, but this has always worked for me!
What to do if your map is gigantic and it takes forever to move anything
I am coming back to this guide to write some updates on what to do if your map has a ton of assets that freezes unreal every time you try and move it. My second map has encountered some unique difficulties that are worth documenting, so hopefully this helps other people as well!
With the Funger map, it was laggy when I moved it around, yet it still moved successfully if you waited a couple seconds while holding down the mouse button. I am now working on Tracen Academy from Umamusume, which has over 1000 total objects inside of it, and trying to get it to move down 225 units has been a nightmare. Even though the objects themselves are relatively low complexity,