 Day One Fixes
SolvedHow-toUpdated
Monster Hunter Wilds: The Hunter's Handbook: A Guide to the Wilds
Short answer
This guide contains a wealth of information on various topics to help lay the groundwork for understanding the game, improving player knowledge and skill, and otherwise enhancing the experience.
Steam Community guide by ҉̧ ҉̧҉ ҉Minorou ꧁💀꧂.
Hello, Hunter!
Welcome to Monster Hunter Wilds! The Monster Hunter series has seen explosive growth in popularity over the past few years, and Wilds promises to continue that trend.
This is a wonderful, quirky series with a lot of content. Each game offers dozens to hundreds of hours worth of entertainment for those willing to dive in. With that amount of content, there is a lot to know, and so much to learn. This guide aims to help ease in new players to the series, or refresh the memory of returning veterans.
Some key things to understand about Monster Hunter:
- This is a notoriously difficult series to get into. It took me three solid attempts over several years to break in and finally "get" it. Capcom has made great strides to make each successive game more approachable, but don't feel discouraged if you don't enjoy the game; it's not for everyone.
- Combat is slow and deliberate. It's not a spectacle fighter. When you hit an attack button, you commit to that attack. With few exceptions, you can't dodge or block until it's complete. You have to read your opponent and anticipate their attacks so you can respond in kind.
- Your character has no "stats," and doesn't level up. Your character is exactly the same at the beginning of the game as they are at the end-game. The only things that improve are your supplies, weapons, armor, and your own skill and knowledge as a player.
- There's only so much a guide can teach. If you know someone who plays Monster Hunter, ask them. Nothing can compare to a veteran teaching you the game and answering your questions as they come up. Even if you don't know someone in-person or online, there's plenty of resources dedicated to helping people learn this wonderful series, including the many discord servers dedicated to Monster Hunter. The Monster Hunter Gathering Hall[discordapp.com] is the officially partnered one.All in all, there are two priorities in Monster Hunter:
- Don’t get hit
- Hit the monsterThe order is important. If you can remember and abide by that mantra, you’ll be all right.
Trying to learn everything about a game as big as Monster Hunter Wilds all at once can be intimidating. Don't worry! Take your time. It will all become second nature as you get familiar. Monster Hunter is a long game, and you have plenty of time to get acclimated at your own pace.
Keep in mind this game just came out. While most of this guide's information is based off demo playtime and official media sources, some parts are speculation based off trends from previous games. I will update the guide accordingly once information becomes available.
What's the Story?
Do I need to know the lore of the past games to know what's going on?
No. The Monster Hunter series has barely any story at all. Most games can nearly all boil down to: "a big monster is threatening the local ecosystem; can you take care of it?" You can jump straight into Monster Hunter Wilds without any trouble.
Seriously, give it to me. What's the lore?
Take this first paragraph with a grain of salt; very little of it is referenced in the series directly. Some of this info comes from notes from artbooks and concept art, and may or may not be considered canon. Either way, it can be fun to think about.
A long time ago, there was an ancient civilization[monsterhunter.wikia.com] of many races, including humans and wyverians, who are humanoids with four fingers and pointed ears. They possessed great knowledge and had an advanced level of technology unknown today. They exploited the wyverns and elder dragons of their time. At some point, they performed The Forbidden Act, killing numerous wyverns to create their own massive bioweapon lifeform called the Equal Dragon Weapon/Wyvern Machine Soldier. Many of these bioweapon lifeforms were made. This greatly angered the dragons, sparking the Great Dragon War. It was a terribly violent conflict that left the ancient civilization in ruins and most dragons extinct.
With most of the world in shambles and the knowledge and technology of the ancient civilization lost, humans and wyverians adopted a new culture. Instead of directly antagonizing wyverns and dragons, they would instead live alongside them with a healthy respect for nature. This isn't to say conflict ceased entirely: wyverns are a constant threat to humanoids and other monsters alike, and something needed to be done to protect the peace.
The Hunter's Guild was formed to maintain that peace. It's the central governing body of the world, and the primary way monster-related problems get solved. Officially-sanctioned hunters are not out to annihilate all monsters, rather, they're more glorified park rangers. They hunt down overpopulated animals, eliminate disruptive invasive species, and protect towns from marauding monsters. Guild Knights are dispatched to execute poachers that disobey these rules. Everything is done to learn more about the world and protect the world's ecosystem.
The Monster Hunter setting is sometimes referred as something akin to "cave punk", a world where many structures and tools are made of wood, stone, and dinosaur bone. That isn't to say the culture is primitive—alchemy, metallurgy, and aviation are all present. Access to fantastical monster parts and recovered ancient technology has led society to develop airships and advanced weaponry like dragonators and charge blades.
A few months before the game released, Capcom released this video:
https://www.youtube.com/watch?v=FWnKdXMgNeQ It serves as a good introduction to the Monster Hunter world, though some (in good fun) conspiratorially call it pro-Guild propaganda.
All right. How about Monster Hunter Wilds specifically?
A young boy named Nata is discovered near the border of the Forbidden Lands, an area believed to be uninhabited ever since access was restricted a thousand years ago. He wants to return to his clan, the Keepers, who supposedly live there. He fled his village after a monster attacked, and from his descriptions, it seems to be a fearsome monster long thought extinct.
Scholars remained skeptical, until they examined his pendant and found it to be made of material they've never seen before. The Hunter's Guild organized an expedition into the Forbidden Lands to find the Keepers and this mysterious monster. You are among the hunters assigned to the mission to handle any monsters that get in the way of the investigation.
You are leader of the Avis unit, a small team also tasked with protecting Nata during the expedition. Your unit includes Guild Handler Alma, Gemma the Smithy, and your trusty sidekick Palico.
Understanding the UI - Combat
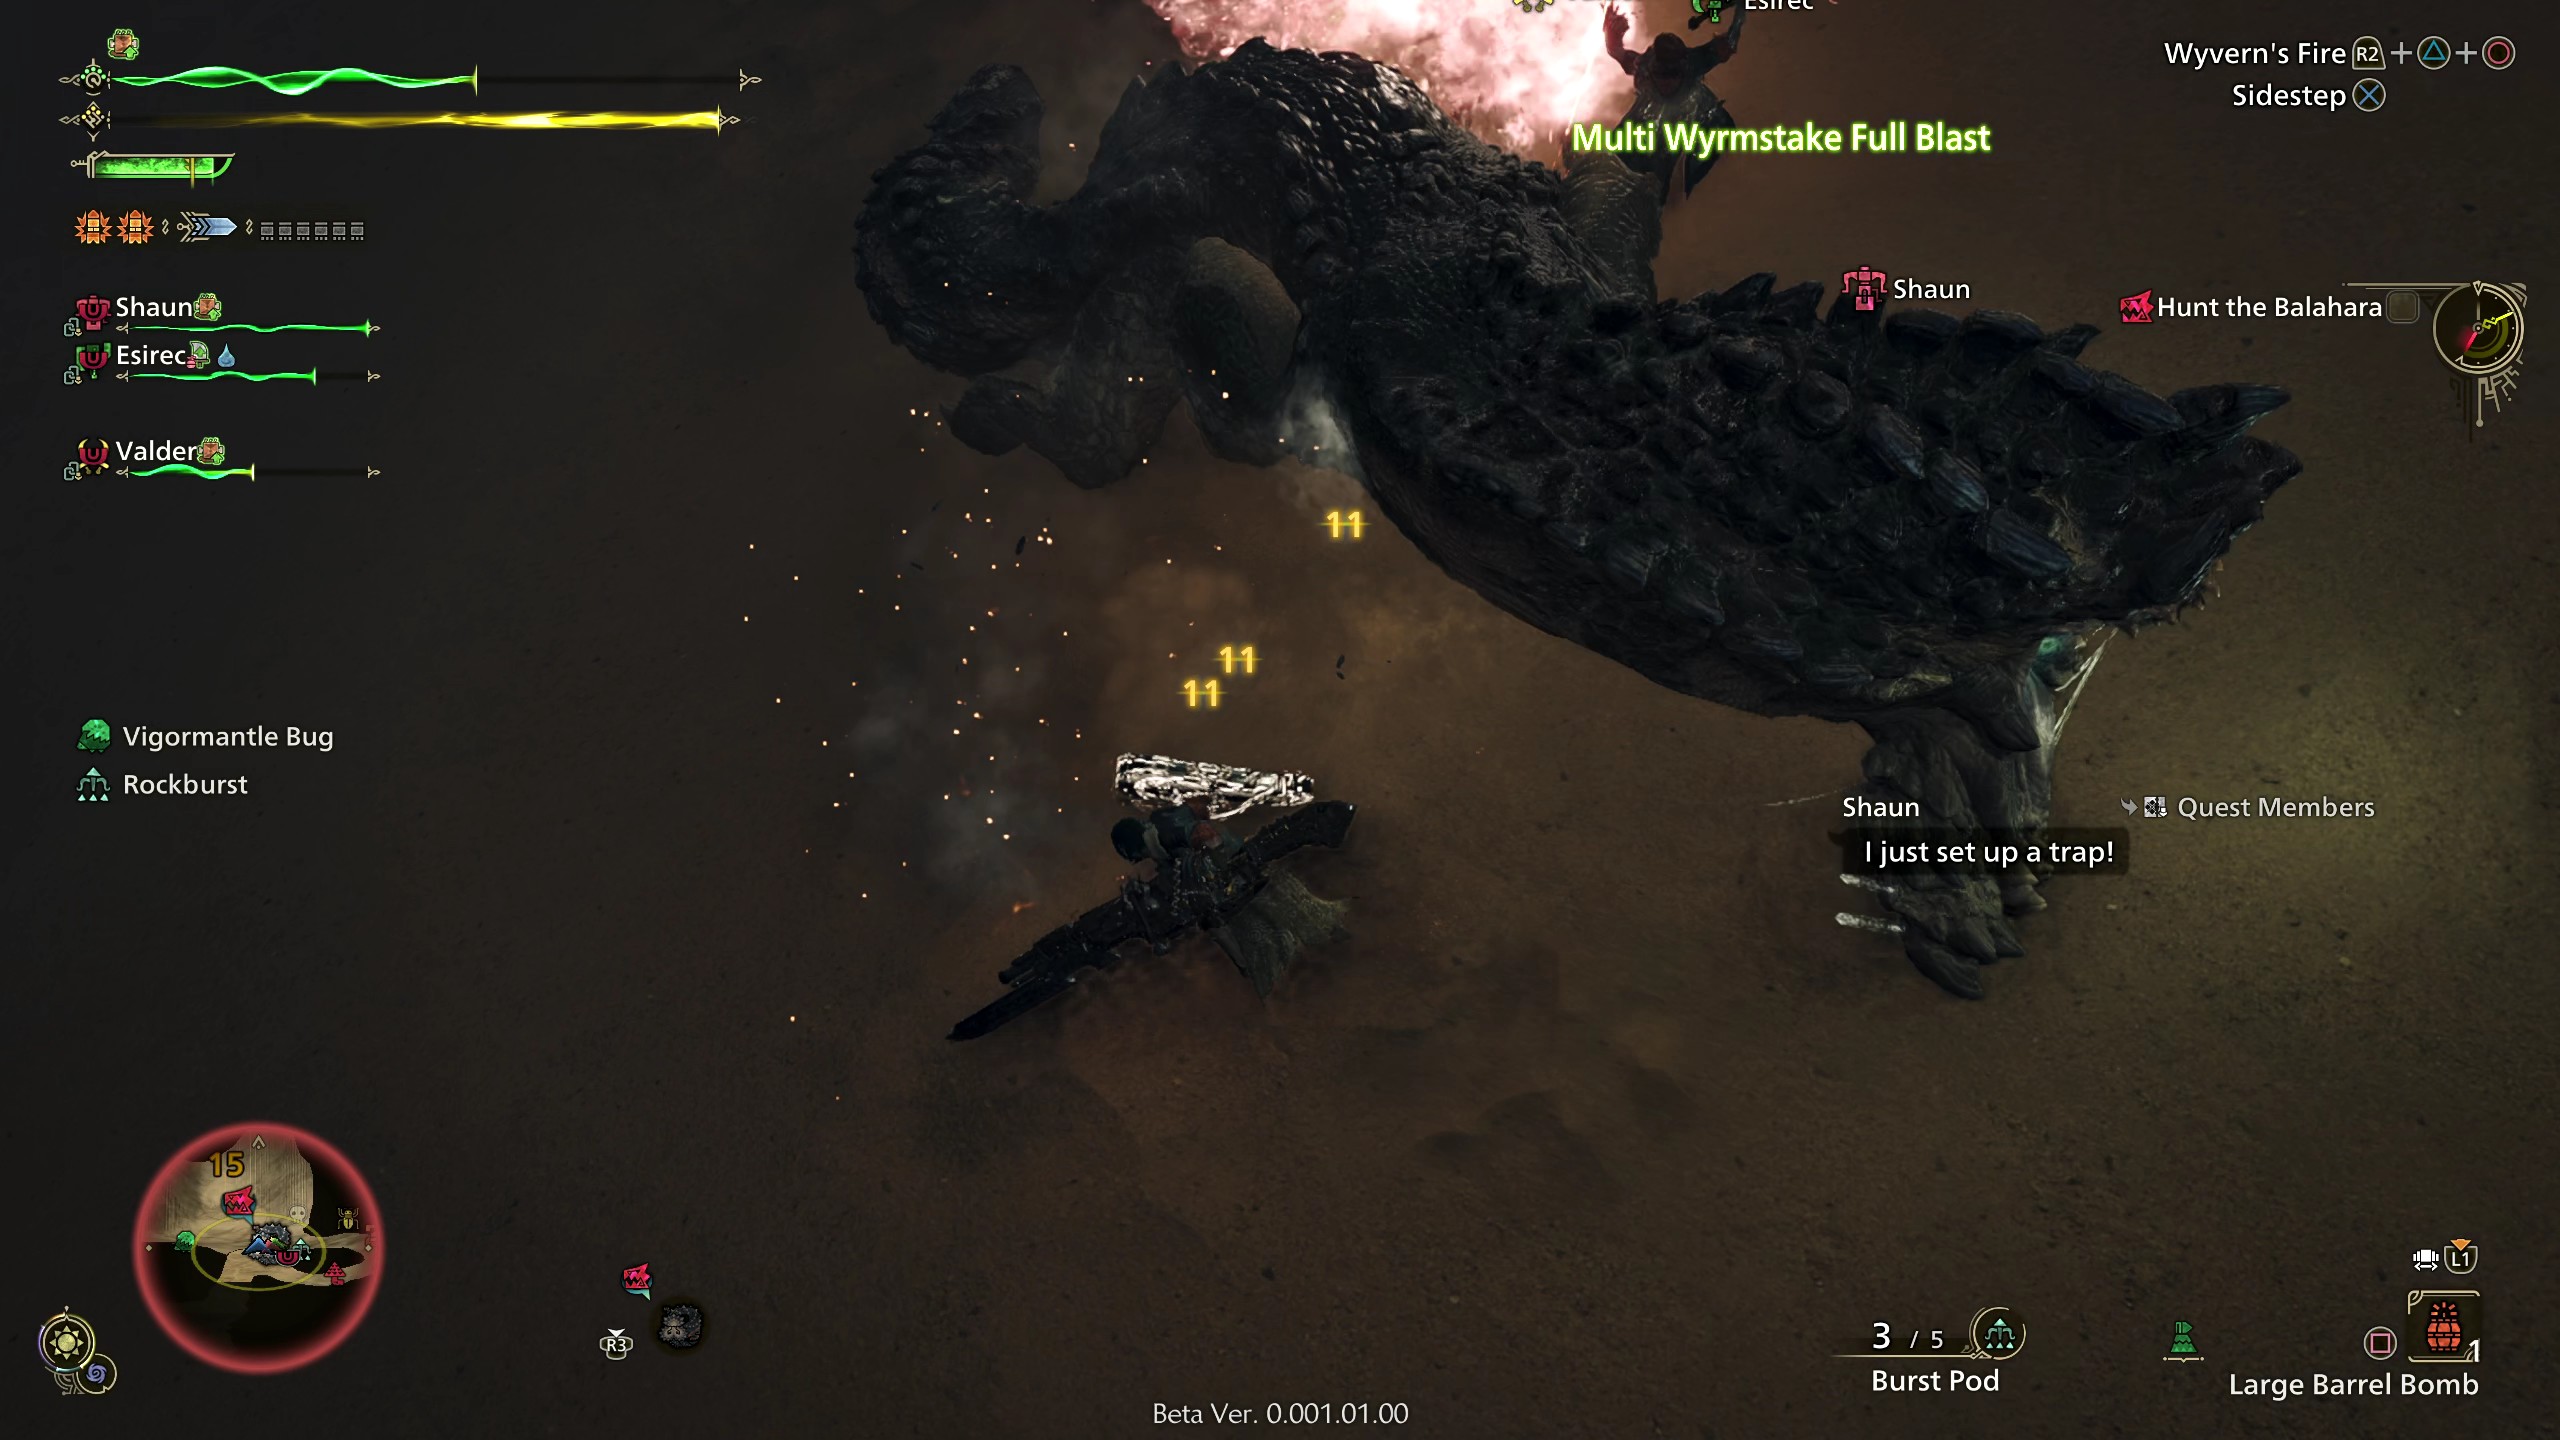
Monster Hunter has a lot of information on screen, so let's break down what you're looking at to get a better sense of what's going on. Click the image below to make it larger if you need to see more detail.
TOP LEFT
Let's start with the top left and go clockwise. At the very top, above the green bar, is a buff icon. If you have any temporary effects, buffs and debuffs will appear here. The green bar itself is your health. The yellow bar is the stamina bar, which depletes with actions such as running, dodging, and some special attacks.
Below the stamina bar are weapon status icons. These may be different depending on what weapon you are wielding. This player is using a hammer, which doesn't have any. Other weapons, such as Long Sword or Gunlance, have special gauges or ammunition displays. Aside from weapon-specific indicators, all melee weapons ("Blademaster") will have a sharpness gauge, which measures your weapon's condition through its color and how full the bar is. Each time you hit a monster, your sharpness decreases. When it reaches a lower sharpness category, it decreases your damage output and can even cause your attacks to bounce off monsters. You'll find a more thorough explanation of sharpness in the weapons section below.
Beneath that is your hunting party. This shows an overview of your group's health, buffs, debuffs, and whether they're in combat with a monster or not (with the red eye icon over their weapon).
TOP RIGHT
To the top right of the screen, we can see the action suggestions. This lists most available actions the player can take, as well as the button prompts to do them. This changes dynamically depending on what the player is currently doing. To the left of that, the large text highlighted in green is your current action. It can help to pay attention to this corner while learning the game. If you find it distracting, you can turn it off in the options.
Below that is the current quest objective and the time limit. This example's hunt is about 4 minutes in, with a time limit of 30 minutes. Pretty straightforward.
Below the objective is a notification area. This is where research, tracking, player chat, NPC chat, combat notifications, environmental events, and acquired loot is displayed.
BOTTOM RIGHT
At the bottom right of the screen is a small version of your item bar. The most prominently-displayed item is your currently-selected one. Pressing the button displayed there while your weapon is sheathed will use that item. You can change your currently-selected item by holding down the button displayed on top of the item bar.
Left of the item bar is a small status indicator of your mantles. It shows whether it's ready, equipped, or on cooldown.
To the left of that is the ammunition currently equipped to your Slinger.
BOTTOM LEFT
At the bottom left of the screen, to the right of the minimap, is your monster lock-on. If multiple monsters are around, you can select different ones to lock on to.
Displayed prominently on the bottom left is the minimap. It displays the general topography and shows points of interest such as gathering points. The outline color of the minimap will show your current status: red in combat, black out of combat, and gray if near a monster that's unaware of you.
Tucked in the corner is the current time of day and weather. In this example image, the ecosystem is currently in Fallow at late night, just before dawn. The colored border around the circle indicates how long each time period lasts and relatively how soon until the next one arrives.
Above the minimap are a list of objects of interest close by. You can usually interact with these with your Slinger. Pay attention for anything you may need, such as Slinger ammo, natural healing sources, or environmental traps to take advantage of.
You can customize many UI elements in the options, including size and visibility.
Health and Stamina Bar - In Depth
Let's have a closer look at that top left part of the screen. In many ways, it's one of the most important parts of the UI.
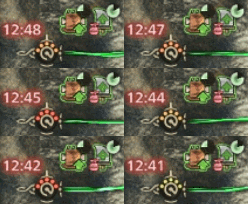
Once again, you can see buffs and debuffs above the Health and Stamina Bar. If you hold down the button to swap items in the Item Bar (left shoulder button by default), you'll see a circular timer indicating how long they will last. When a buff or debuff is about to expire, it will display how many seconds are left.
The long green part of the health bar shows how much health you currently have. The red portion means you were recently damaged. As long as you don't take any more damage, that portion of health will recover over time. The gray, empty part on the right will not recover by itself; you need to heal yourself to restore it. You can do so in many ways, from drinking potions to interacting with certain (green-colored) plants and animals.
Curiously, this stamina bar is blue. Why? Because this player is afflicted with the Waterblight debuff, indicated with the water drop icon above. The abnormal color indicates that something is affecting your stamina usage or recovery.
What might be harder to notice is that this stamina bar is full, even though it's not filling out the whole bar. This is because as time goes on, your hunter becomes hungry. This will cause maximum stamina to become capped at a lower level than normal. You can alleviate this by eating food such as Rations, Well-Done Steak, or any cooked meal.
On the left side of the Health and Stamina bars, you can see green and yellow pips that somewhat resemble an animal's paw. These pips are another indicator of your maximum health and stamina. If all five are bright, you're at maximum potential health or stamina. If some of them are faded out, your health or stamina is capped below the maximum.
Try to always keep your health and stamina topped up. You may need to eat a meal from a tent or with a Portable BBQ Grill.
Your health bar also reacts to danger. If you're at extremely low health, it will flash green and red to gain your attention. If a monster is about to use an especially powerful attack, your health bar will go wild:
Getting hit with an attack like that will drop your health quite low, if not knock you out entirely.


Understanding the UI - Map
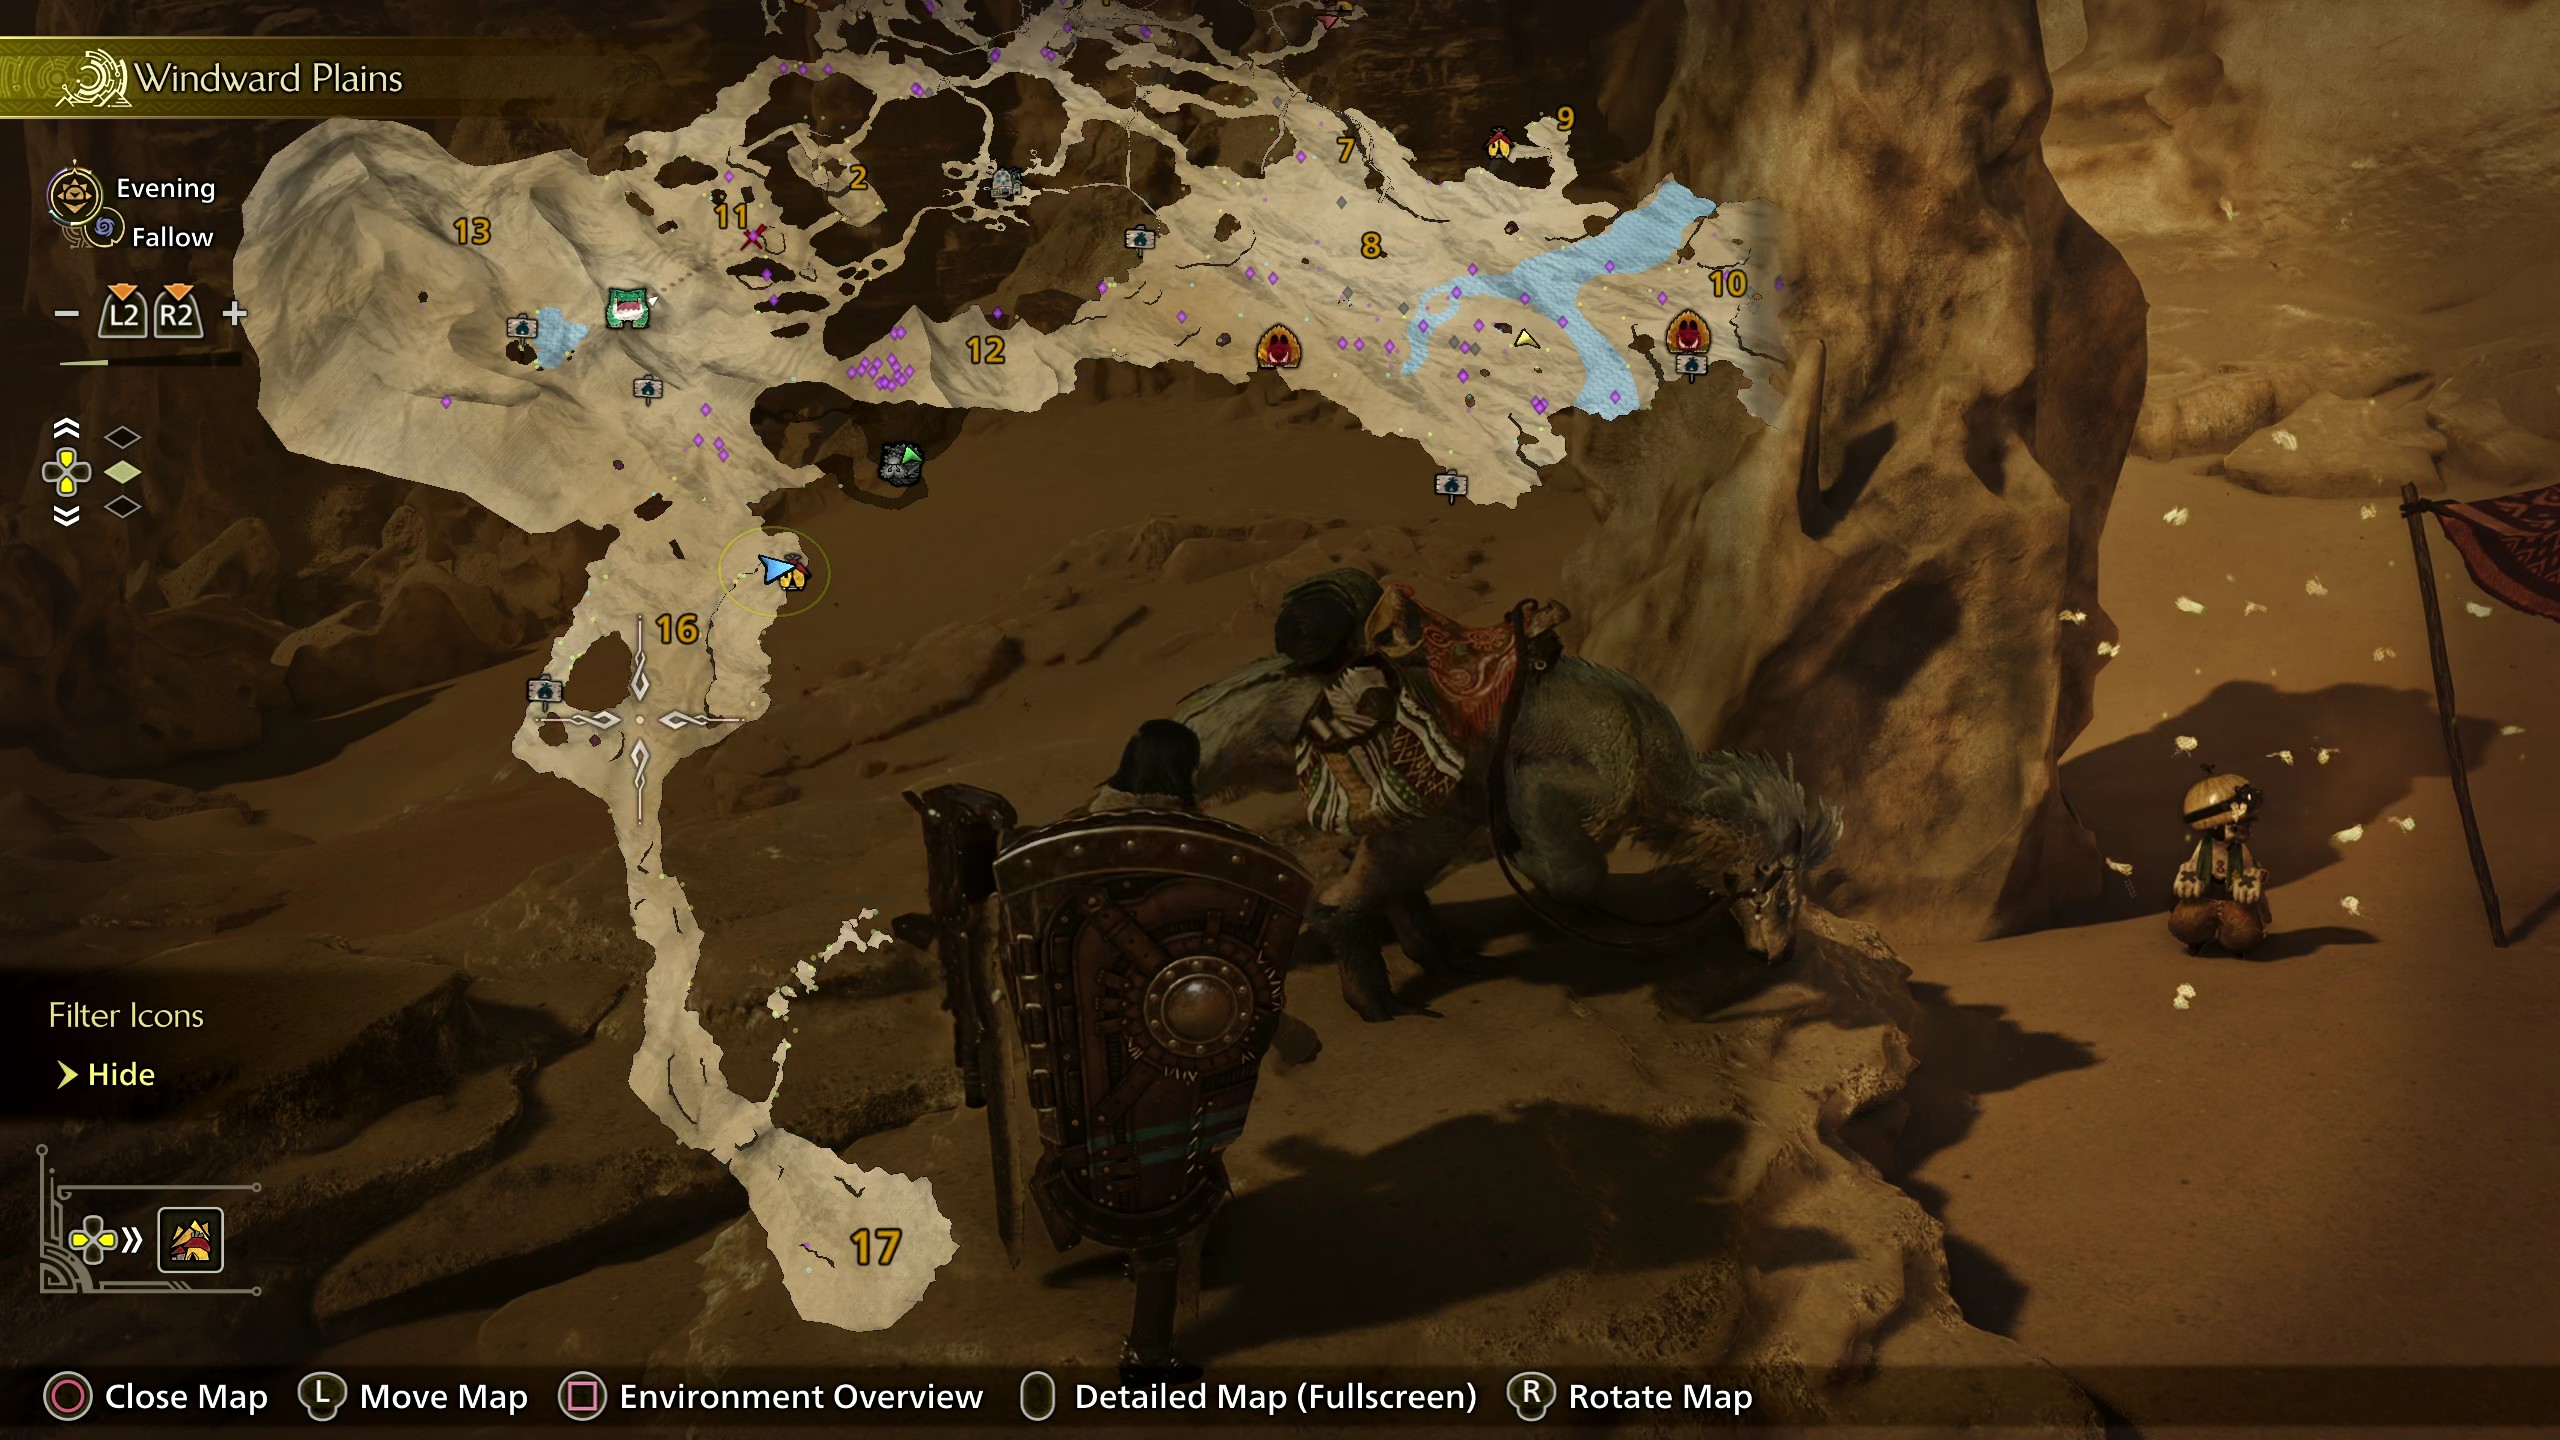
Let's bring up the map, shall we? Click the image below if you need to look closer. By using controls at the bottom, you are free to move, rotate, and zoom on the map to orient yourself. You can also fullscreen the map if you need more space.
This time, let's start in the middle with the map itself. Usually, the yellow arrow in the is your character, pointing in the direction your character is facing. If you are playing in multiplayer, players will show up as other arrows in their respective color. No matter what color arrow you are, your icon will always emit small circles to draw attention to where you are. When you open the map, it will usually be centered on your character.
In this example, I'm playing in multiplayer. The host (yellow) is near the river in the top right. I am near a tent, with a circle indicating where I am as the blue arrow. The green player is on a lower level, near a Balahara.
You can see that the map itself is labelled with numbers such as 13, 11, 2, etc. This can be useful when coordinating with other hunters in multiplayer. "Let's hunt the Doshaguma in area 10," for example.
Near areas 9 and 16 you can see camp tent icons, indicating that the player has a tent placed there. You can fast travel to these locations, restock items, change equipment, et cetera. Other potential tent locations are indicated by the small signpost icons. Generally, the more central or open a tent location, the more vulnerable it is to monsters finding and destroying it.
In the top left is the name and icon of the map you're on. Below that is the current time and weather. In this case, the Windward Plains are currently in Fallow during the evening.
Beneath the time and weather is the zoom level. Press the buttons as indicated to zoom in or zoom out. Below the map zoom level is your map elevation. Press the buttons as indicated to change what elevation of the map you're currently looking at. Whenever you bring up your map, it will be at your current elevation by default.
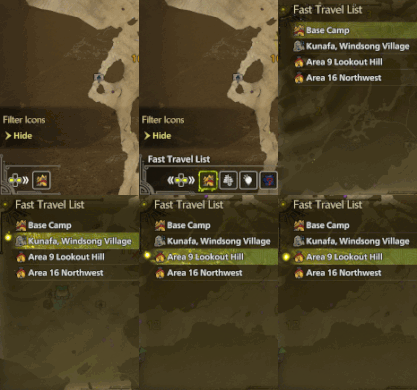
On the bottom left, pressing left or right brings up an extra menu for the map. The first option is Fast Travel, for quick selection of places to fly to. This is usually faster than manually moving the cursor over travel destinations on the map.
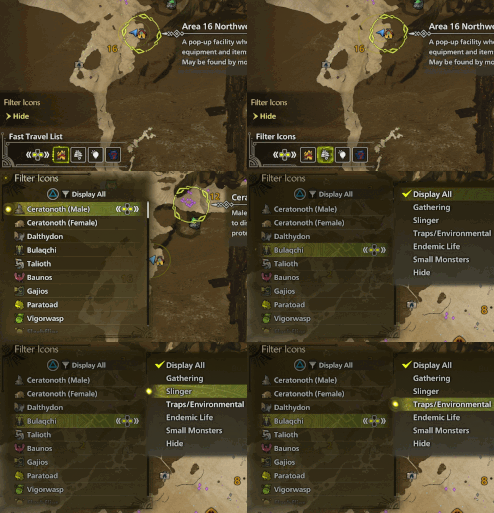
By default, there are the many icons dotting the map, showing items you can gather, monsters roaming around, camp locations, et cetera. This is helpful for gathering or determining where to go. You can select anything on the map and hit "Set Waypoint" for your Seikret to automatically travel there, or have Scoutflies show you the way on foot.
If there's too many icons on the map, you can filter icons to your liking. You can choose to only see gathering points, Slinger ammo, traps/environmental notes, endemic life, small monsters, or nothing at all. In my example, I disabled some icons to declutter the map.
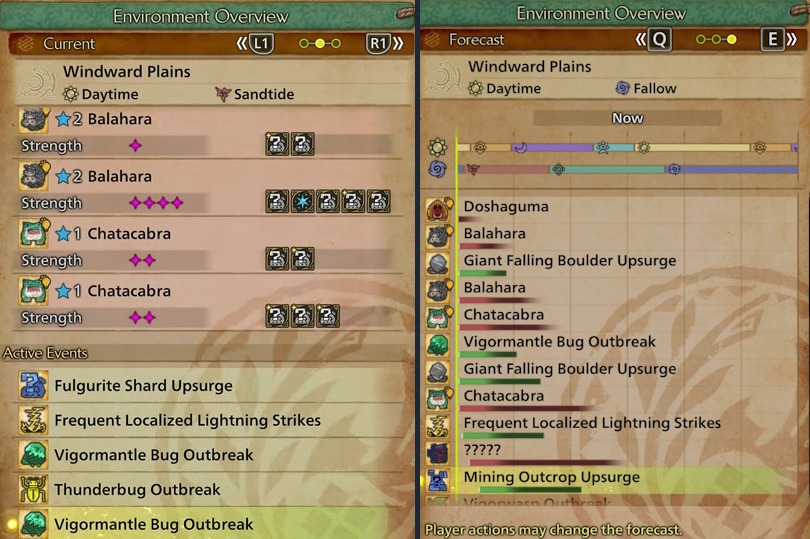
By pressing the Environment Overview button, details will show up on the right side of the screen. This will show overall useful info for the map. The first page, Update, shows anything new that's happened recently.
Perhaps more useful is the second page, Current (displayed on the left), which shows every large monster and event that's present on the map at this point in time. The five-pointed star indicates the level of a quest. If the five-pointed star is blue, it's a low rank quest. If it is orange, it is a high rank quest.
The pink/purple four-pointed stars next to a monster show its relative strength compared to others of the same species. You'll also get a preview of some rewards if you hunt that particular monster. Keep that in mind if you're looking for something specific.
The third page, Forecast (displayed on the right), shows what's coming up soon. At the top, you can see the current time and weather. The colored bars show when the ecosystem's weather will change over the next day/night cycle. The large section taking up most of the page shows what monsters (red bar) and events (green bar) will appear and how long they will stay in the area.
You might notice the red monster bar fades while the green event bars end abruptly. Events have a set duration that do not change from outside interaction. Monsters, though, will leave the area at varying times due to outside stimuli. They may leave earlier if they're close to an exit, or stay longer if they're in combat.
Common Recommended Options
Whenever you're taking a break early on, take some time and look through the options menu and make sure everything is to your liking. There are some settings that veteran hunters recommend.
Some options, mainly ones related to graphics, can only be changed from the title screen. The game plays a lot better with a high framerate. On PC, adjust your settings so you have a decently high framerate. On console, set graphics settings to prioritize framerate.
Within the Options Menu:
- If the game looks dull or washed out, chances are your brightness is set too high. Many players found the game looks much better by going into Display ➔ Brightness and tuning Brightness Adjustment 3 (Overall Luminosity) according to the on-screen instructions.
- If you have framerate issues while in Base Camp, enable the option to hide other players' Seikrets. That can significantly reduce the amount of models, textures, and animations taking up resources.
- Turn off Seikret Auto-Explore. This option affects Manual Control mode. Most players prefer to sit still when not pressing any inputs. Auto-Explore has no effect on how your Seikret moves in Auto Mode.
- Set Hold Confirmation Duration to short. This shortens the time it takes to call your Seikret, as well as a few other commands. It may only save a small amount of time, but over a long play session it'll add up. It can also make the difference between carting and getting away in emergencies.
- Disable Auto Sheathe. This causes your character to automatically sheathe their weapon while standing still a few seconds. It's a small thing, but it is an interruption to controlling your character. This can cause you to put your weapon away when you don't want to, like locking you into the animation when a monste