 Day One Fixes
SolvedHow-toUpdated
Monster Hunter Wilds Multiplayer Definitive Guide
Short answer
Spend less time confused and more time engaged in jolly co-operation! This guide starts with step-by-step instructions on how to party up with your friends, then covers all the multiplayer systems in detail. Use the sidebar on the right to jump to any section you want to learn about.
Steam Community guide by tentacles.
How to play with friends
The first time you party up will involve some extra steps. It'll be a lot easier in future sessions once you've already progressed far enough in the story and you added your buddies as Hunter Friends.
1. Unlock Multiplayer
In order to play any multiplayer, you first have to create your Hunter and Palico, watch some cutscenes, and play through the story until you find yourself in a base camp with lots of NPCs. All of this will take about an hour. At some point the game will ask you to visit your tent in camp for the first time. When you exit your tent you'll notice you're in a lobby with other players. This is the point where multiplayer is unlocked.
Now let's get everyone to join a private lobby, add each other as Hunter Friends, and then start a quest.
2. Enable crossplay for everyone
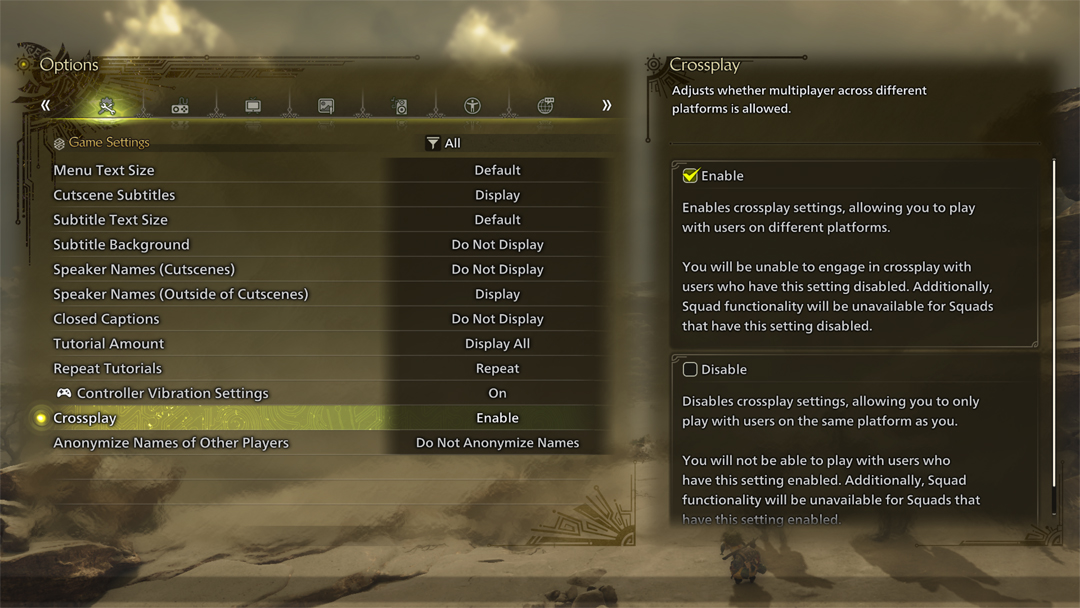
You need to make sure that you and your friends have the same crossplay setting. This is important even if you're all playing on Steam. The game will not let you group up if you have different crossplay settings from each other, period. Crossplay is enabled by default, but let's make sure everyone has this set up properly. Go to the Title Screen Main Menu → Options → Game Settings (first tab) → Crossplay. I recommend just leaving it on the default "Enable" at all times.
3. Create a private lobby
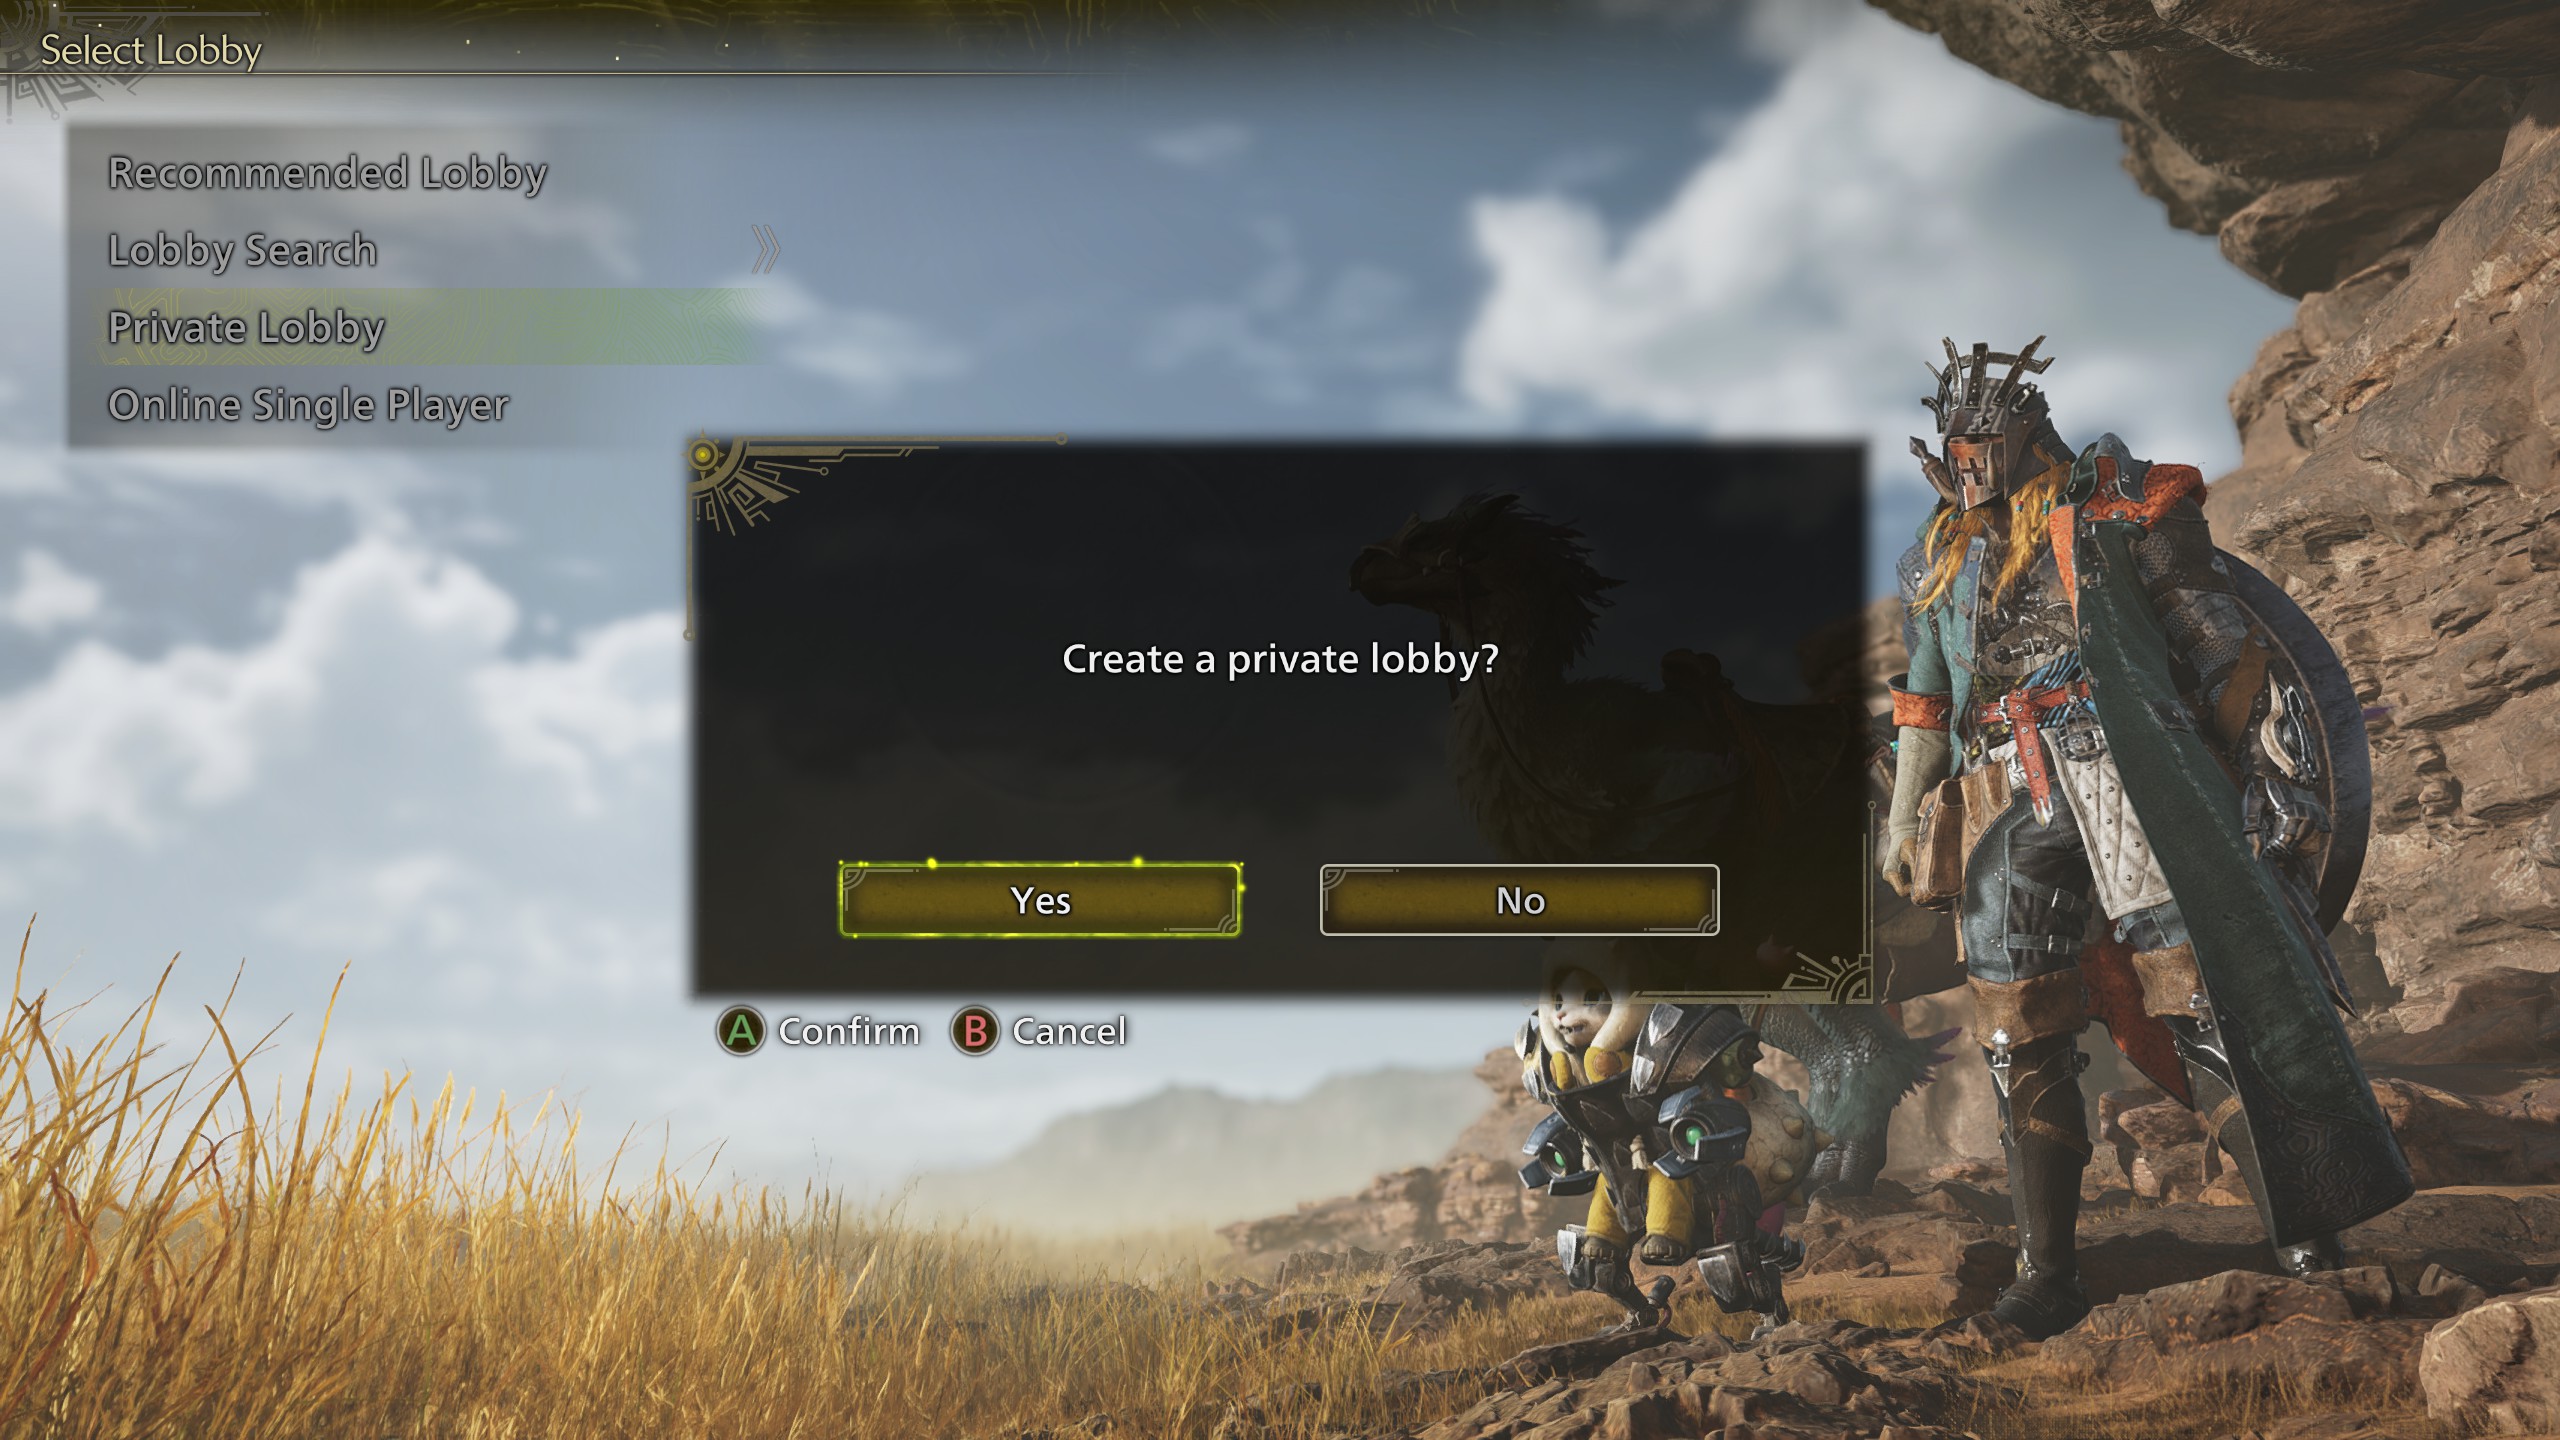
You, the person reading this guide, will make a private lobby for the others to join. Start a private lobby by going to the Title Screen Main Menu → Start Game → Choose your hunter → Private Lobby. (Alternatively, while in-game and at base camp, you can talk to Alma → go to 3rd tab for the Change Lobby menu → Private Lobby.)
4. Share your lobby ID code
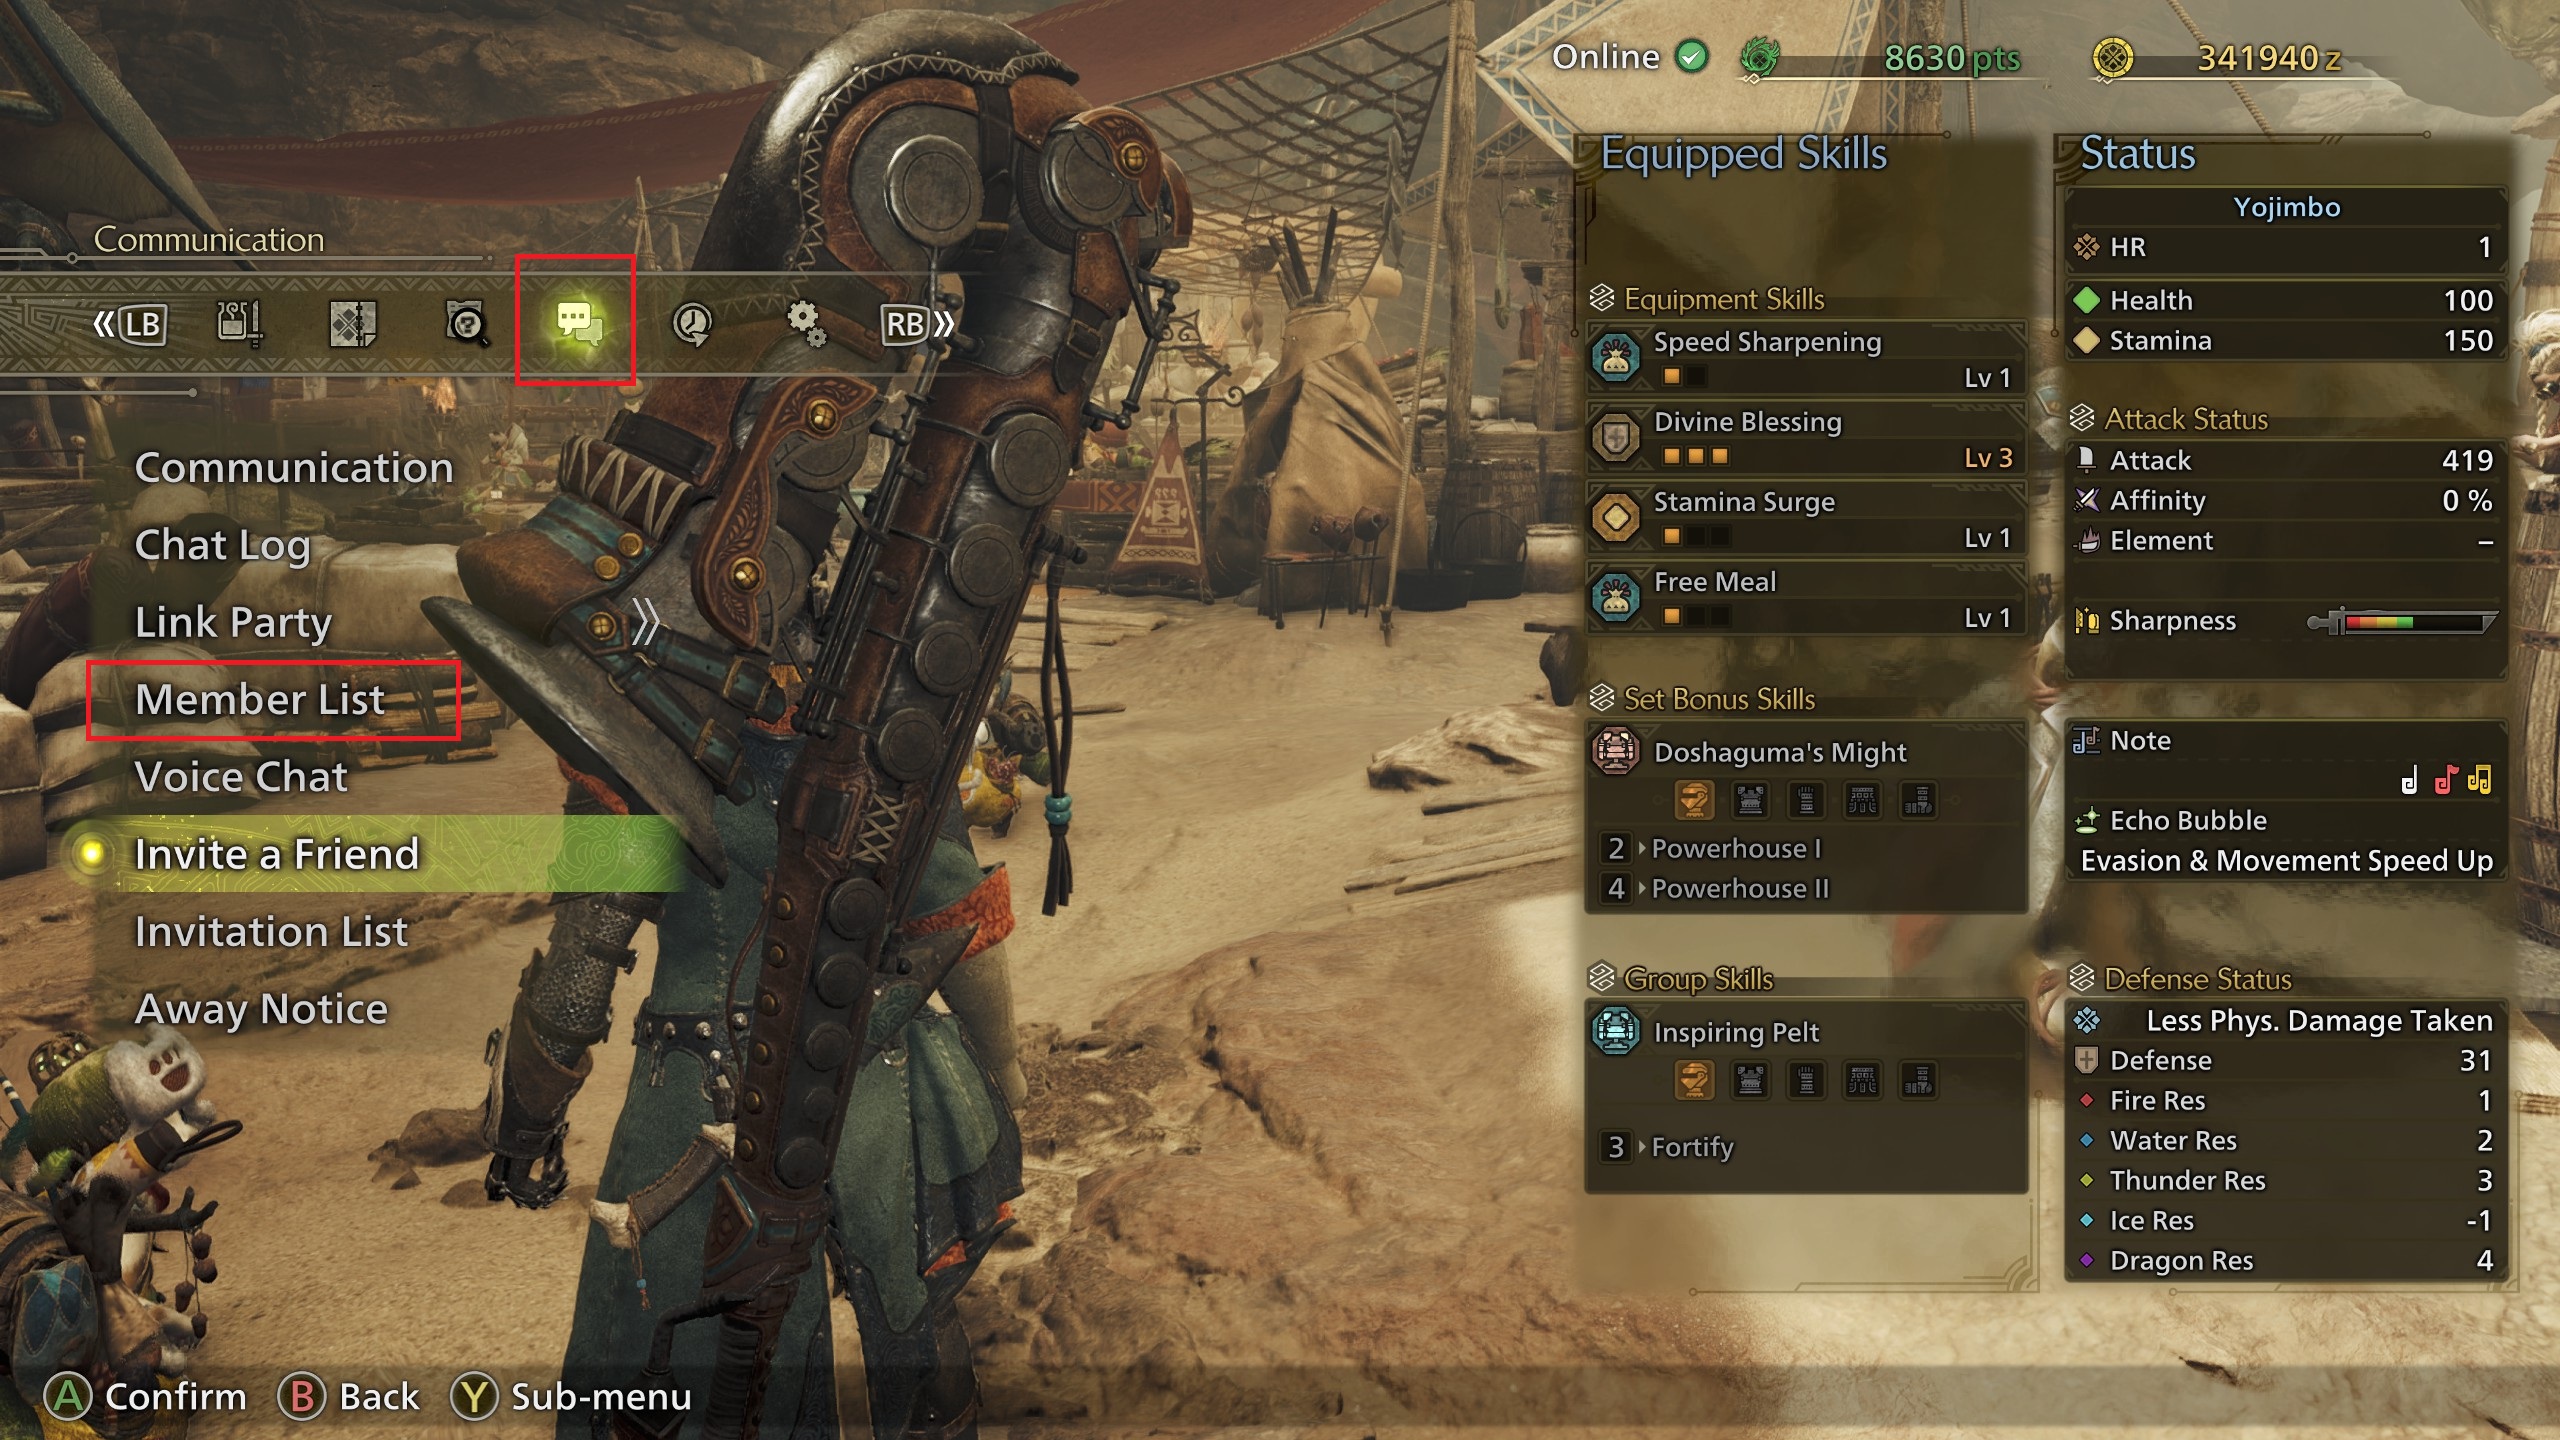
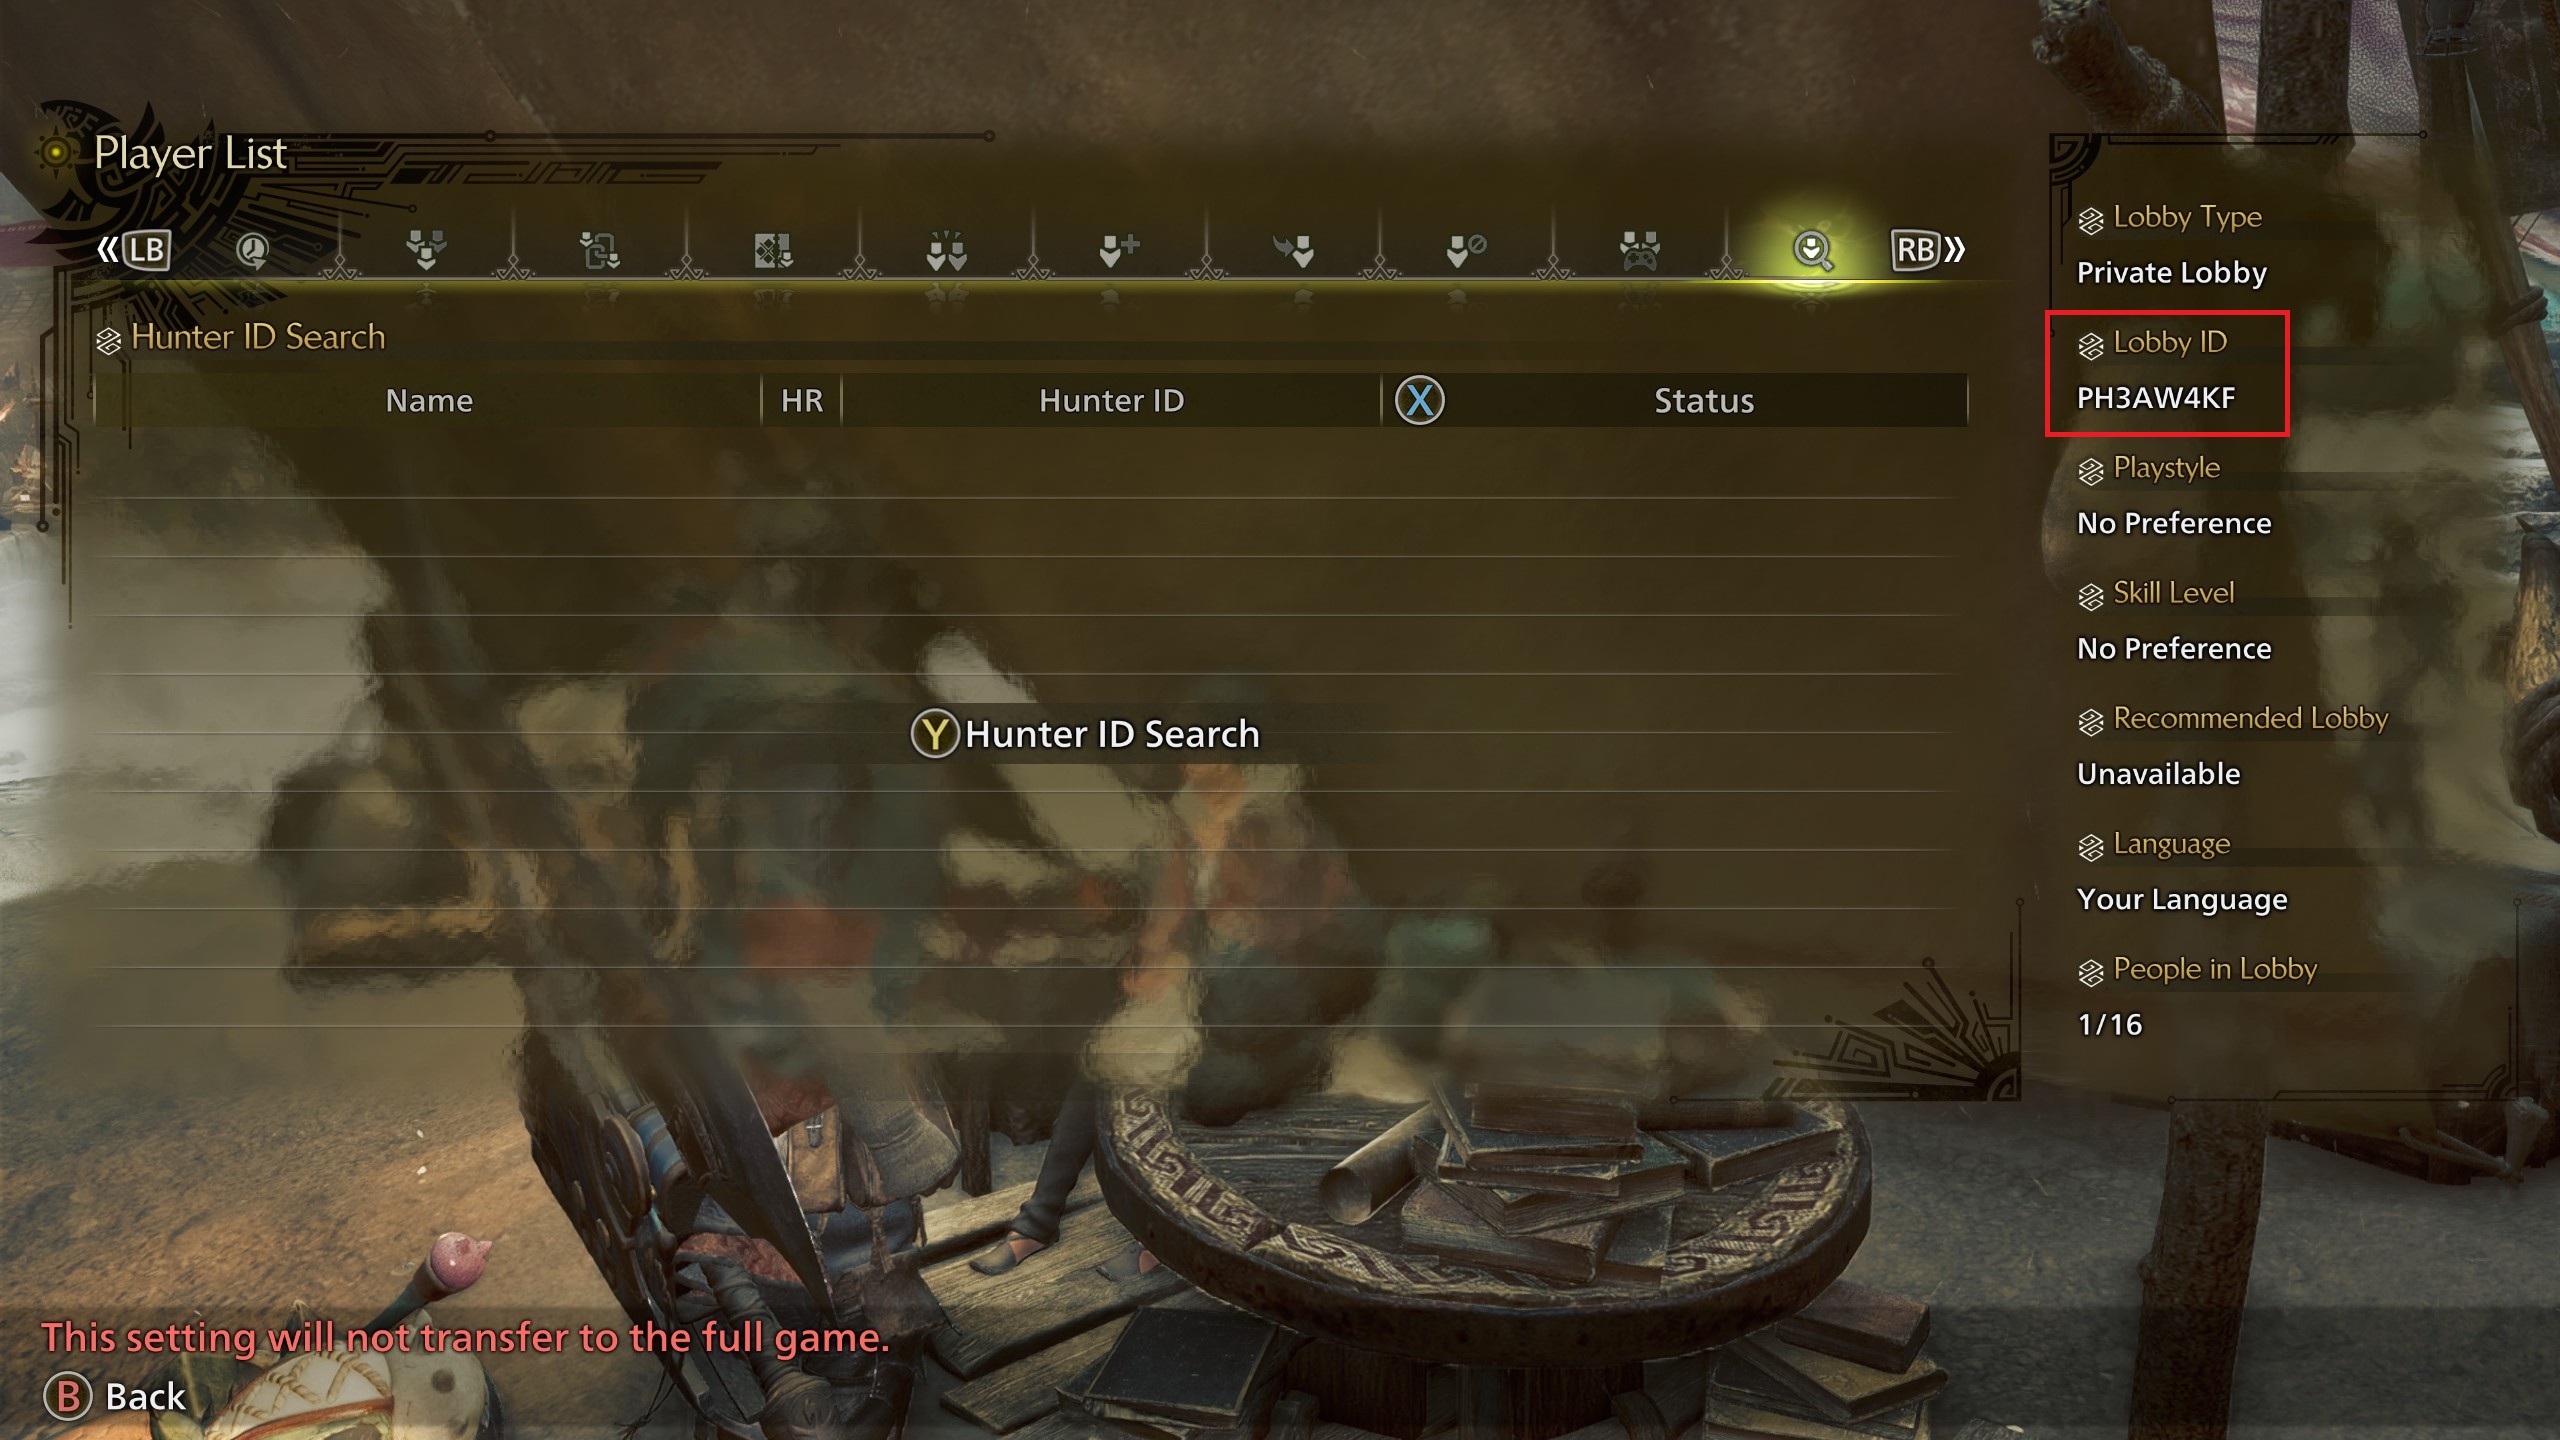
After loading in to the game, you need to give your friends the lobby ID code. You can find this in the Start Menu → Communication (4th tab) → Member List. When you've brought up the Member List window, the Lobby ID code will be on the right side of the screen. Share this code with your friends.
5. Find private lobby using ID code
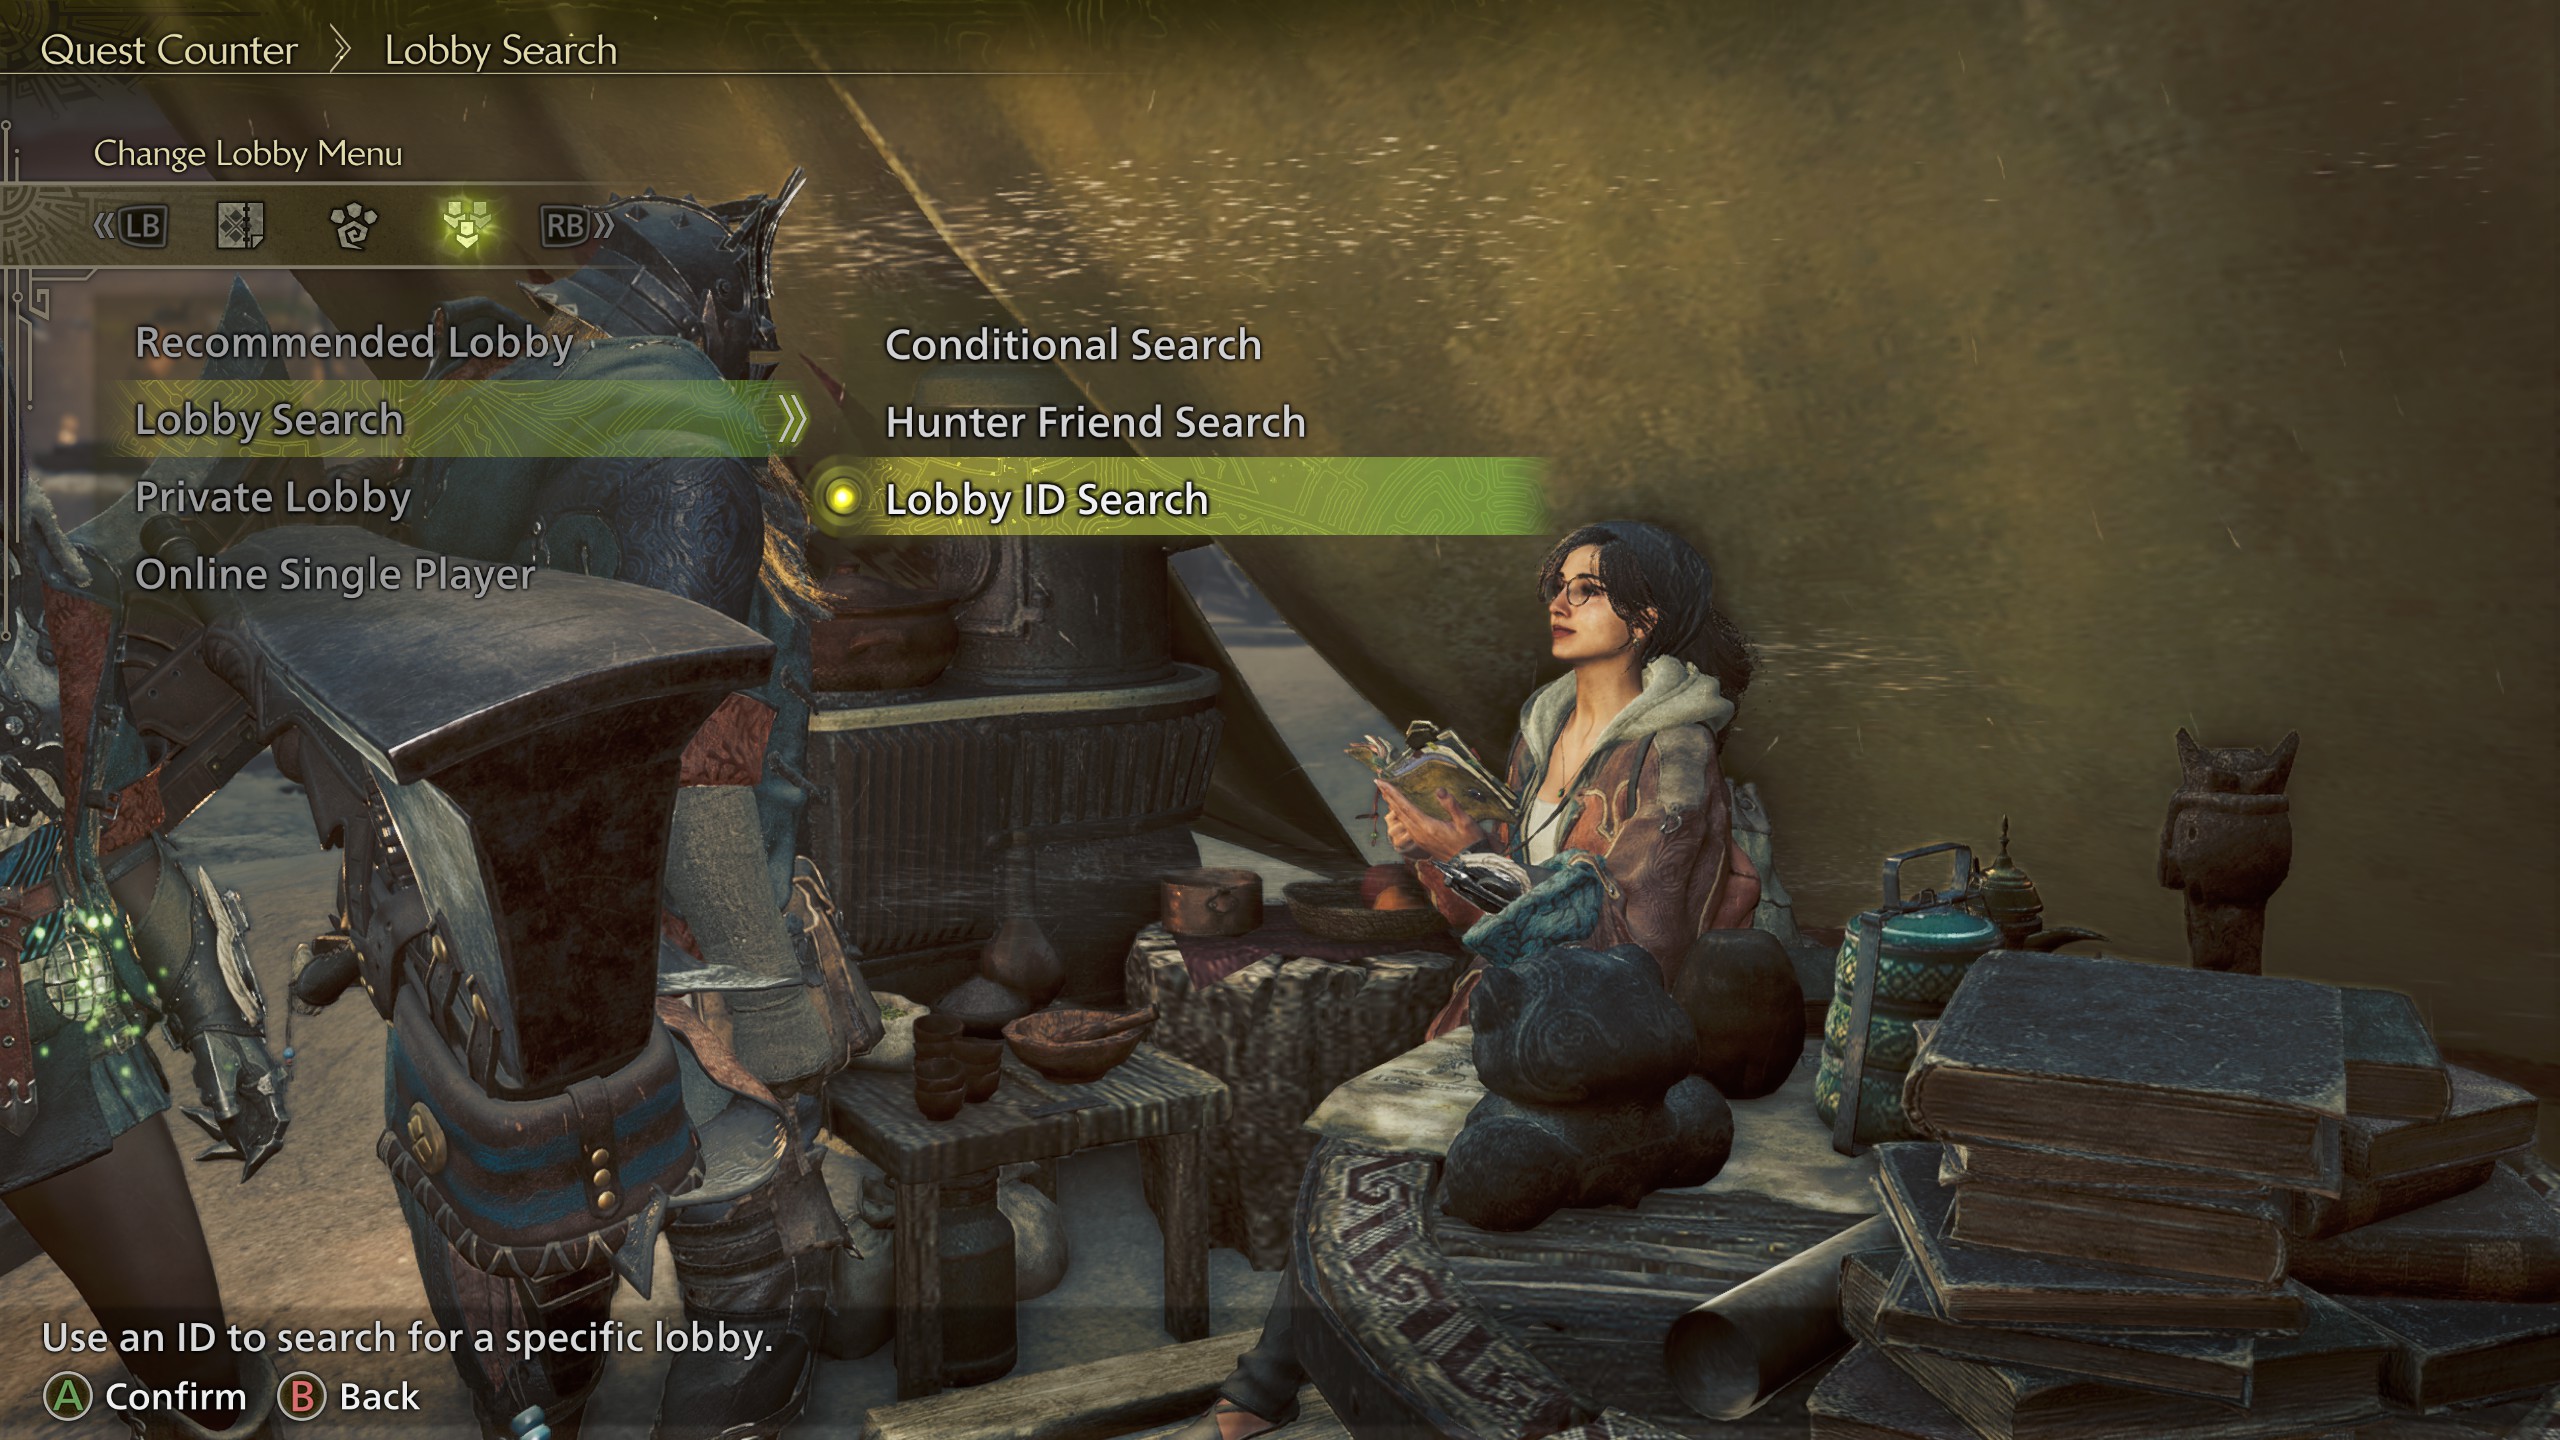
Your friends will use the Lobby ID code and join your lobby by going to the Title Screen Main Menu → Start Game → Choose your hunter → Lobby Search → Lobby ID Search. (Alternatively, while in-game and at base camp, your friends can talk to Alma → go to 3rd tab for the Change Lobby menu → Lobby Search → Lobby ID Search.)
If your friends entered the code correctly then they will start loading in to the lobby.
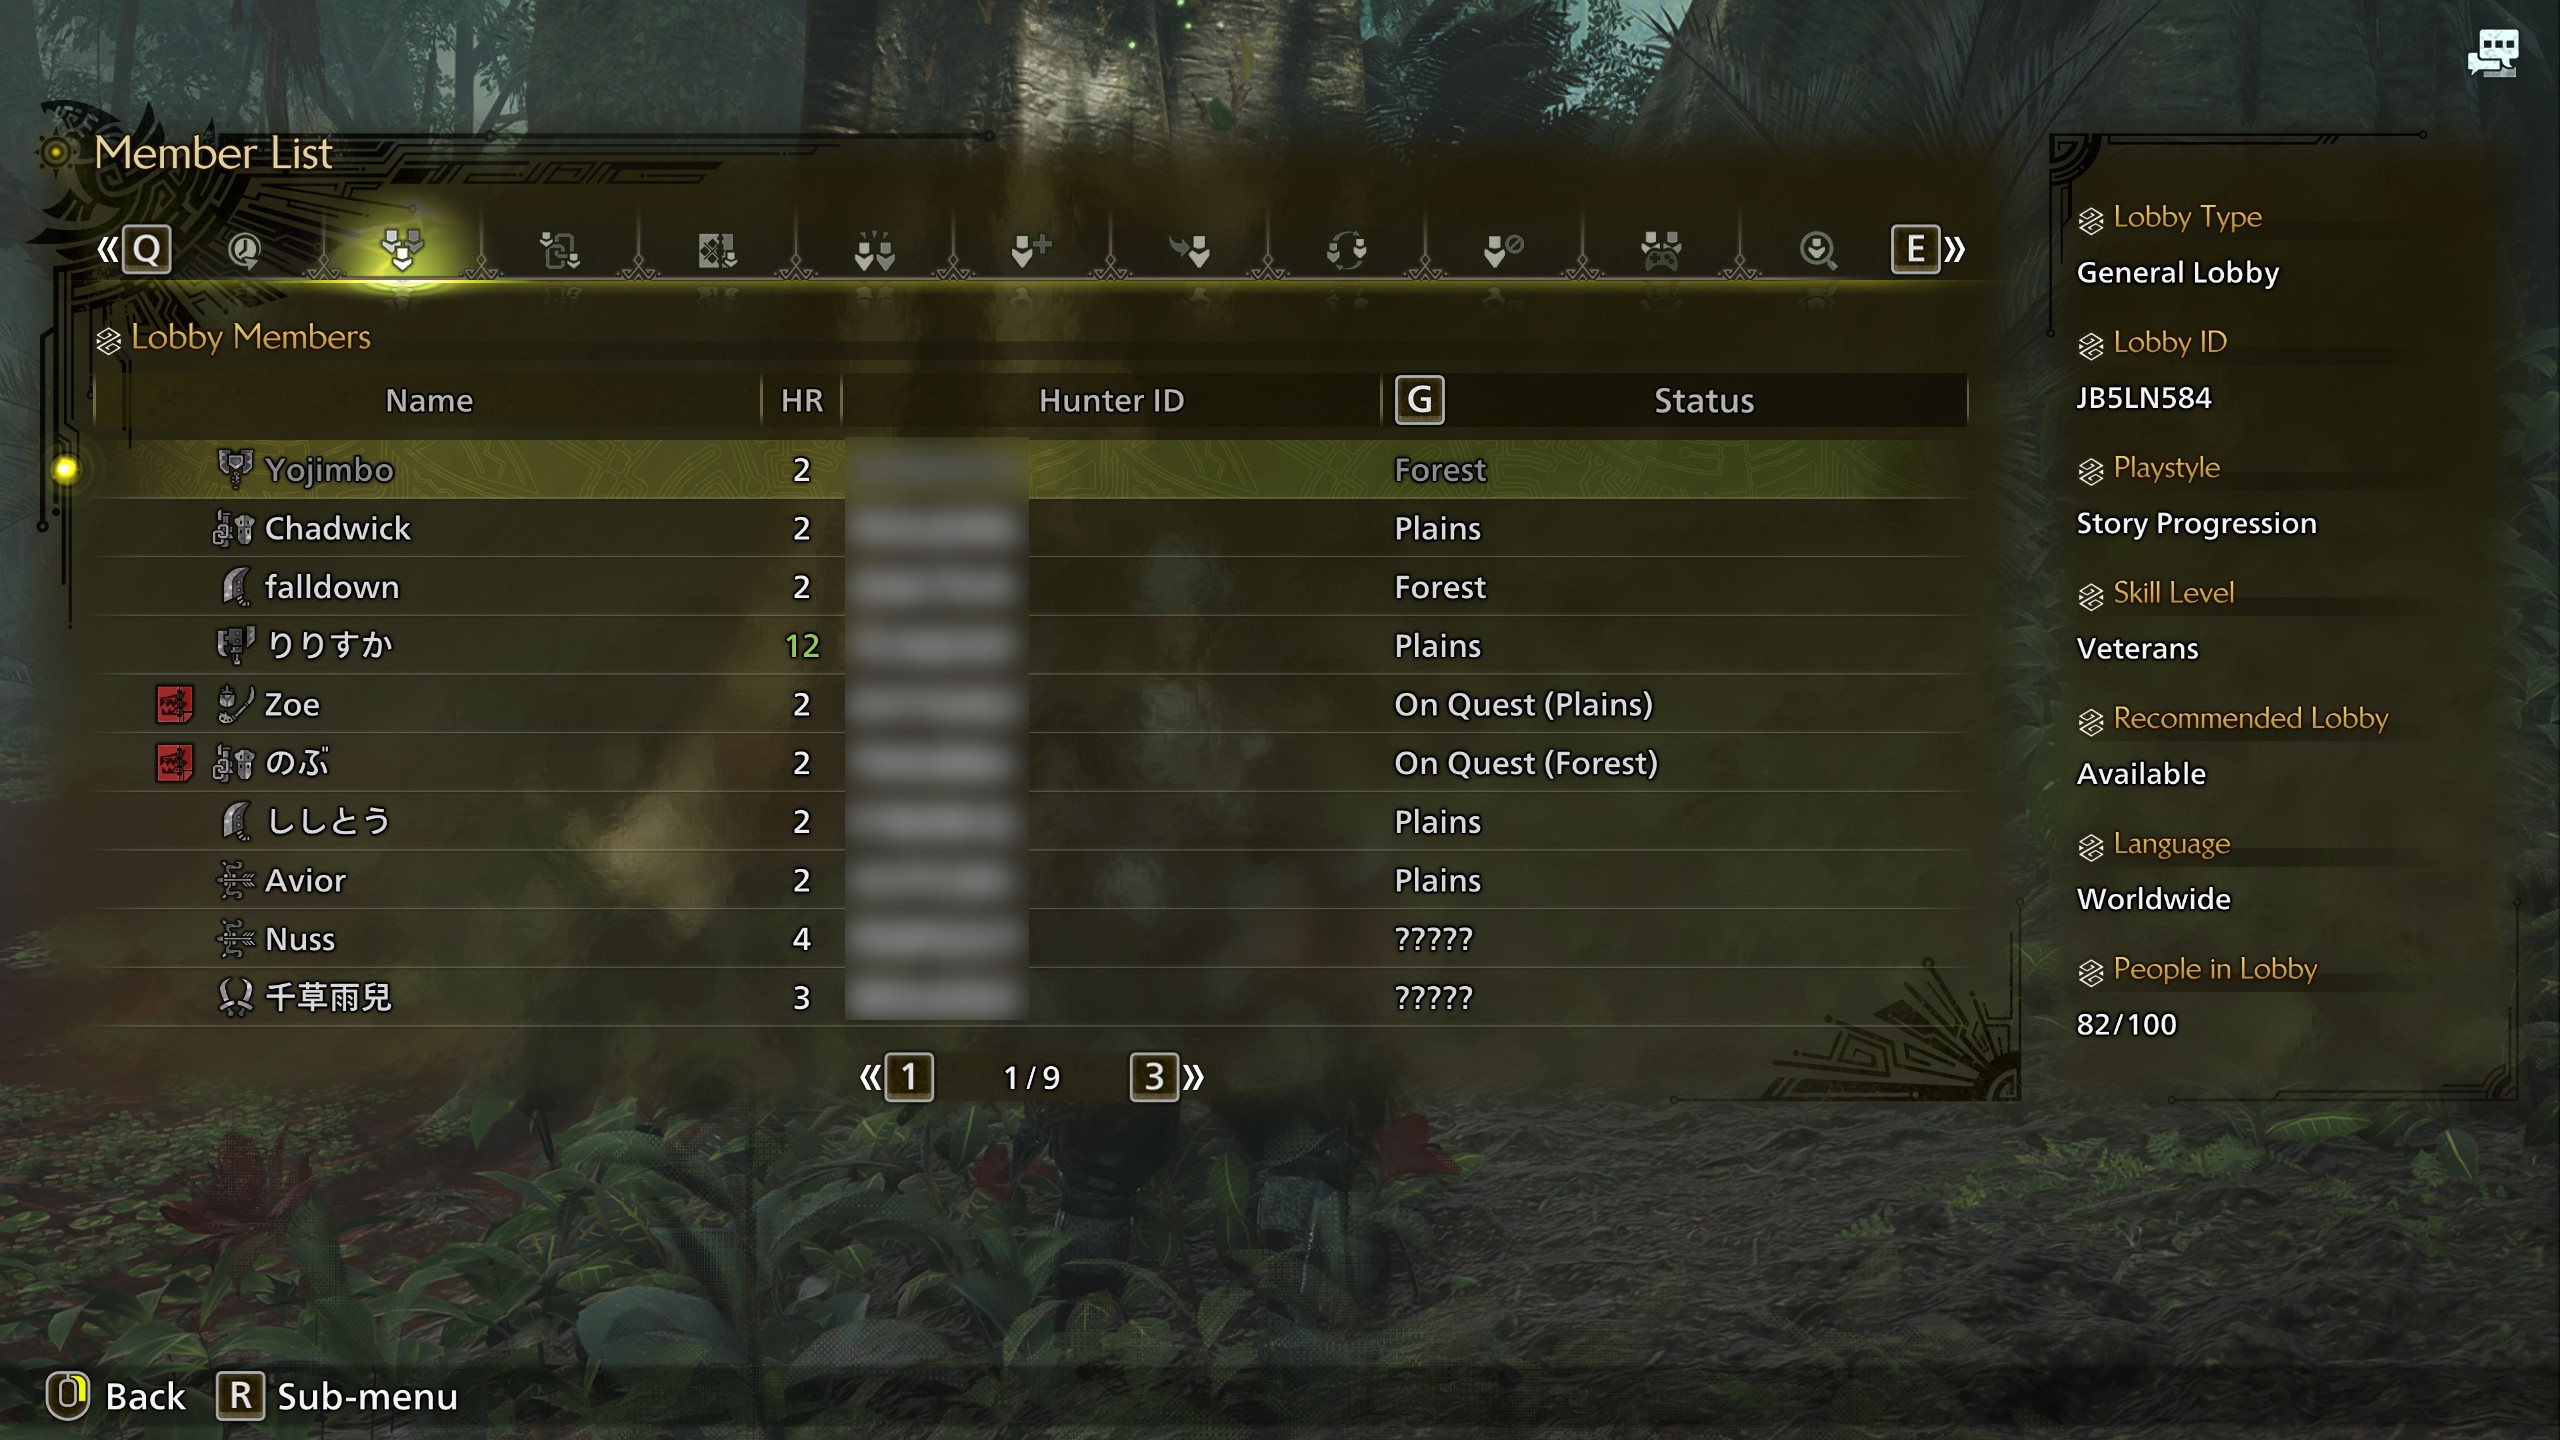
Congrats, by this point you should all be in the same private lobby together! That was the hardest part. You can check this worked by looking at the lobby member list: Start Menu → Communication (4th tab) → Member List, then choosing the 2nd tab to view Lobby Members.
6. Add each other as Hunter Friends
Inside of the Start Menu → Communication (4th tab) → Member List, you can select each of your friends and add them as a Hunter Friend. This is a friend list specific to Monster Hunter Wilds and it's a collection of all your friends across all platforms. By adding Hunter Friends it will be much easier to play together in the future. Add a Hunter Friend by hovering over their name in the Member List, selecting it, then choosing Send Friend Request.
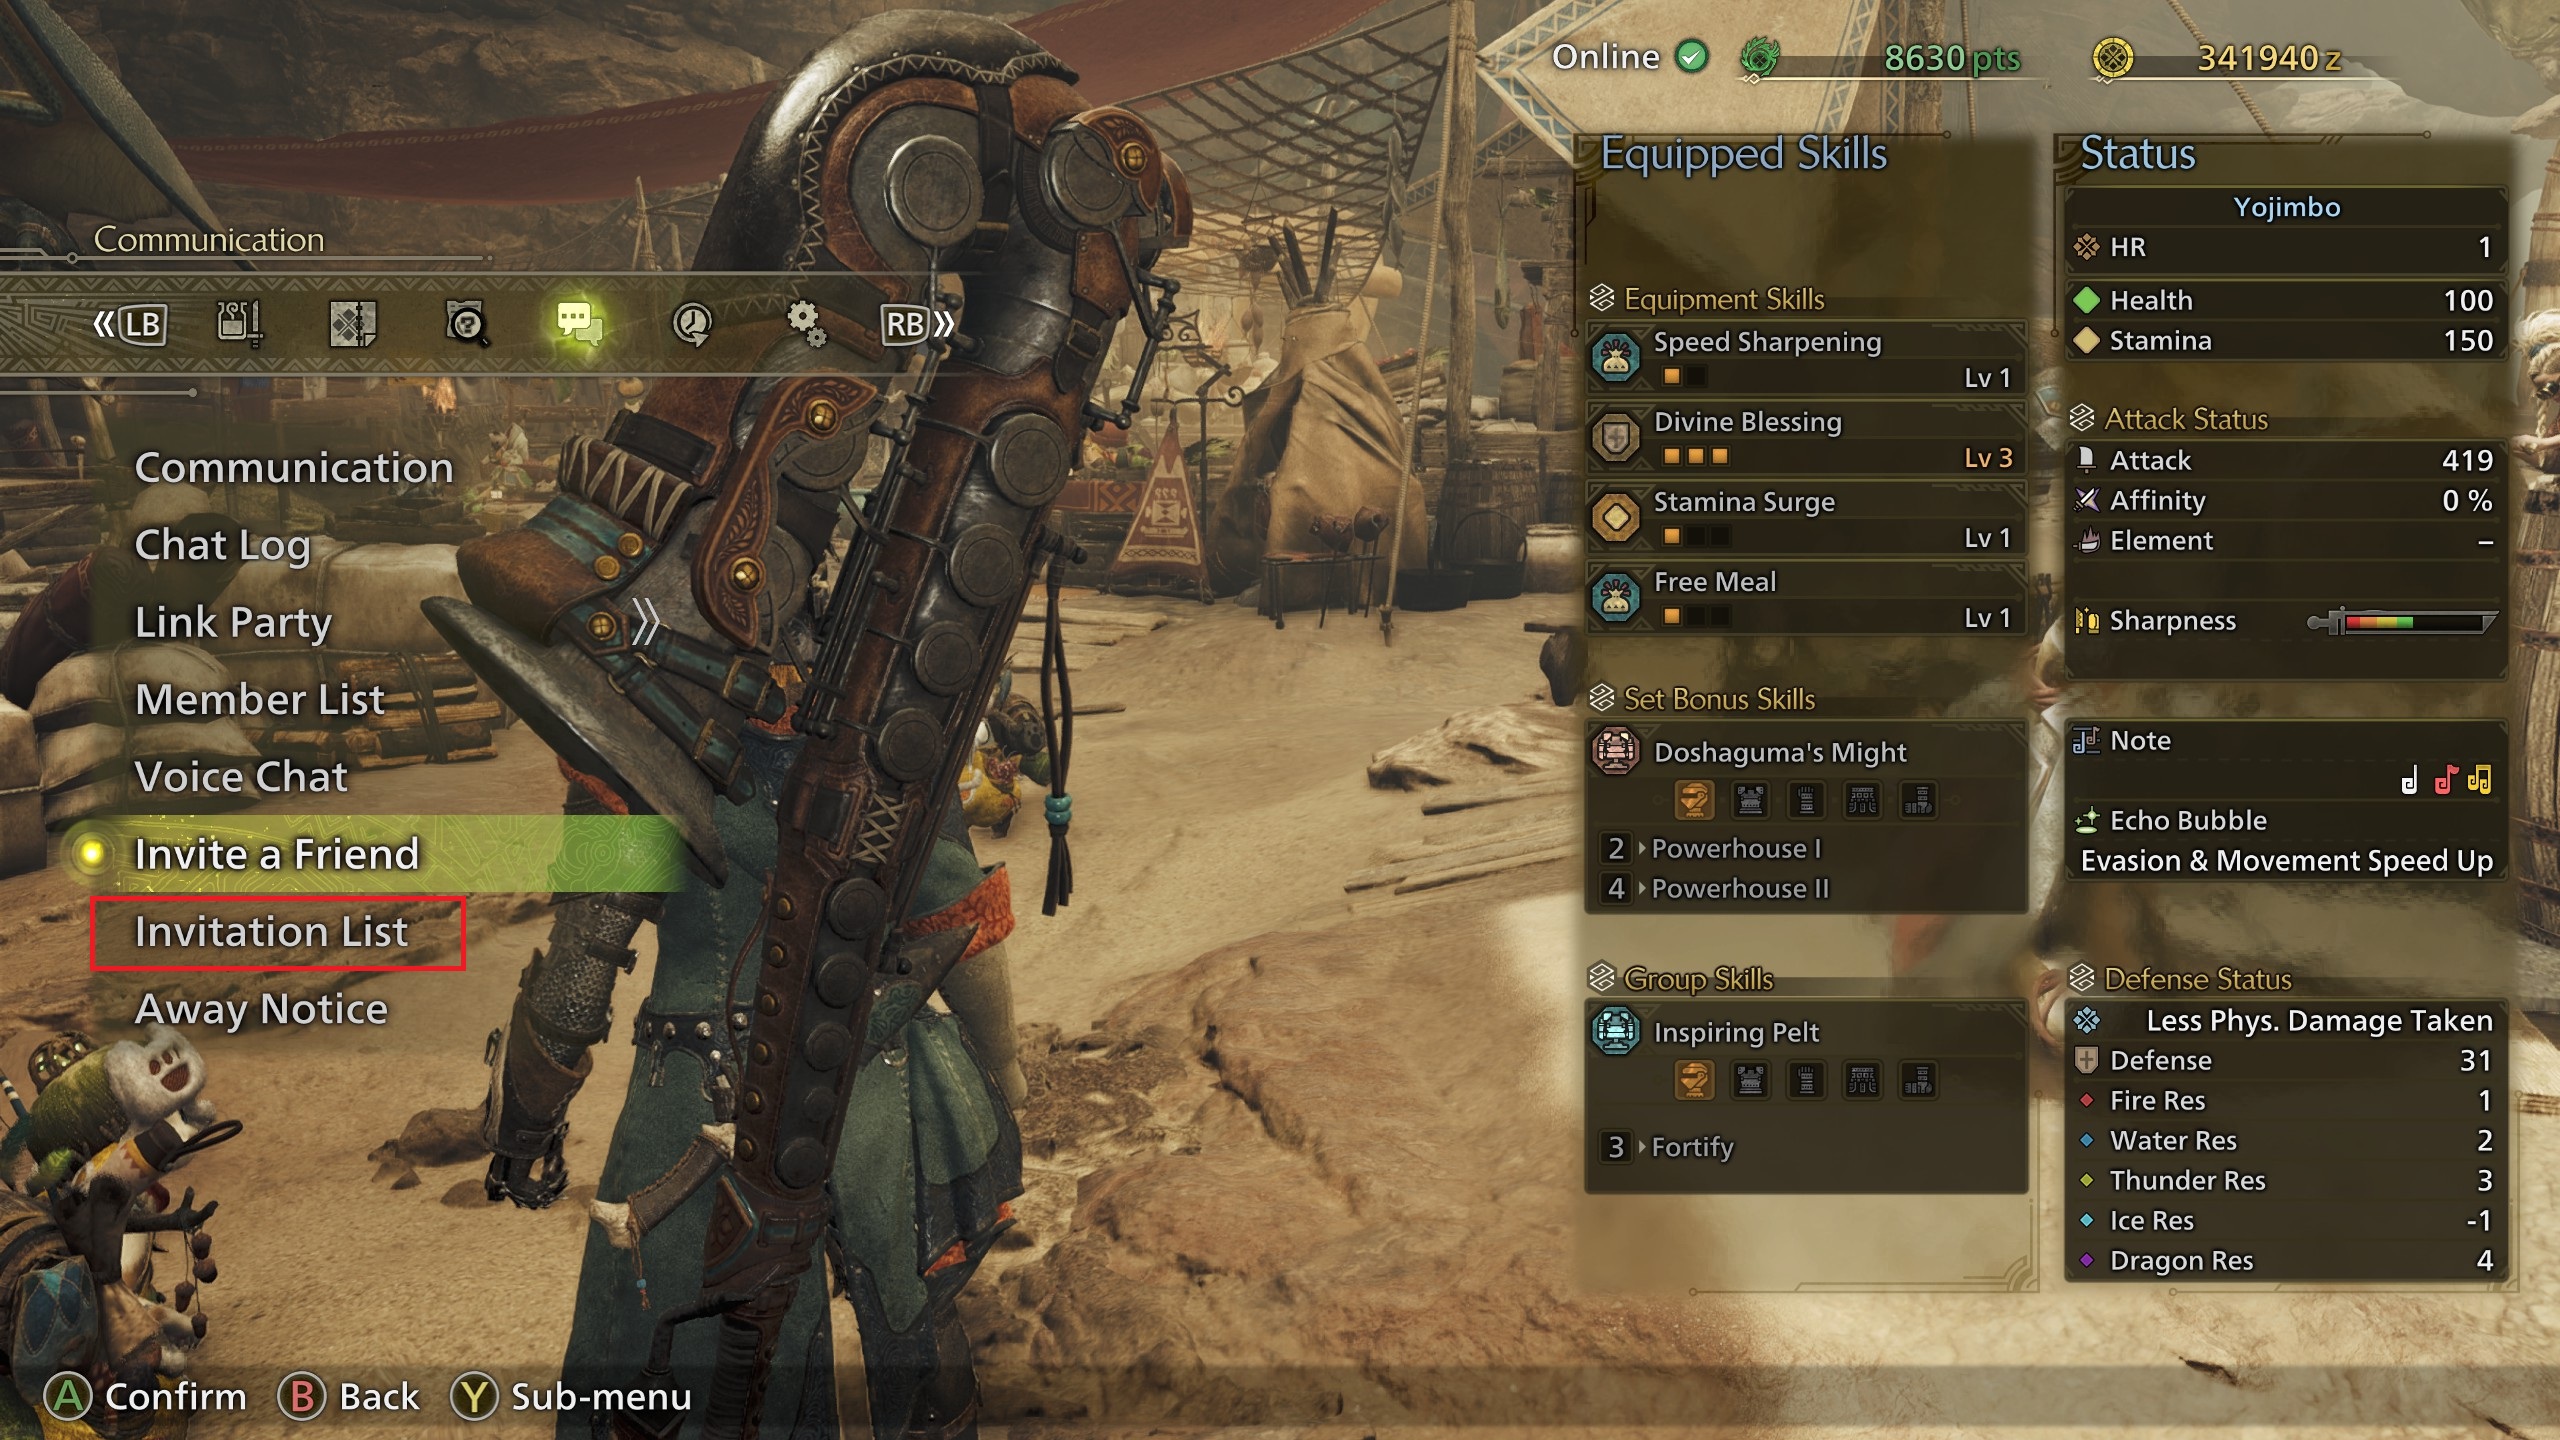
Your friend can accept the request by going to the Start Menu → Communication (4th tab) → Invitation List → select the Hunter Friend Request → Accept.
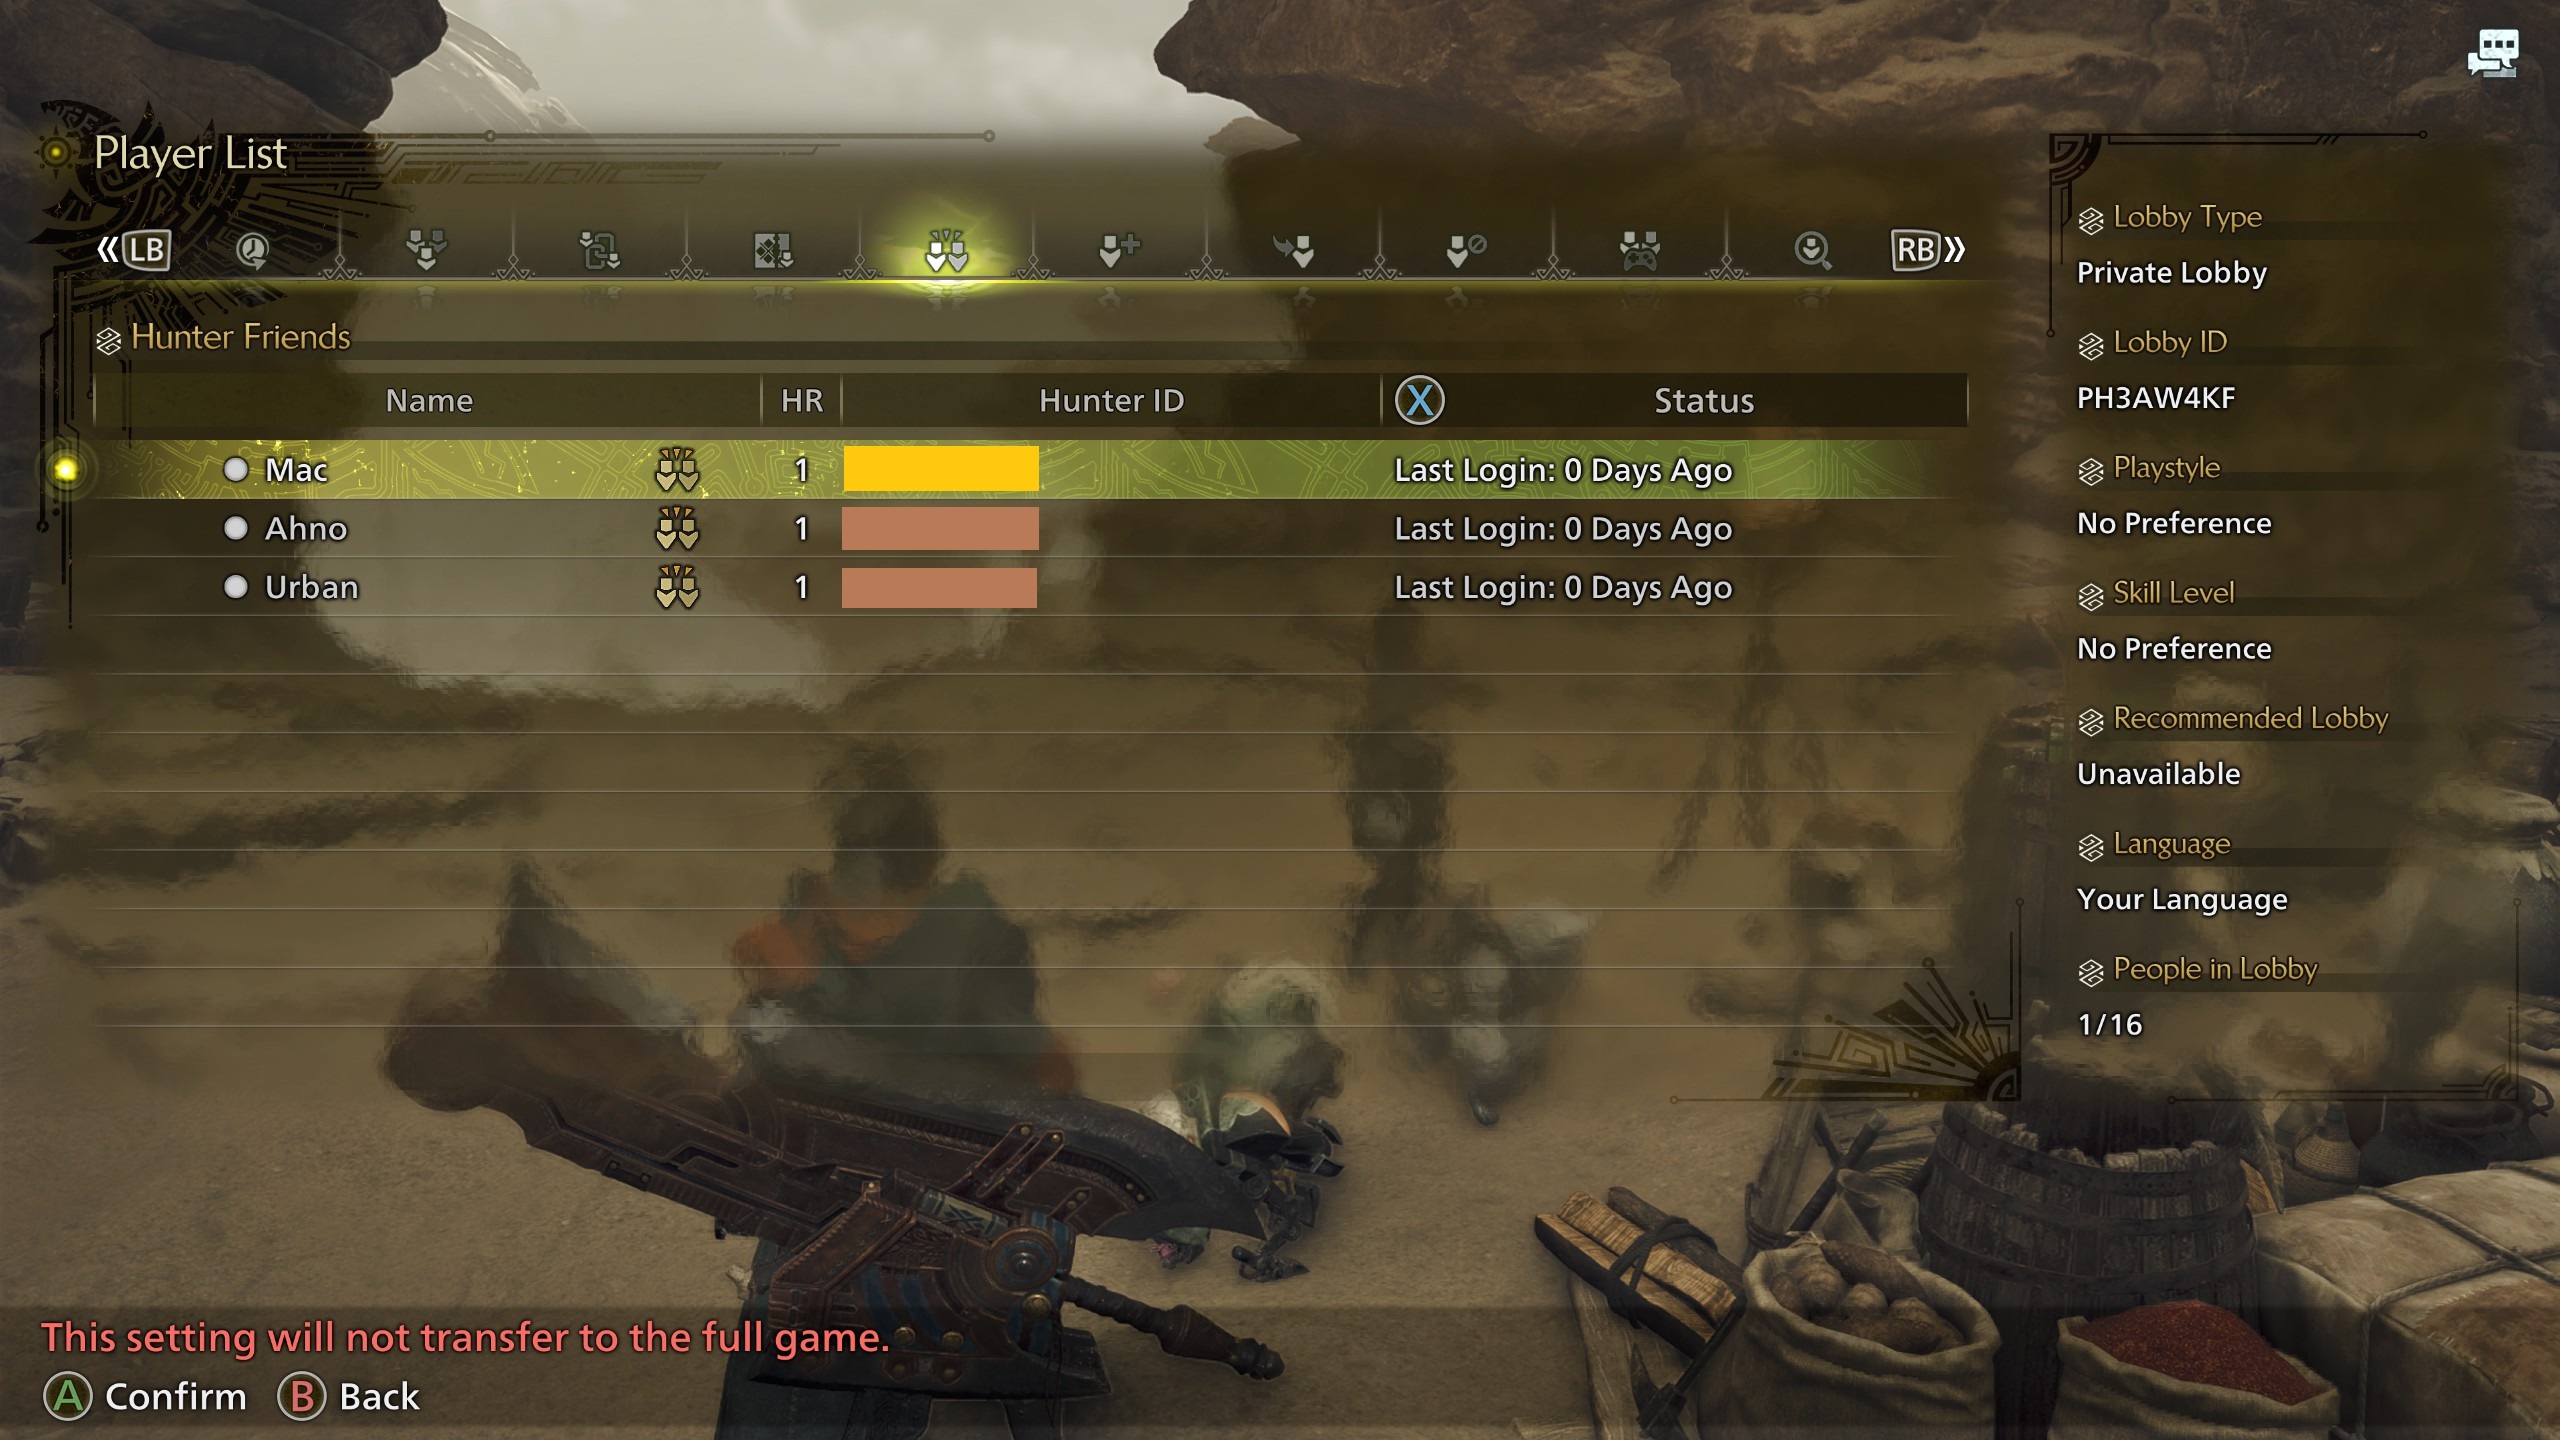
Your Hunter Friends list is in the Start Menu → Communication (4th tab) → Member List, in the 5th tab.
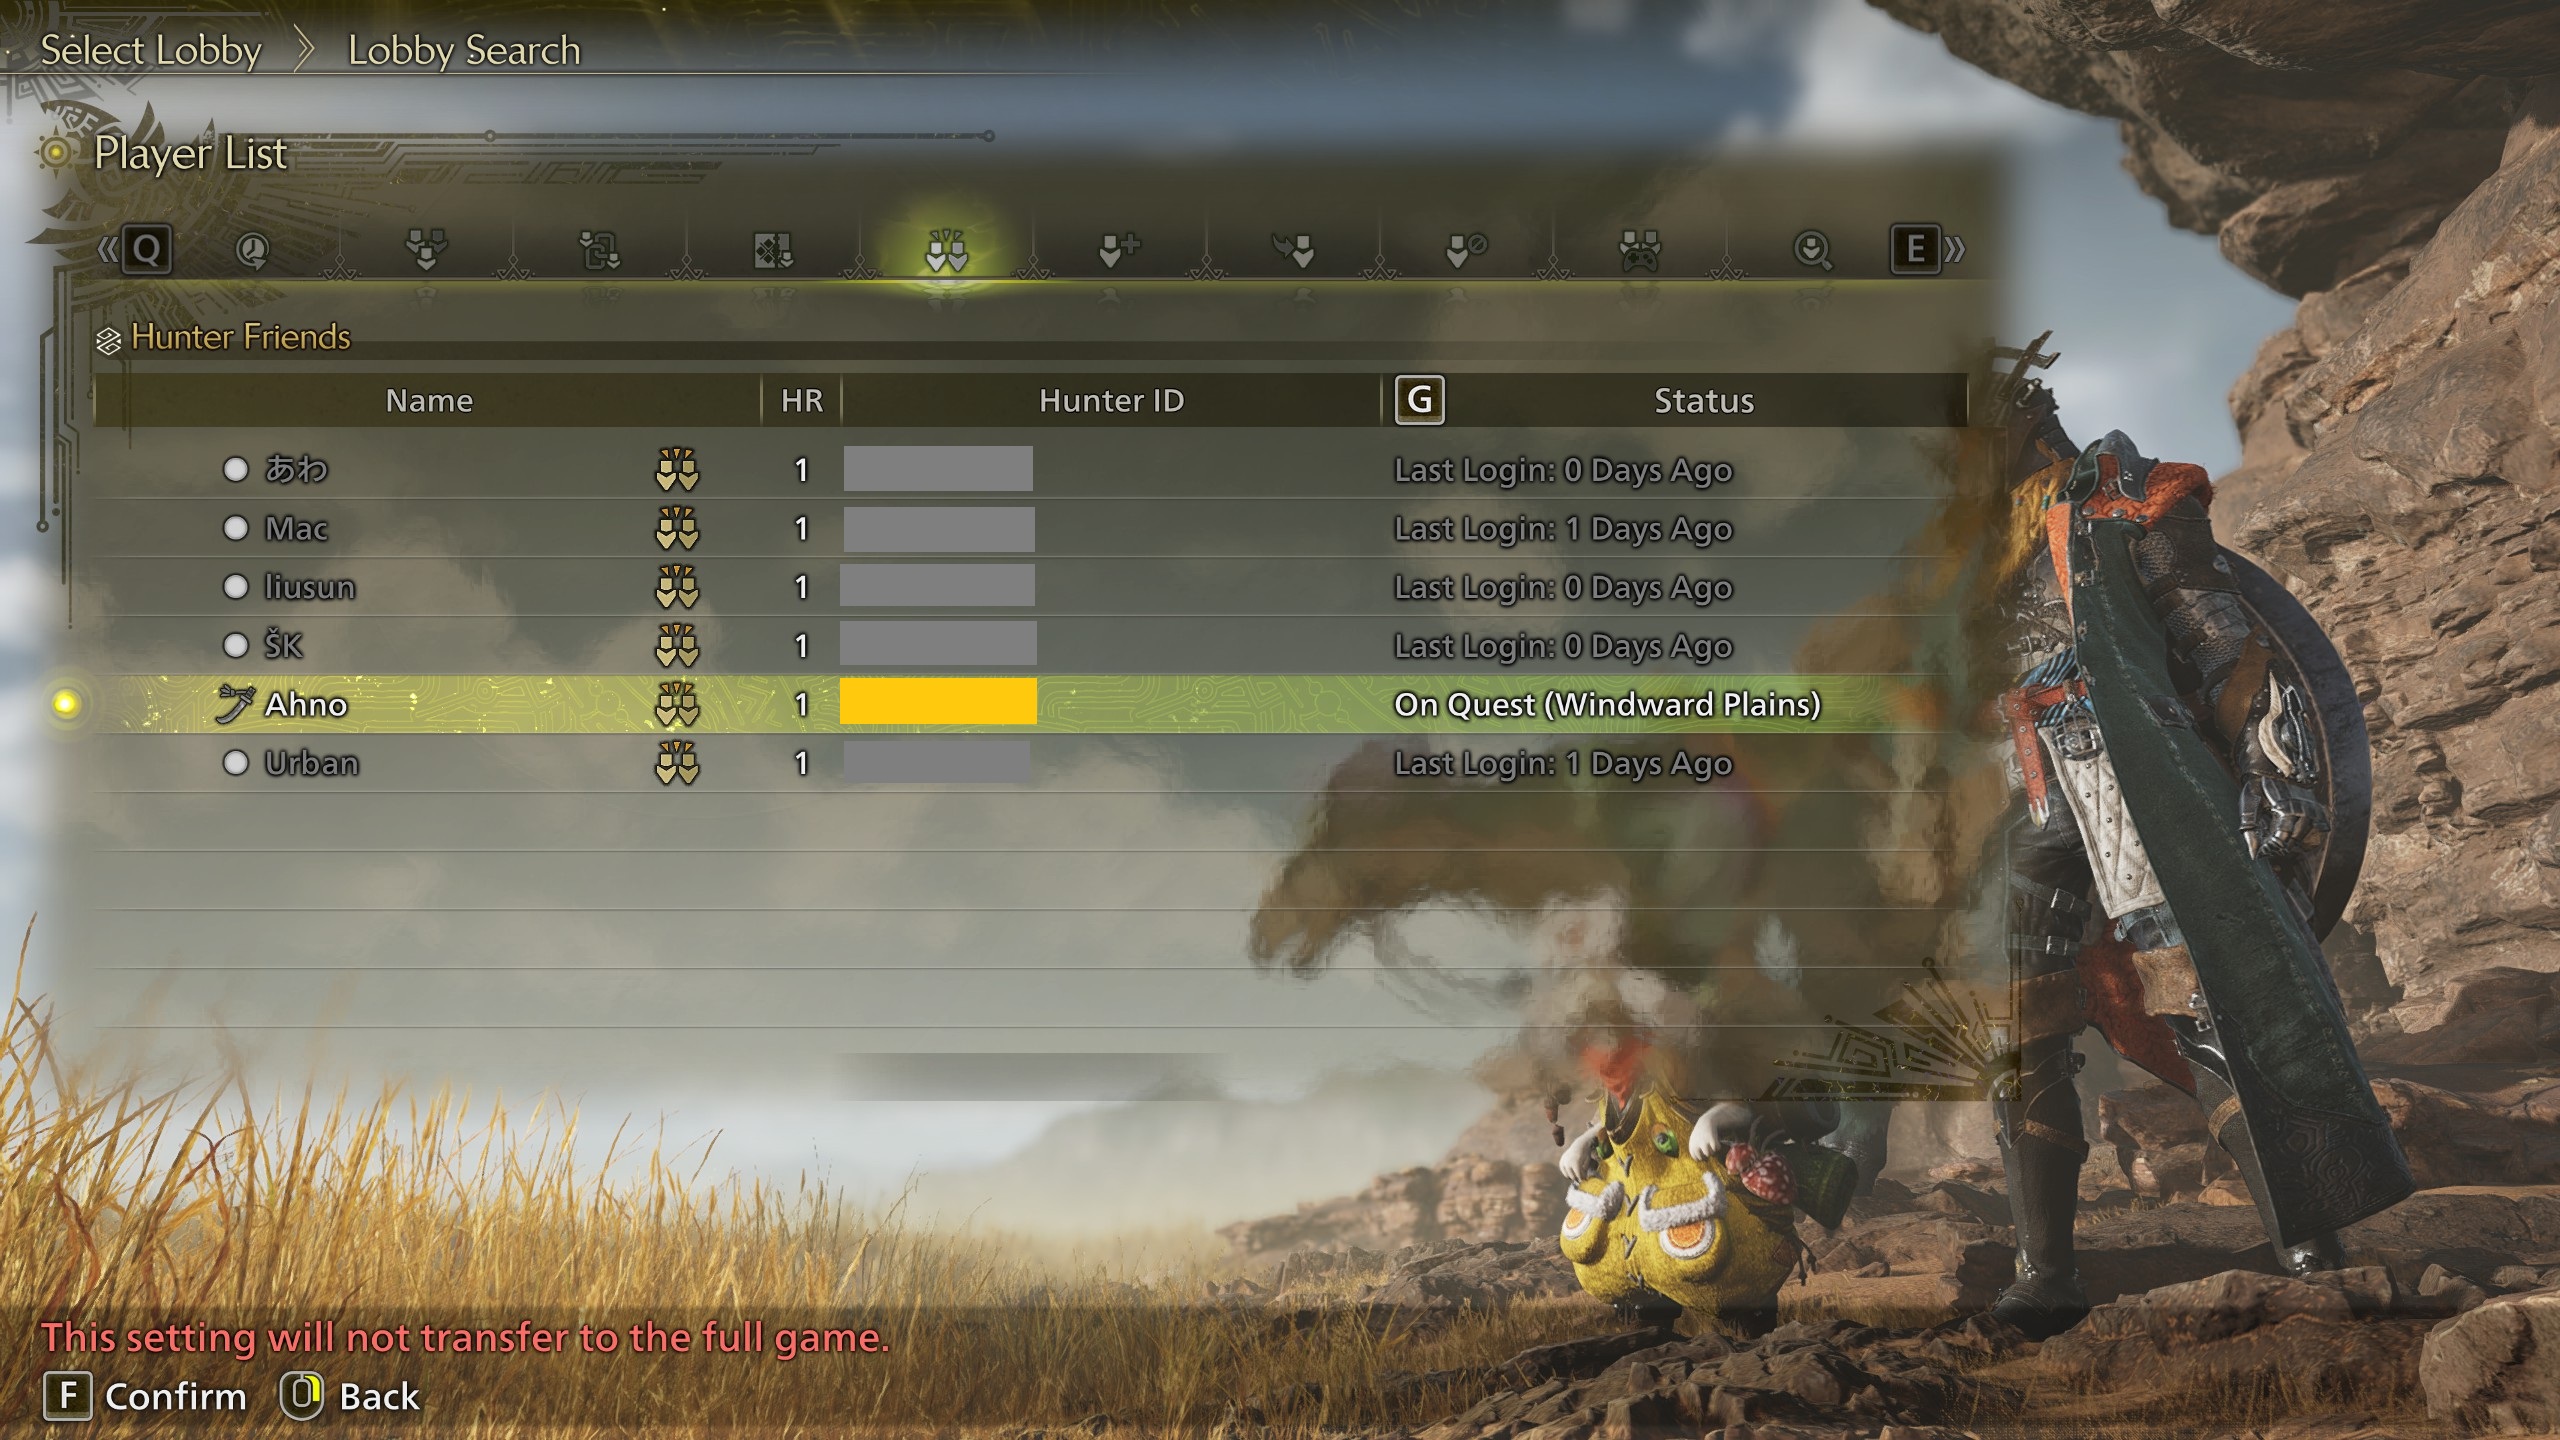
Becoming Hunter Friends is great because you'll no longer have to share lobby codes in the future. All you need to do is have one person start a lobby. You can join your Hunter Friend's lobby by going to the Title Screen Main Menu → Start Game → Choose your hunter → Lobby Search → Hunter Friend Search, then on the next screen select the friend you want to join. (Alternatively, while in-game and at base camp, you can talk to Alma → go to 3rd tab for the Change Lobby menu → Lobby Search → Hunter Friend Search.)
7. Post a quest
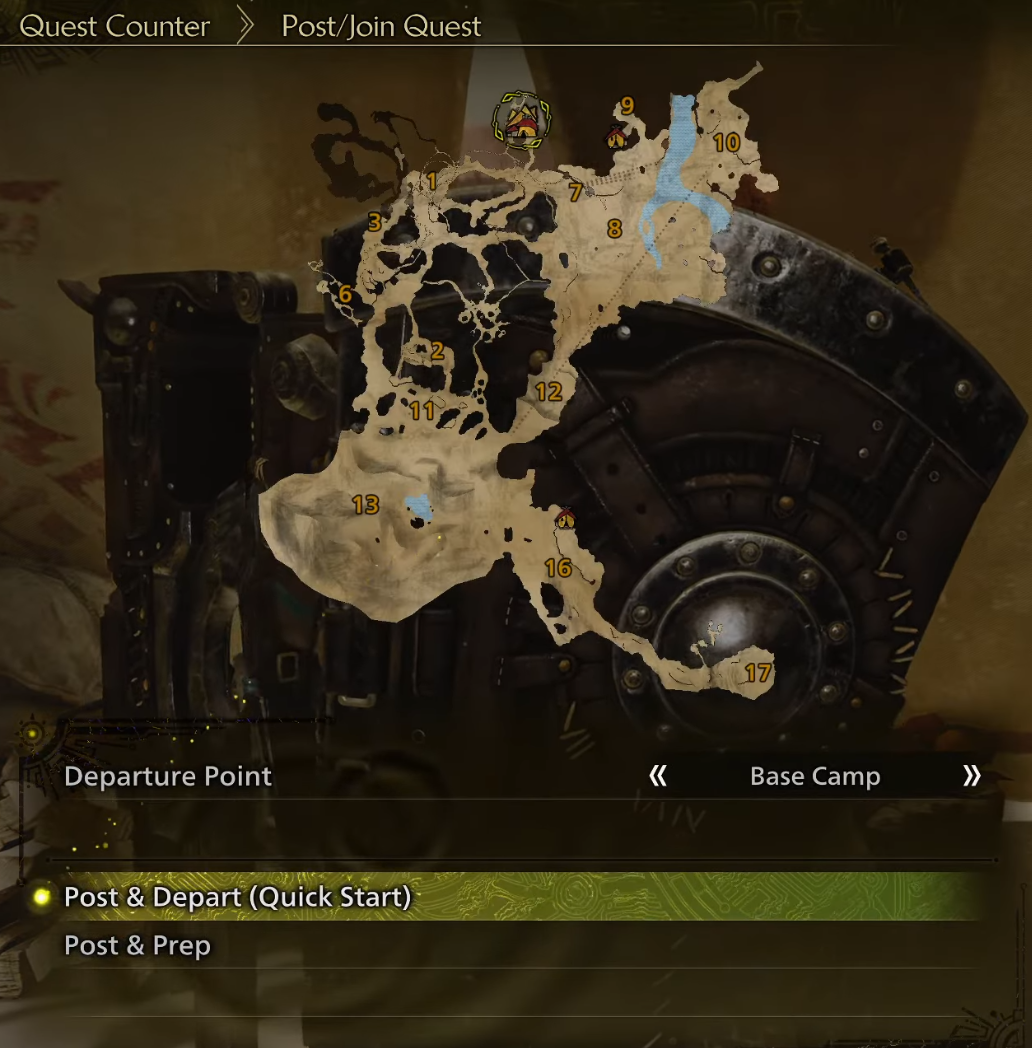
Post a quest by going to the Quest Counter (talking to Alma). You can choose to create a story quest, or optional quest, or event quest. After selecting the quest, choose the first option on the next screen that says "Post and Depart (Quick Start)". This will immediately load you into the quest.
8. Friends join the quest
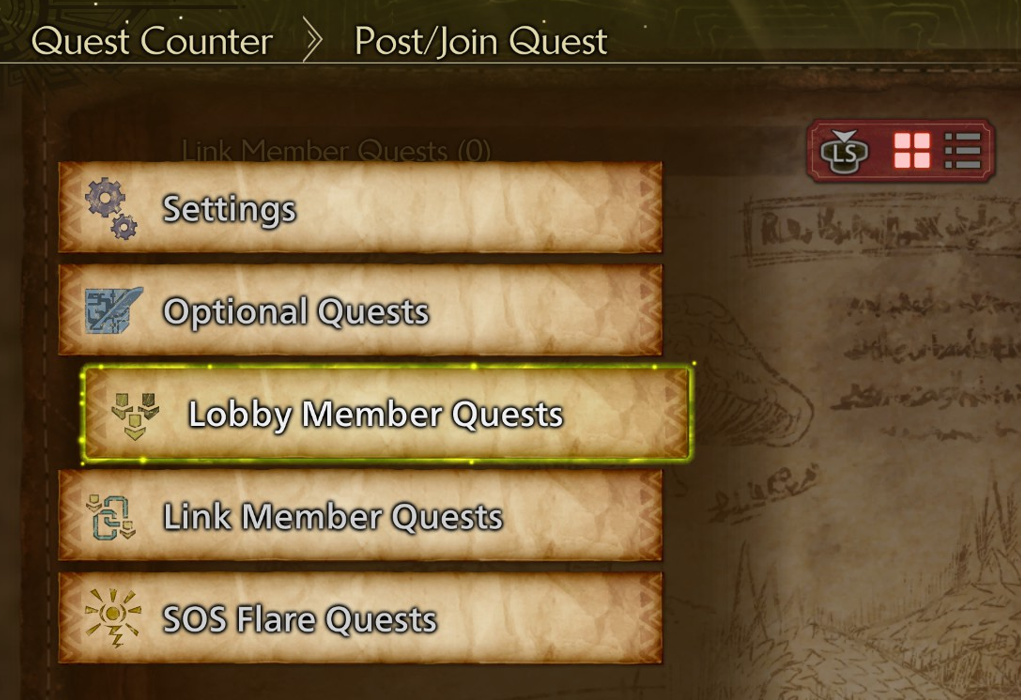
Your friends can join the quest in-progress by going to the Quest Counter (talking to Alma), then selecting Lobby Member Quests. The quest that you just created will show up in their list. They can join by selecting the quest, then choosing the first option on the next screen that says "Post and Depart (Quick Start)".
Enjoy playing with your hunting buddies! The rest of this guide covers more details about the multiplayer systems and features.
How the hunt changes in multiplayer
The game works mostly the same in single player or multiplayer, though there are a few details you should know.
Fun factor
Most importantly, the game is even more fun in multiplayer! You get to show off your skills, heal and buff each other, and execute deadly plans like blowing up a sleeping monster with 8 barrel bombs.
In my experience the Monster Hunter playerbase is very welcoming and helpful even in a public lobby full of strangers. Lots of experienced hunters love nothing more than helping newbies. So don't be afraid to hop in a group hunt and enjoy the ride.
Monster Stats
Many monster stats will scale up in multiplayer for balance reasons. The monster will have a larger HP pool in multiplayer, and it will be more resistant to status ailments like poison, paralysis, or KO. Monster body parts will also have more HP so it'll take more damage to break or sever parts. Notably, the monster's attack damage does not scale up in multiplayer.
Palicoes
If you're only hunting in a duo, you both will get to keep your Palico buddy during the hunt. That means your Palico can help out by healing you, buffing you, drawing monster aggro, and anything else your furry friend does.
In a group of 3 or 4 hunters, everyone's Palico will sit out for the quest. If someone happens to disconnect and it brings the number of hunters back to 2 or less, then your Palico will return to the fight.
Faint Limit
All hunters share the same total number of faints. On a 3 faint limit quest, one person fainting 3 times will end the quest, but so will 3 different people each fainting once.
"Friendly Fire", aka Flinches
You might find yourself getting flinched, staggered, or knocked into the air from your teammates’ weapon attacks. It can feel frustrating to get stunlocked from your teammates especially if it interrupts your combos. There are really just two solutions. Either move away from your friend and attack a different monster part, or equip the skill Flinch Free from an armor piece or decoration. Flinch Free prevents almost all interruptions from friendly weapon attacks. Personally, I feel that using one skill point slot for Flinch Free is much better for your DPS in multiplayer than a pure damage skill like Attack Boost or Critical Eye, so I'm happy to use it.
The Member List: Lobby Members, Hunter Friends, etc.
The Member List is where you can view various lists of players: members of your current lobby, your Hunter Friends, players you've followed, etc. You can also perform certain actions with the members in the list, like adding as a Hunter Friend, inviting to a Link Party, or starting a private text chat channel.
The Member List screen also shows additional helpful information about the current lobby on the right side of the screen. The most important piece of info is the Lobby ID code which you can share with others to allow them to find and join the lobby.
To see the Member List, go to the Start Menu → Communication (4th tab) → Member List.
Here's a summary of the different lists you can see by switching tabs in the Member List.
Past Interactions - 1st tab
Displays players that you've recently quested with.
Lobby Members - 2nd tab
Displays all of the current members in the lobby.
Link Member List - 3rd tab
Shows all of the players in your current Link Party.
Quest Members - 4th tab
Shows the members of your current quest. The player that posted the quest will have a full-size square ticket icon next to their name. All other players will have a tall skinny rectangular ticket instead.
Hunter Friends - 5th tab
All players you've added as friends will show up here. This friend list is specific to Monster Hunter Wilds, and you need to add people as Hunter Friends automatically in-game. In other words, your Steam friends list will not automatically appear here, for example.
Following - 6th tab
Shows a list of all players you've followed.
Followers - 7th tab
Shows a list of all players that have followed you.
Squad Members - 8th tab
Shows all the players belonging to your Squad.
Block List - 9th tab
Shows a list of all players you've blocked.
Platform Friends - 10th tab
Shows your platform friends list - your Steam friends on Steam, or your console friends list if playing on console. The only action you can take in this list is seeing someone's Steam profile (or Playstation / Xbox profile).
Hunter ID Search - 11th tab
This tab allows you to enter the ID of a player to bring up their profile, so that you can perform additional actions such as adding them as a Hunter Friend.
All About Lobbies
A lobby consists of the server you’re playing on, and other players on your same server. You can play on a public or private lobby. A public lobby is open to anyone, and your friends can join you in a public lobby as long as it isn't full. On the other hand, a private lobby is restricted; it can only be joined by friends of the lobby members or by people who know the lobby ID code. Public lobbies have a max capacity of 100 players, and for private lobbies it's 16 players.
While in an online lobby you'll see other players in the Base Camp. The game will only display a maximum of 16 player characters in Base Camp at once, so even if you're in a public lobby with 100 people, you won't be able to see everyone.
The game has a text chat channel for Lobby Members, and that channel does show all the messages for all players in the lobby.
You can join quests of other lobby members by going to the Quest Counter → Lobby Member Quests.
Joining and Creating Lobbies
You can decide what kind of lobby you'd like to play in by going to the Title Screen Main Menu → Start Game → Choose your hunter → Select Lobby. (Alternatively, while in-game and at base camp, talk to Alma → go to 3rd tab for the Change Lobby menu.) Below are the lobby options.
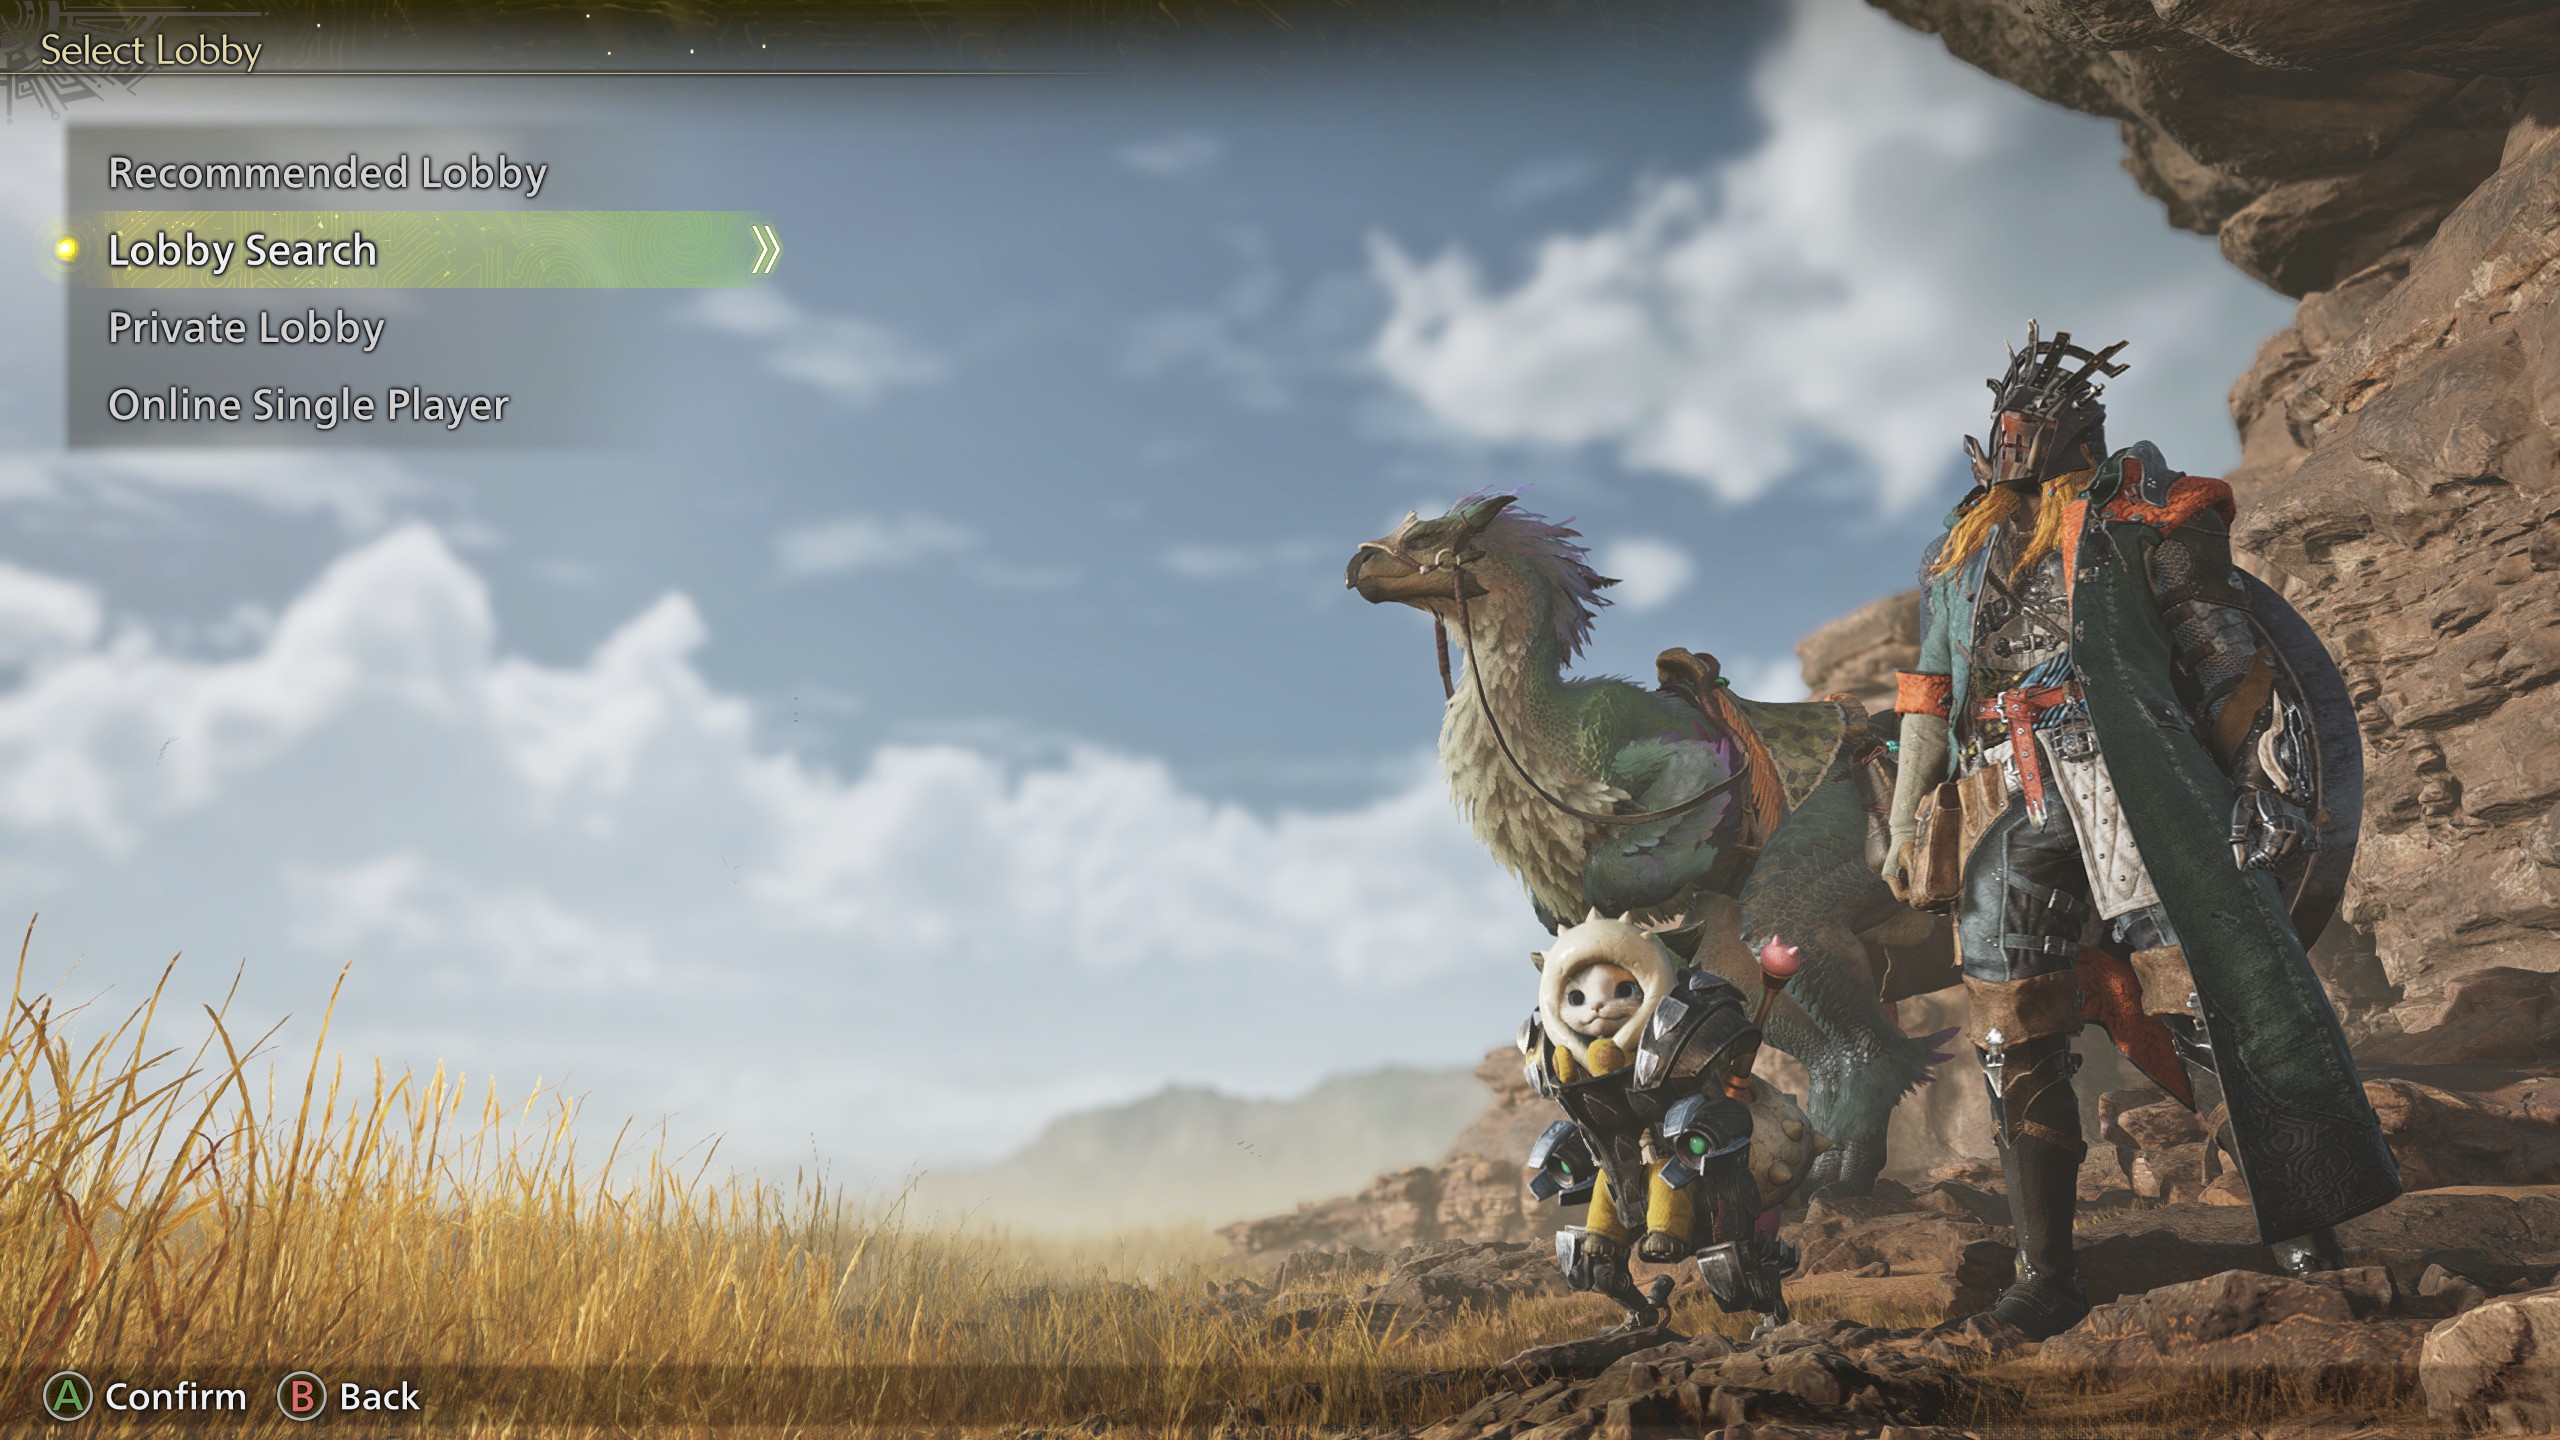
Recommended Lobby
The game will automatically find a lobby for you and place you in it. The selection is likely based on a number of factors like geographic location, your in-game language, your Hunter Rank, etc.
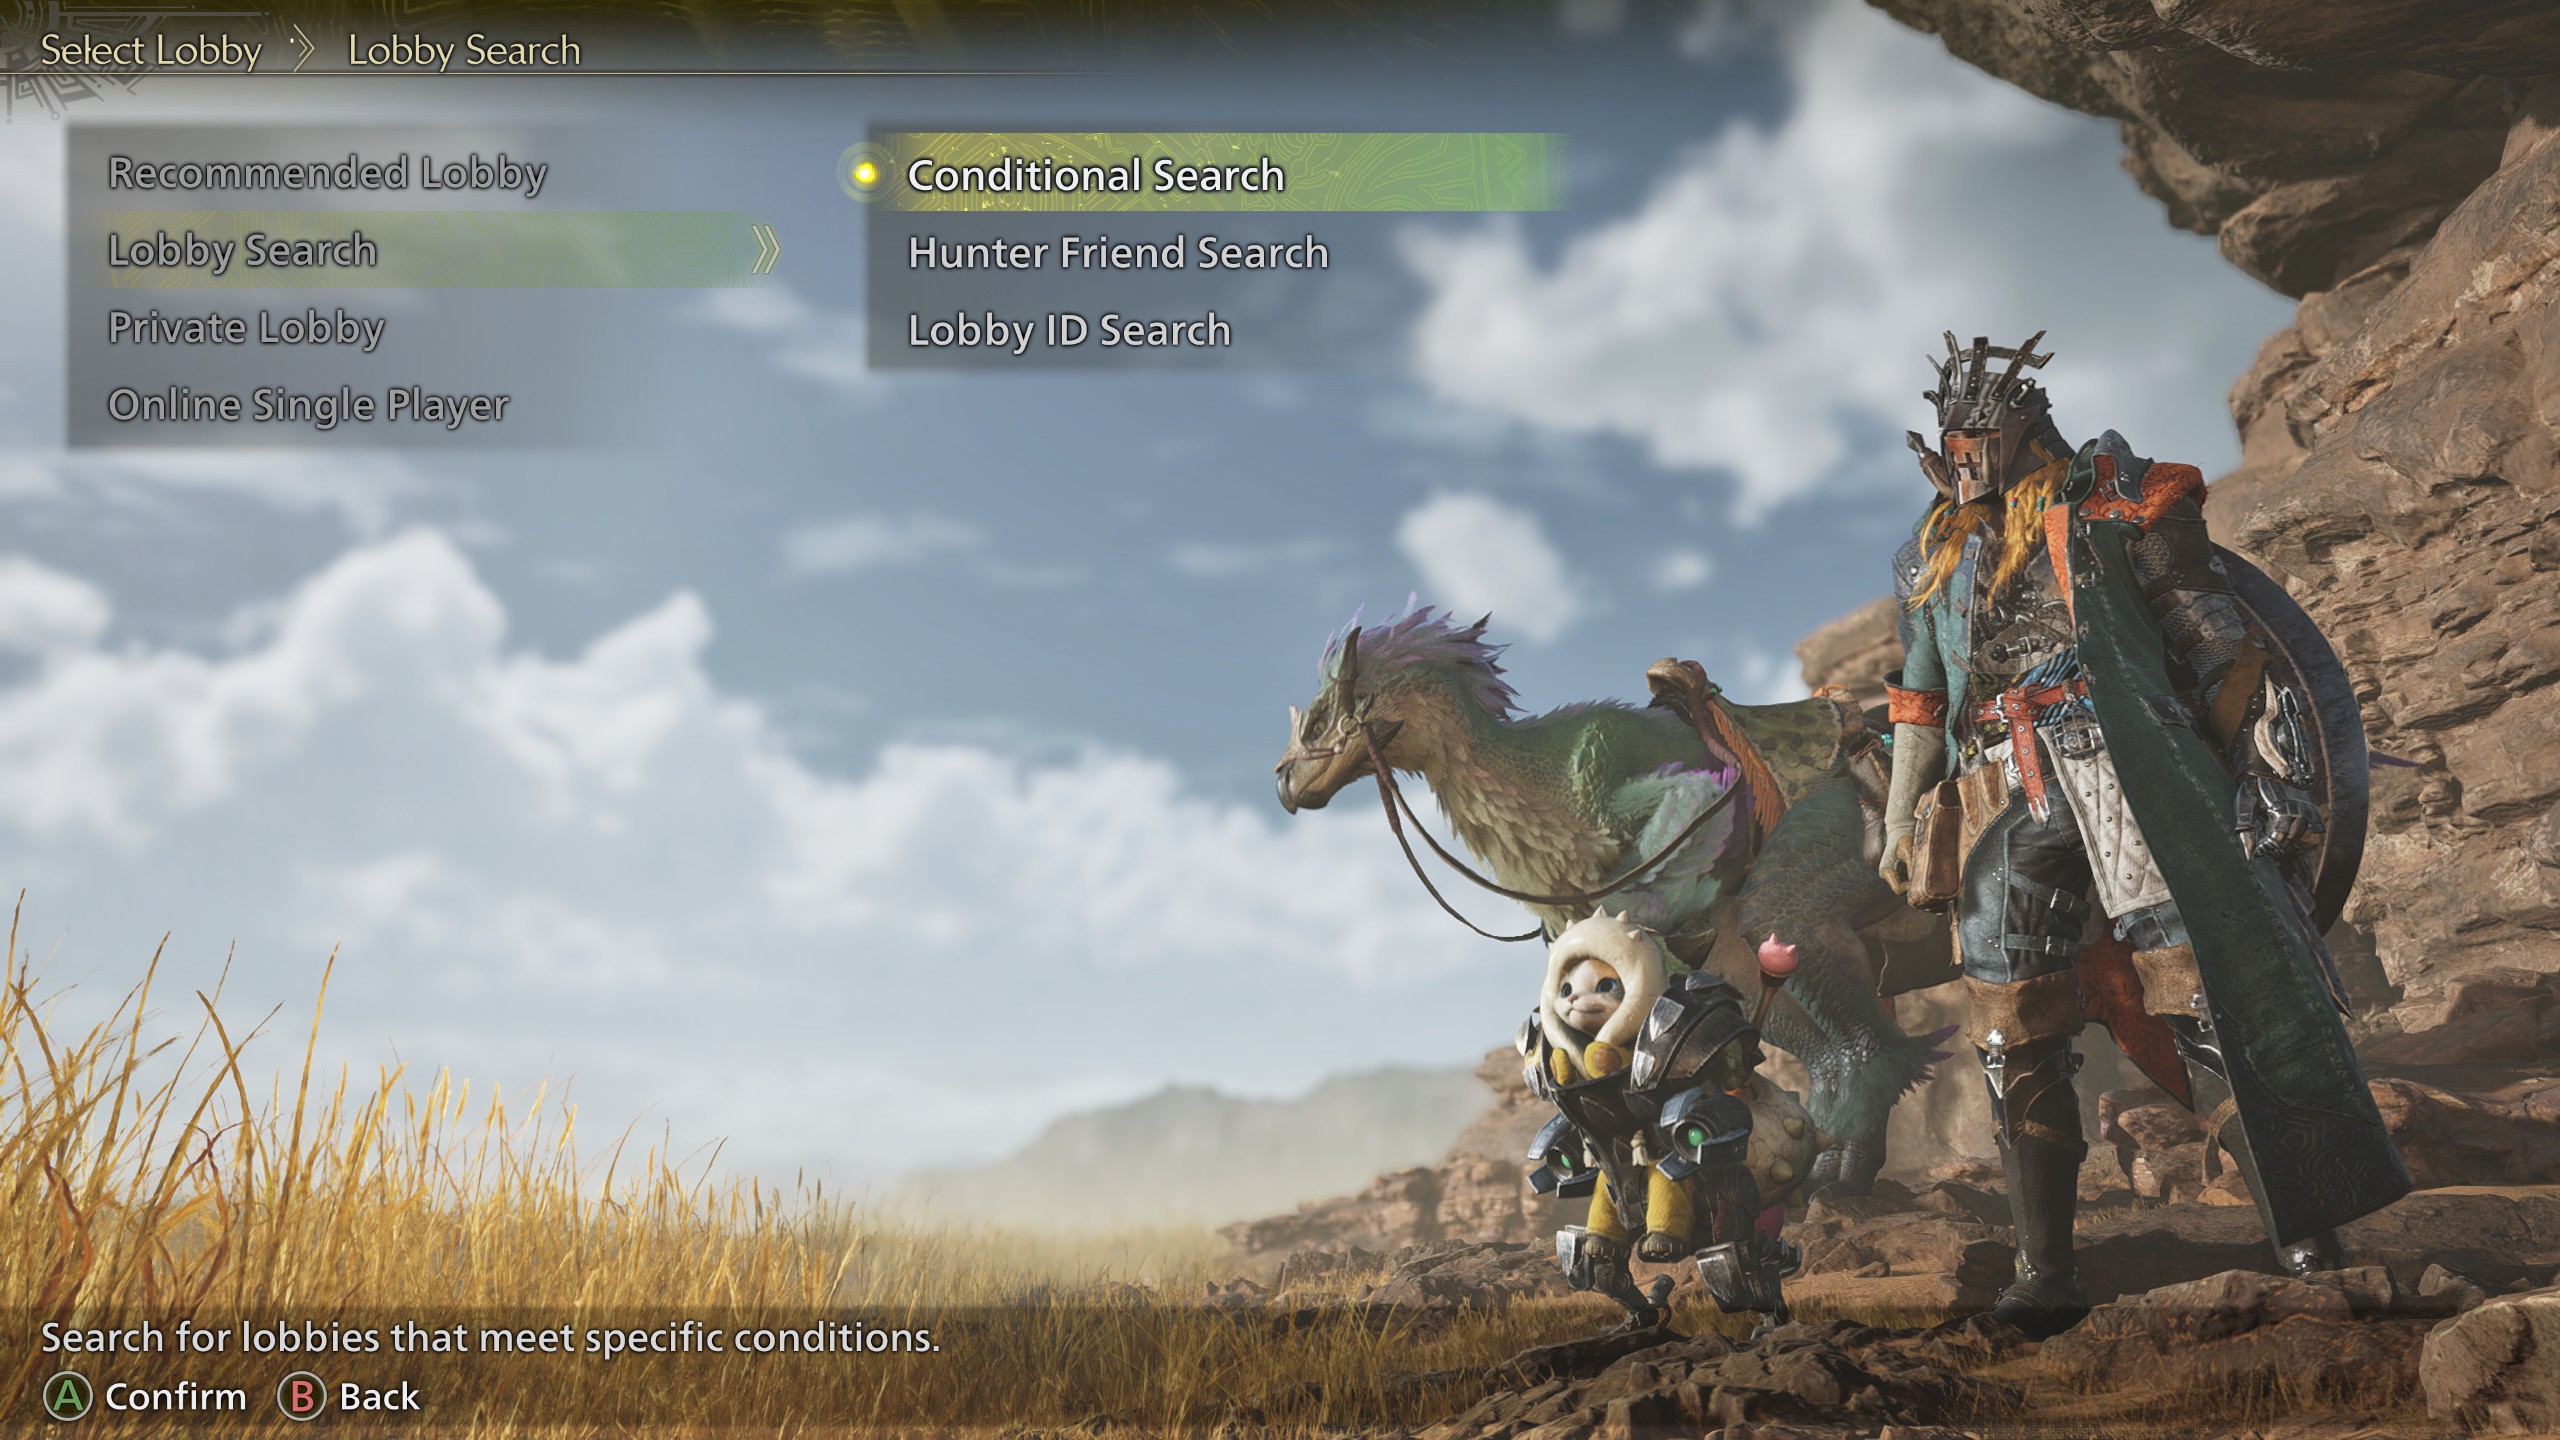
Lobby Search
Selecting Lobby Search will open up a few sub-options.
- Conditional Search - Look for lobbies that meet a set of criteria, like language or skill level (Beginner/Veteran/Any).
- Hunter Friend Search - Brings up your Hunter Friends list. Any friends that are online in an open lobby will have their name in bright white text. The Status column will also tell you whether they are in a quest, and their current in-game location. All other friends that aren't joinable will be in grayed-out text.
- Lobby ID Search - Brings up a text box for you to enter a Lobby ID code.
Private Lobby
This selection creates a fresh, new Private Lobby with you as the host. The only players that will be able to join your lobby are your Hunter Friends, and anyone that you give the Lobby ID code to.
Online Single Player
This selection does not create a lobby, so you can play totally in single-player with nobody else appearing in your Base Camps or showing up in your Chat Log. It is "pseudo-online" because you'll still be able to participate in online hunts with SOS flares.
Calling for Backup with SOS Flares
An SOS flare is a signal that you can send out to request aid from other hunters. The other players will only be around for the length of the quest. Once it's over everyone will go their separate ways. There are no lobby restrictions on SOS flares, so hunters from other lobbies can join to help you out.
There are a lot of players out there that spend tons of time just responding to SOS flares for the simple joy of helping others, so don't hesitate to seek help if you need it!
Firing an SOS Flare
To fire an SOS flare during a quest, go to the Start Menu → Missions & Quests (2nd tab) → SOS Flare. Responding to SOS flares involves other players manually choosing your quest from a list, so it may take a minute or two for you to see others join. If other players aren't finding your quest, the game will eventually substitute in NPC Support Hunters.
Canceling an SOS Flare
You can cancel an SOS flare you've already fired by going to the Start Menu → Missions & Quests (2nd tab) → SOS Flare → Cancel.
Joining an SOS Flare Quest
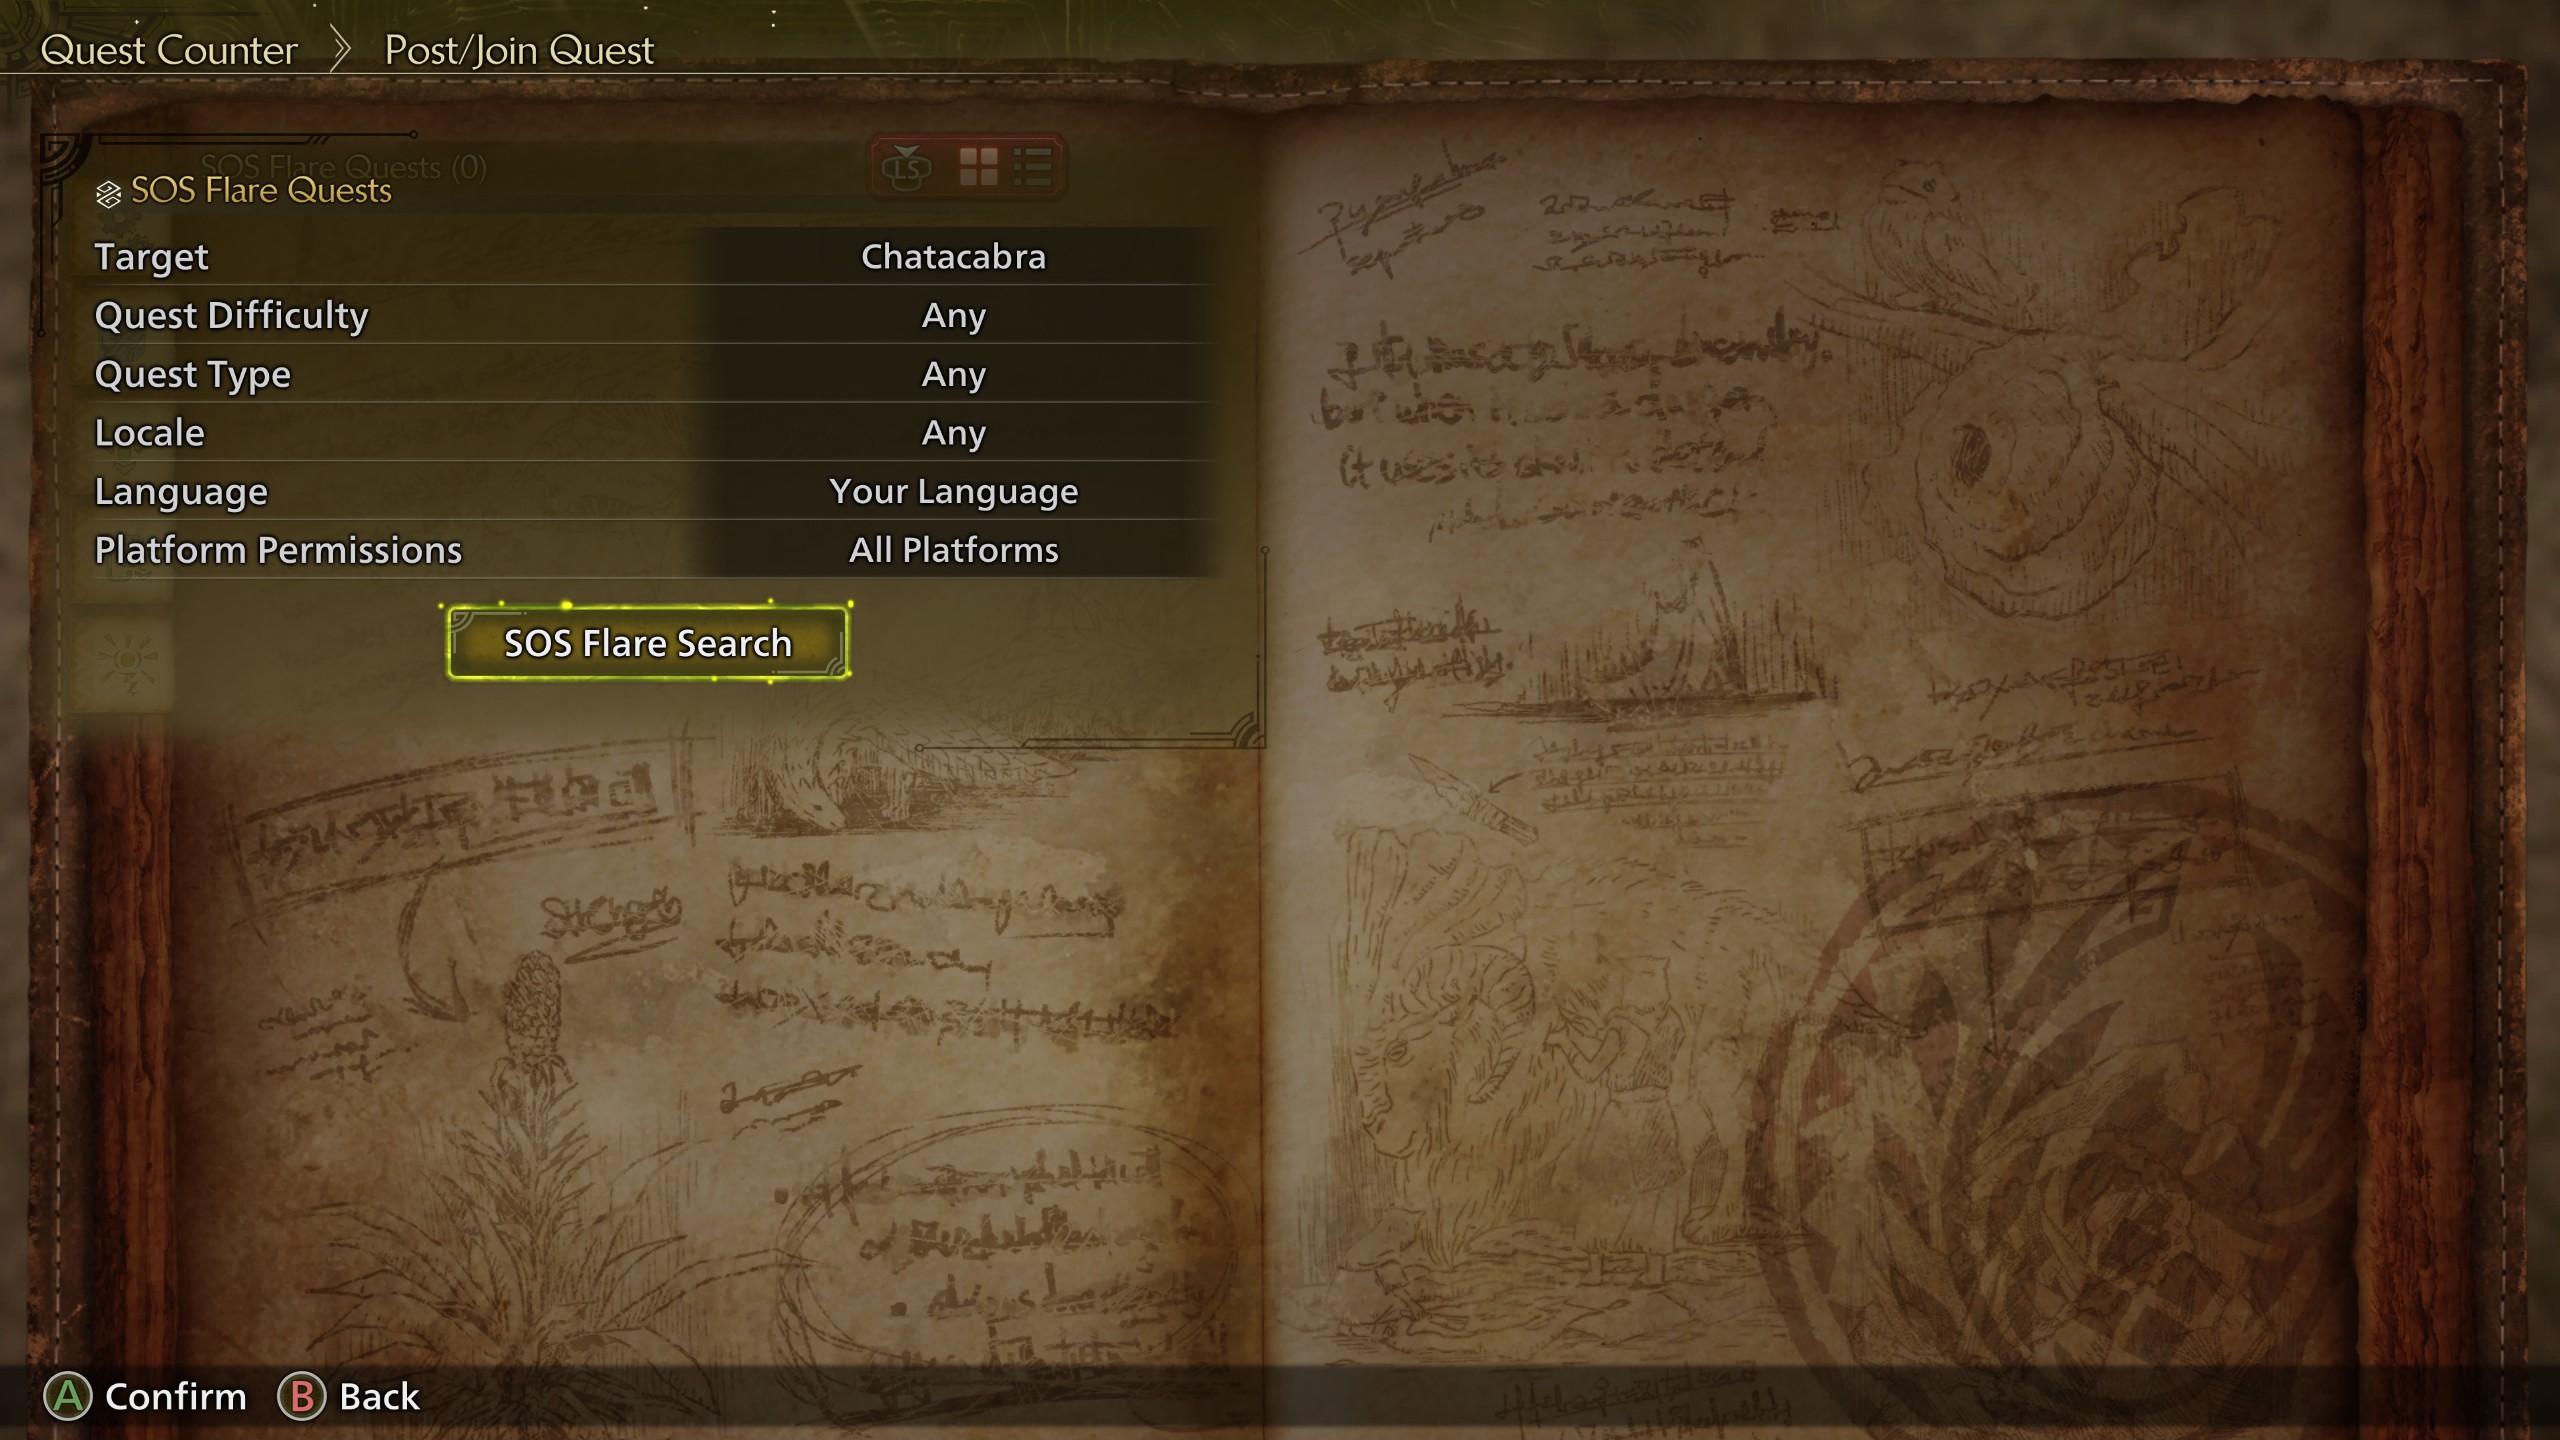
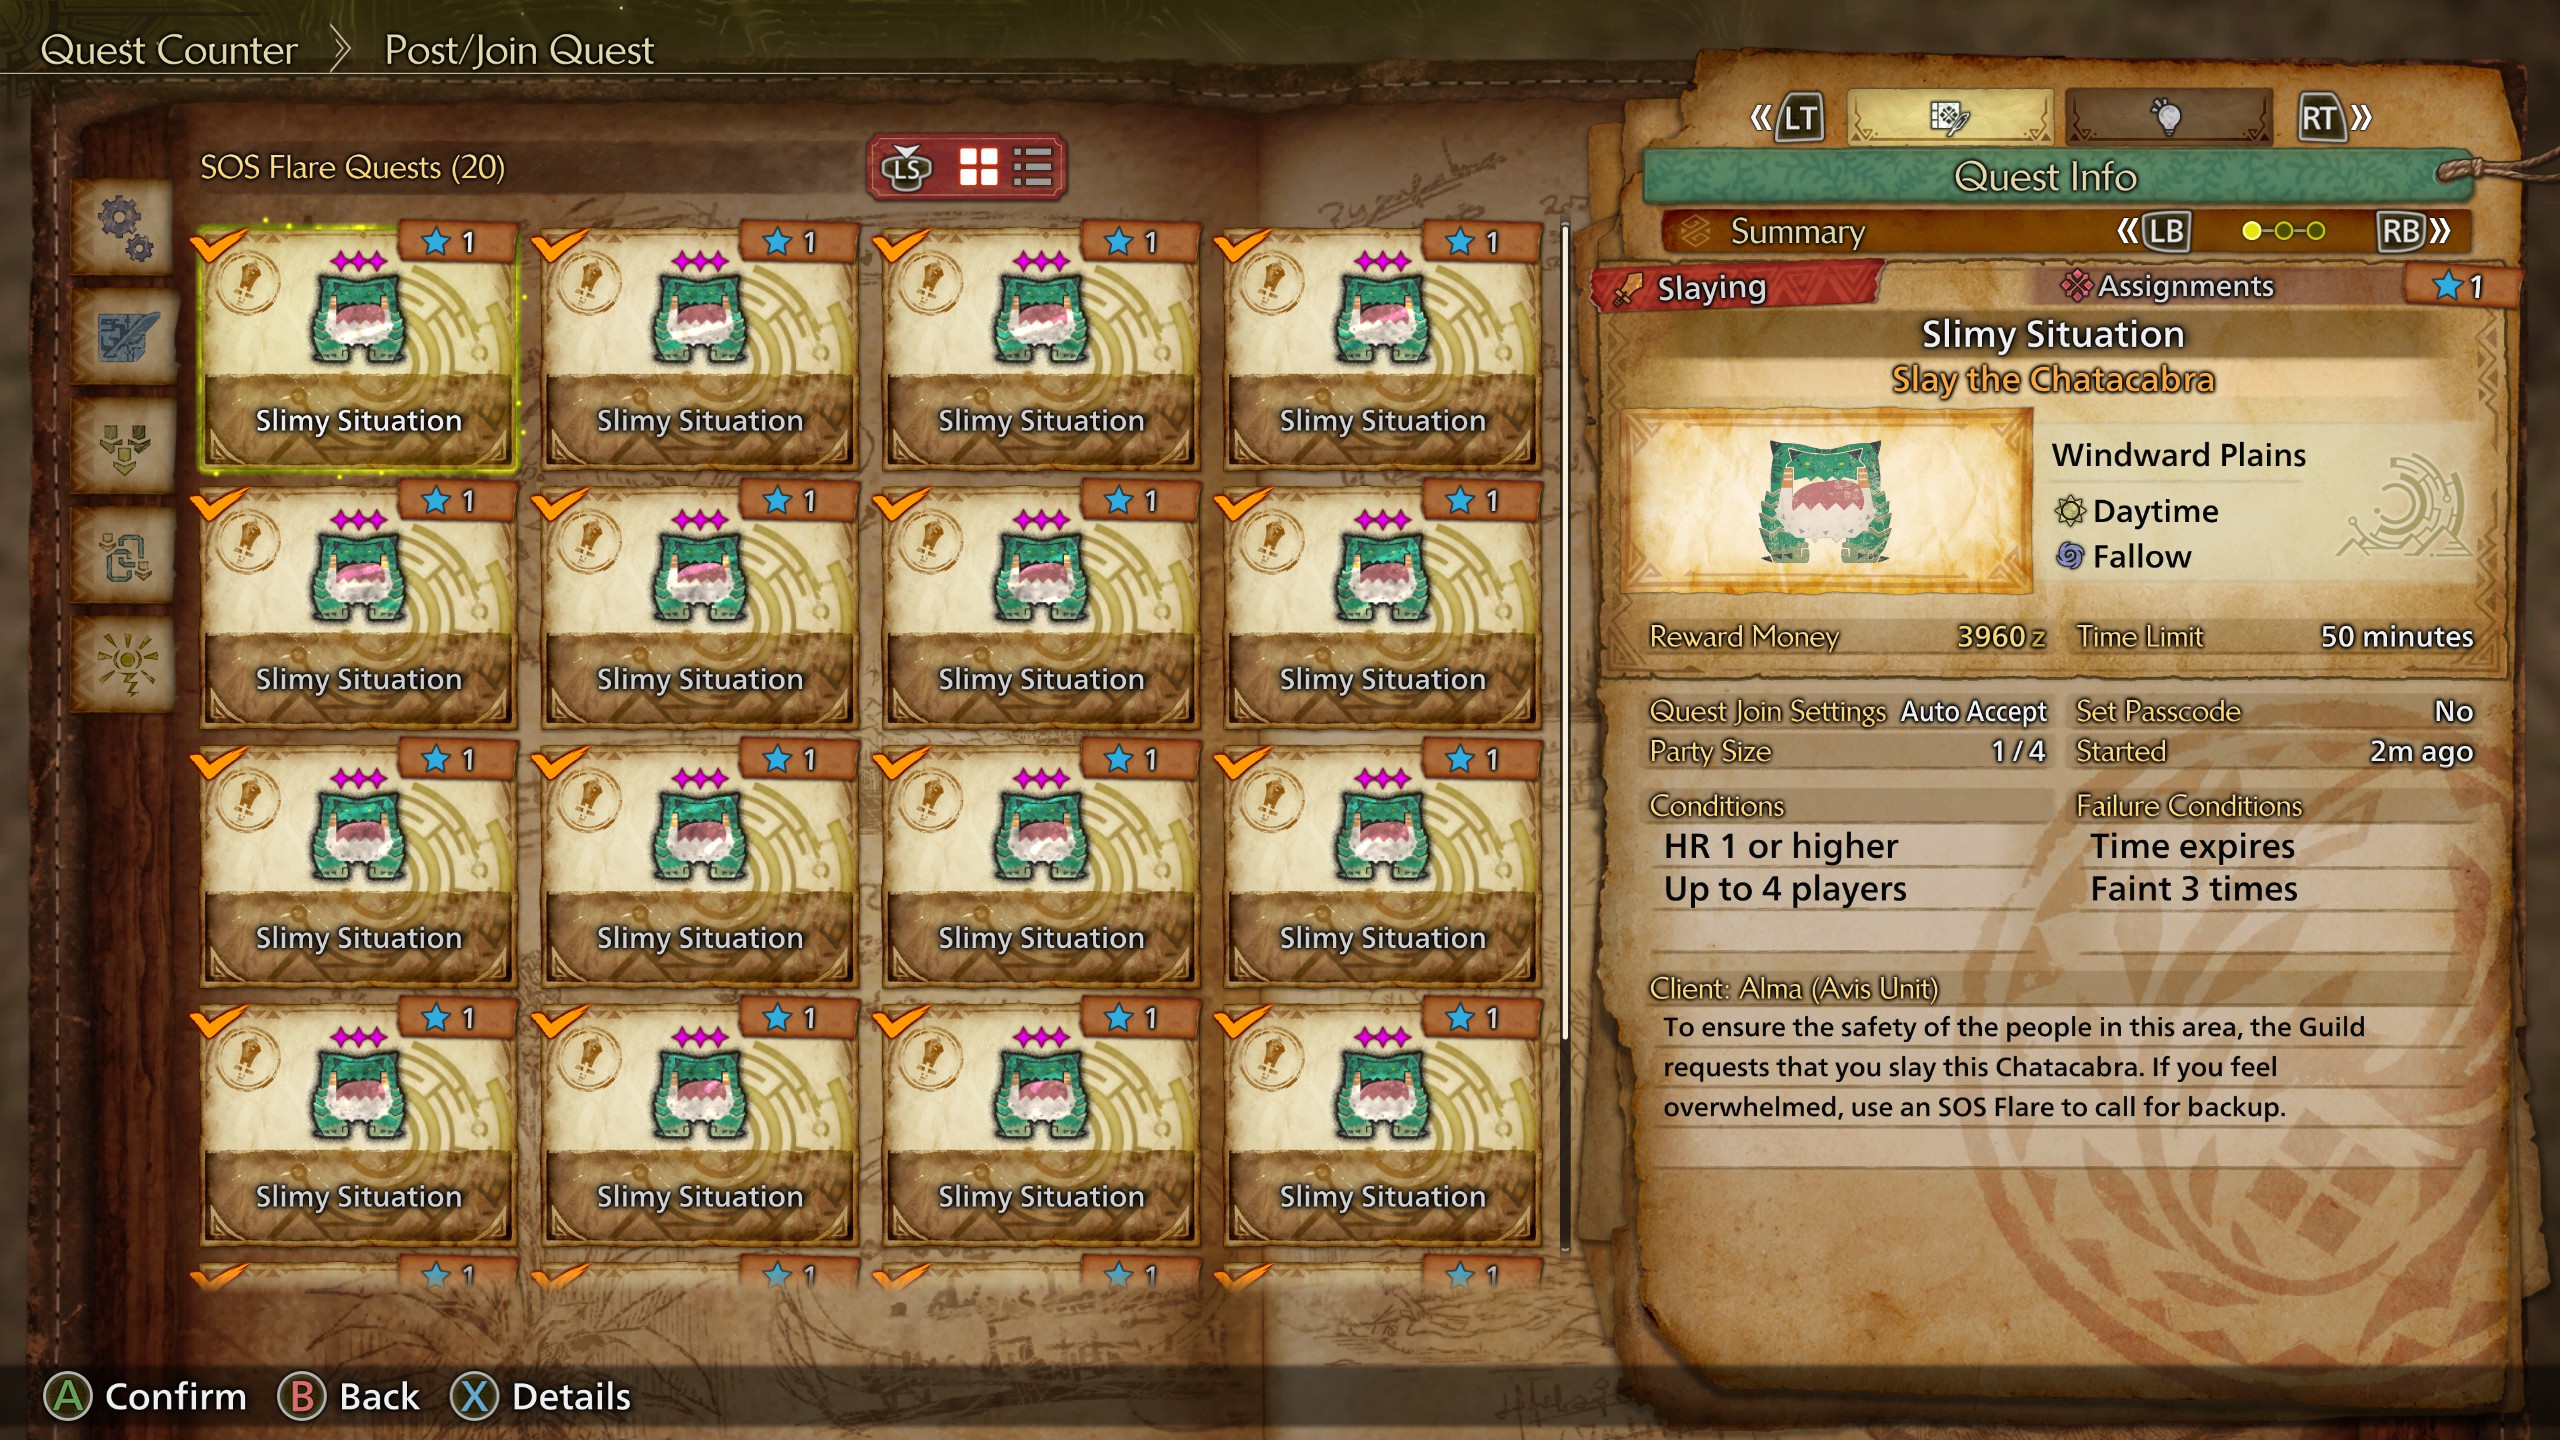
You can join someone else's SOS flare by going to the Quest Counter → SOS Flare Quests. After choosing this option the game will present you with a list of criteria that you can choose to search for. For example, you can look for a particular monster as the target, the locale in which the quest takes place, and you can choose to search for quests on all platforms (PC/PS5/Xbox) or just your own platform.
After choosing the criteria and selecting SOS Flare Search you'll see a list of available quests that match your criteria.
Team Up with Link Parties
A link party is a grouping of 4 players max, allowing them to more easily keep track everyone's activity and join group quests. When someone in a link party posts a quest, the other members will see a notification, and can join the quest directly through the notification popup or from the Quest Counter → Link Member Quests. Link party members also get access to their own in-game chat log and voice chat.
Note, players can be in a link party together even while in different lobbies. In this way you can think of link parties as totally separate features from lobbies. Joining someone’s link party will not automatically put you in their lobby; it only gives you access to the quests they post. If you want to hang out in Base Camp together, for example, you still need to join the same lobby. Also, you're not forced into questing with your Link Party. You're completely free to do solo quests or join other players' quests outside of your current Link Party, then get back into Link Party quests whenever you want.
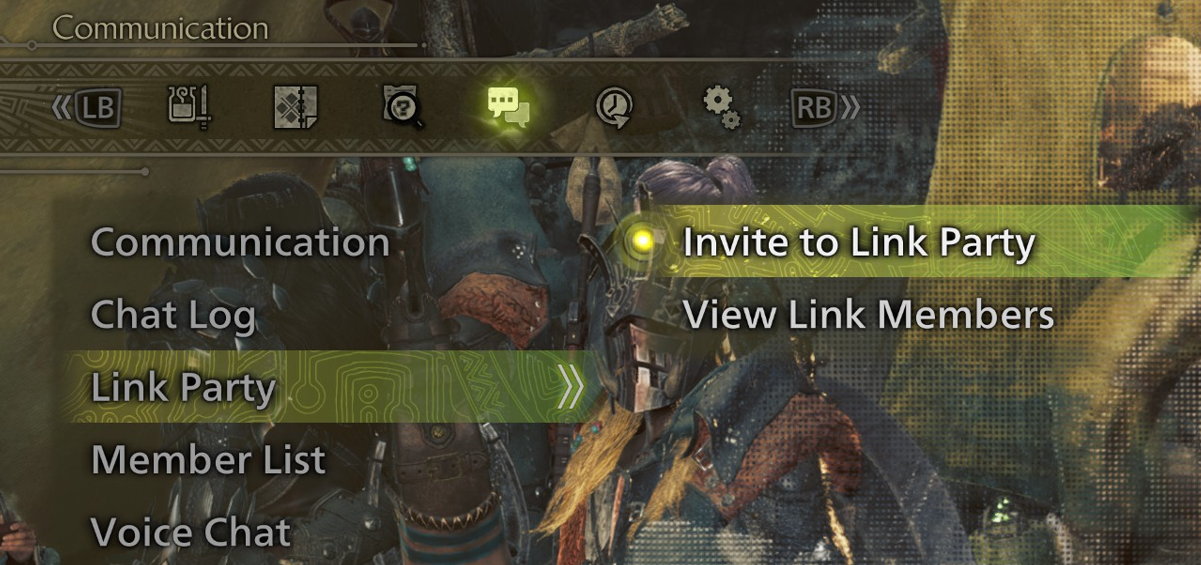
Creating a Link Party
Go to the Start Menu → Communication (4th tab) → Invite to Link Party. This will bring up a list of other players you can invite, including other players in your current lobby, or in your current quest, or players you recently played with.
Joining a Link Party
If you received an invite to a Link Party, you can accept the invitation by going to the Start Menu → Communication (4th tab) → Invitation List → select the Link Party Invite → Accept.
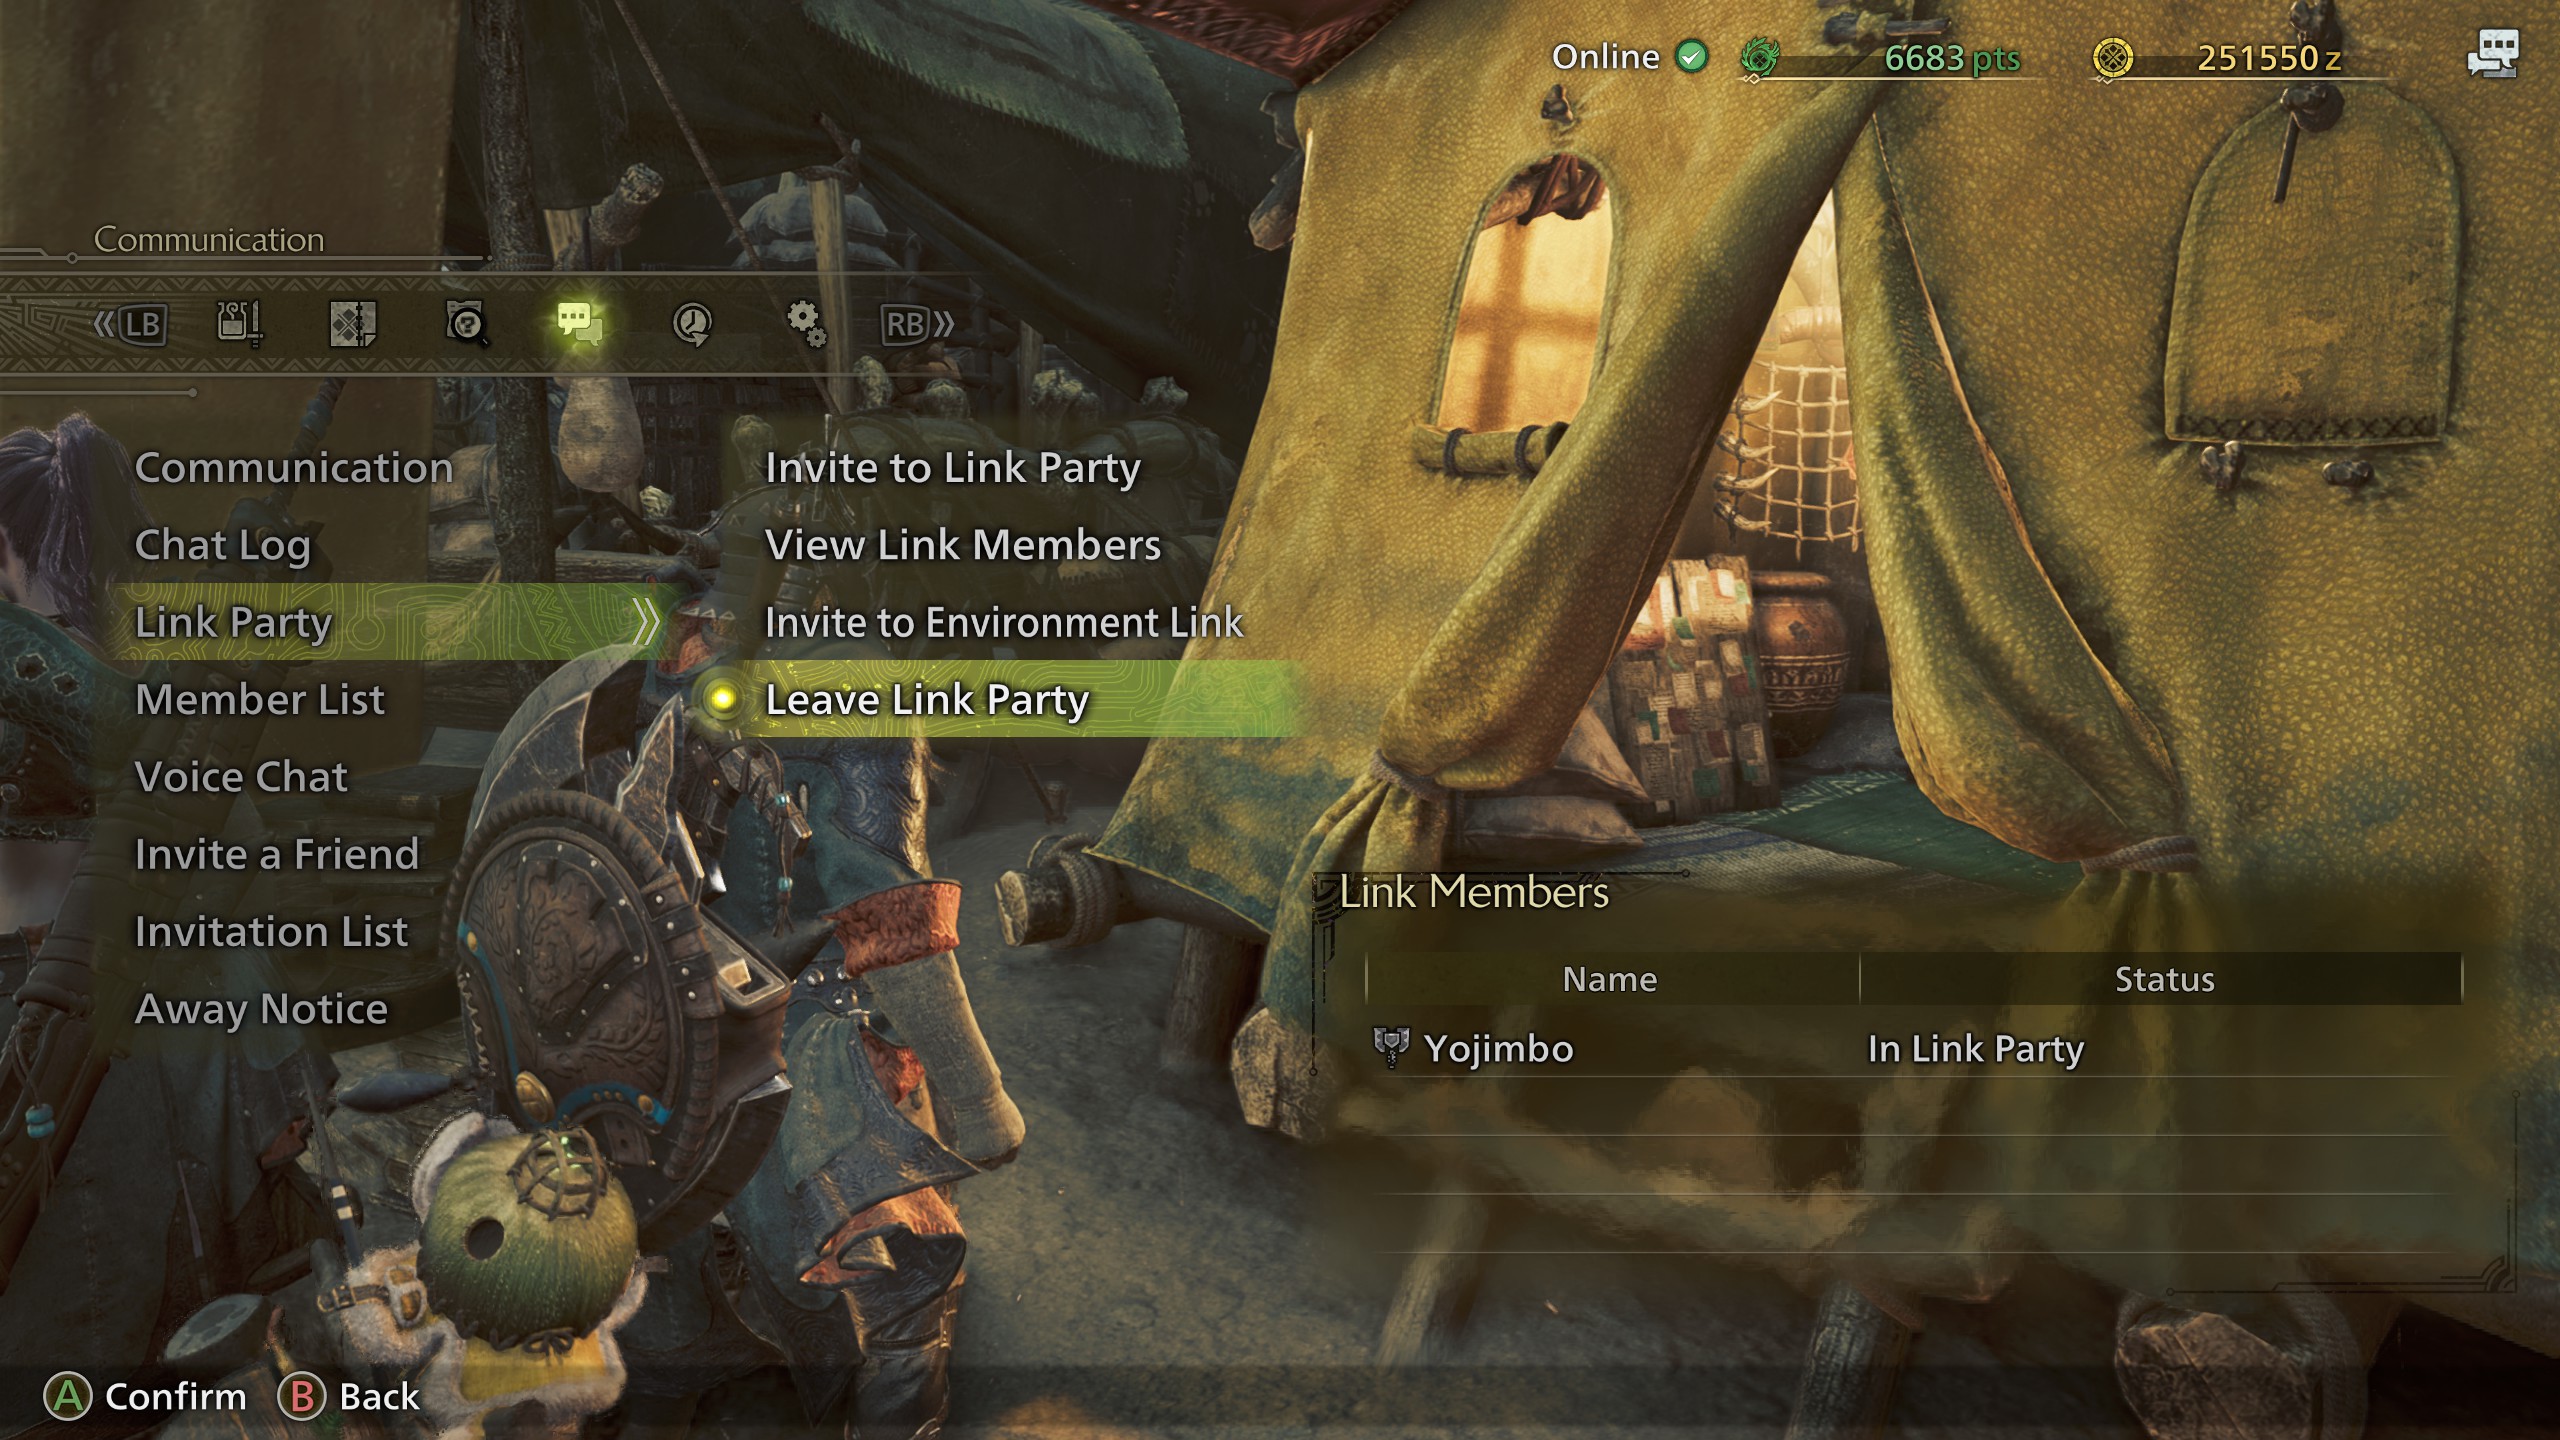
You can then confirm you're in the Link Party by going to the Start Menu → Communication (4th tab) → Link Party → View Link Members.
Leaving your current Link Party
Leave your current Link Party by going to the Start Menu → Communication (4th tab) → Link Party → Leave Link Party.
Joining Link Party Quests
If the Link Party members are all outside of a quest, then when one member posts a quest, everyone else will get a notification on the right side of the screen.
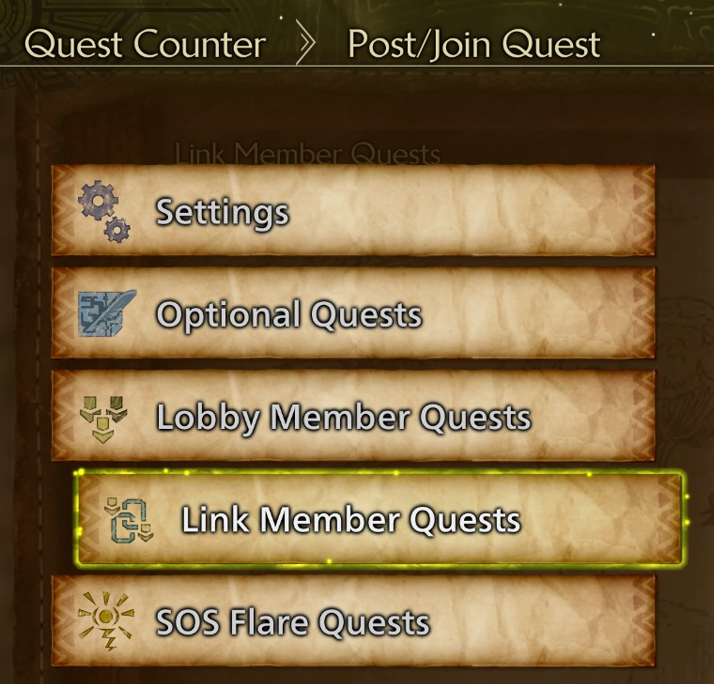
You can join a quest made by someone in your Link Party by going to the Quest Counter → Link Member Quests.
Link Party Chat and Voice Chat
Link Party members have access to their own in-game chat log and voice chat channel.
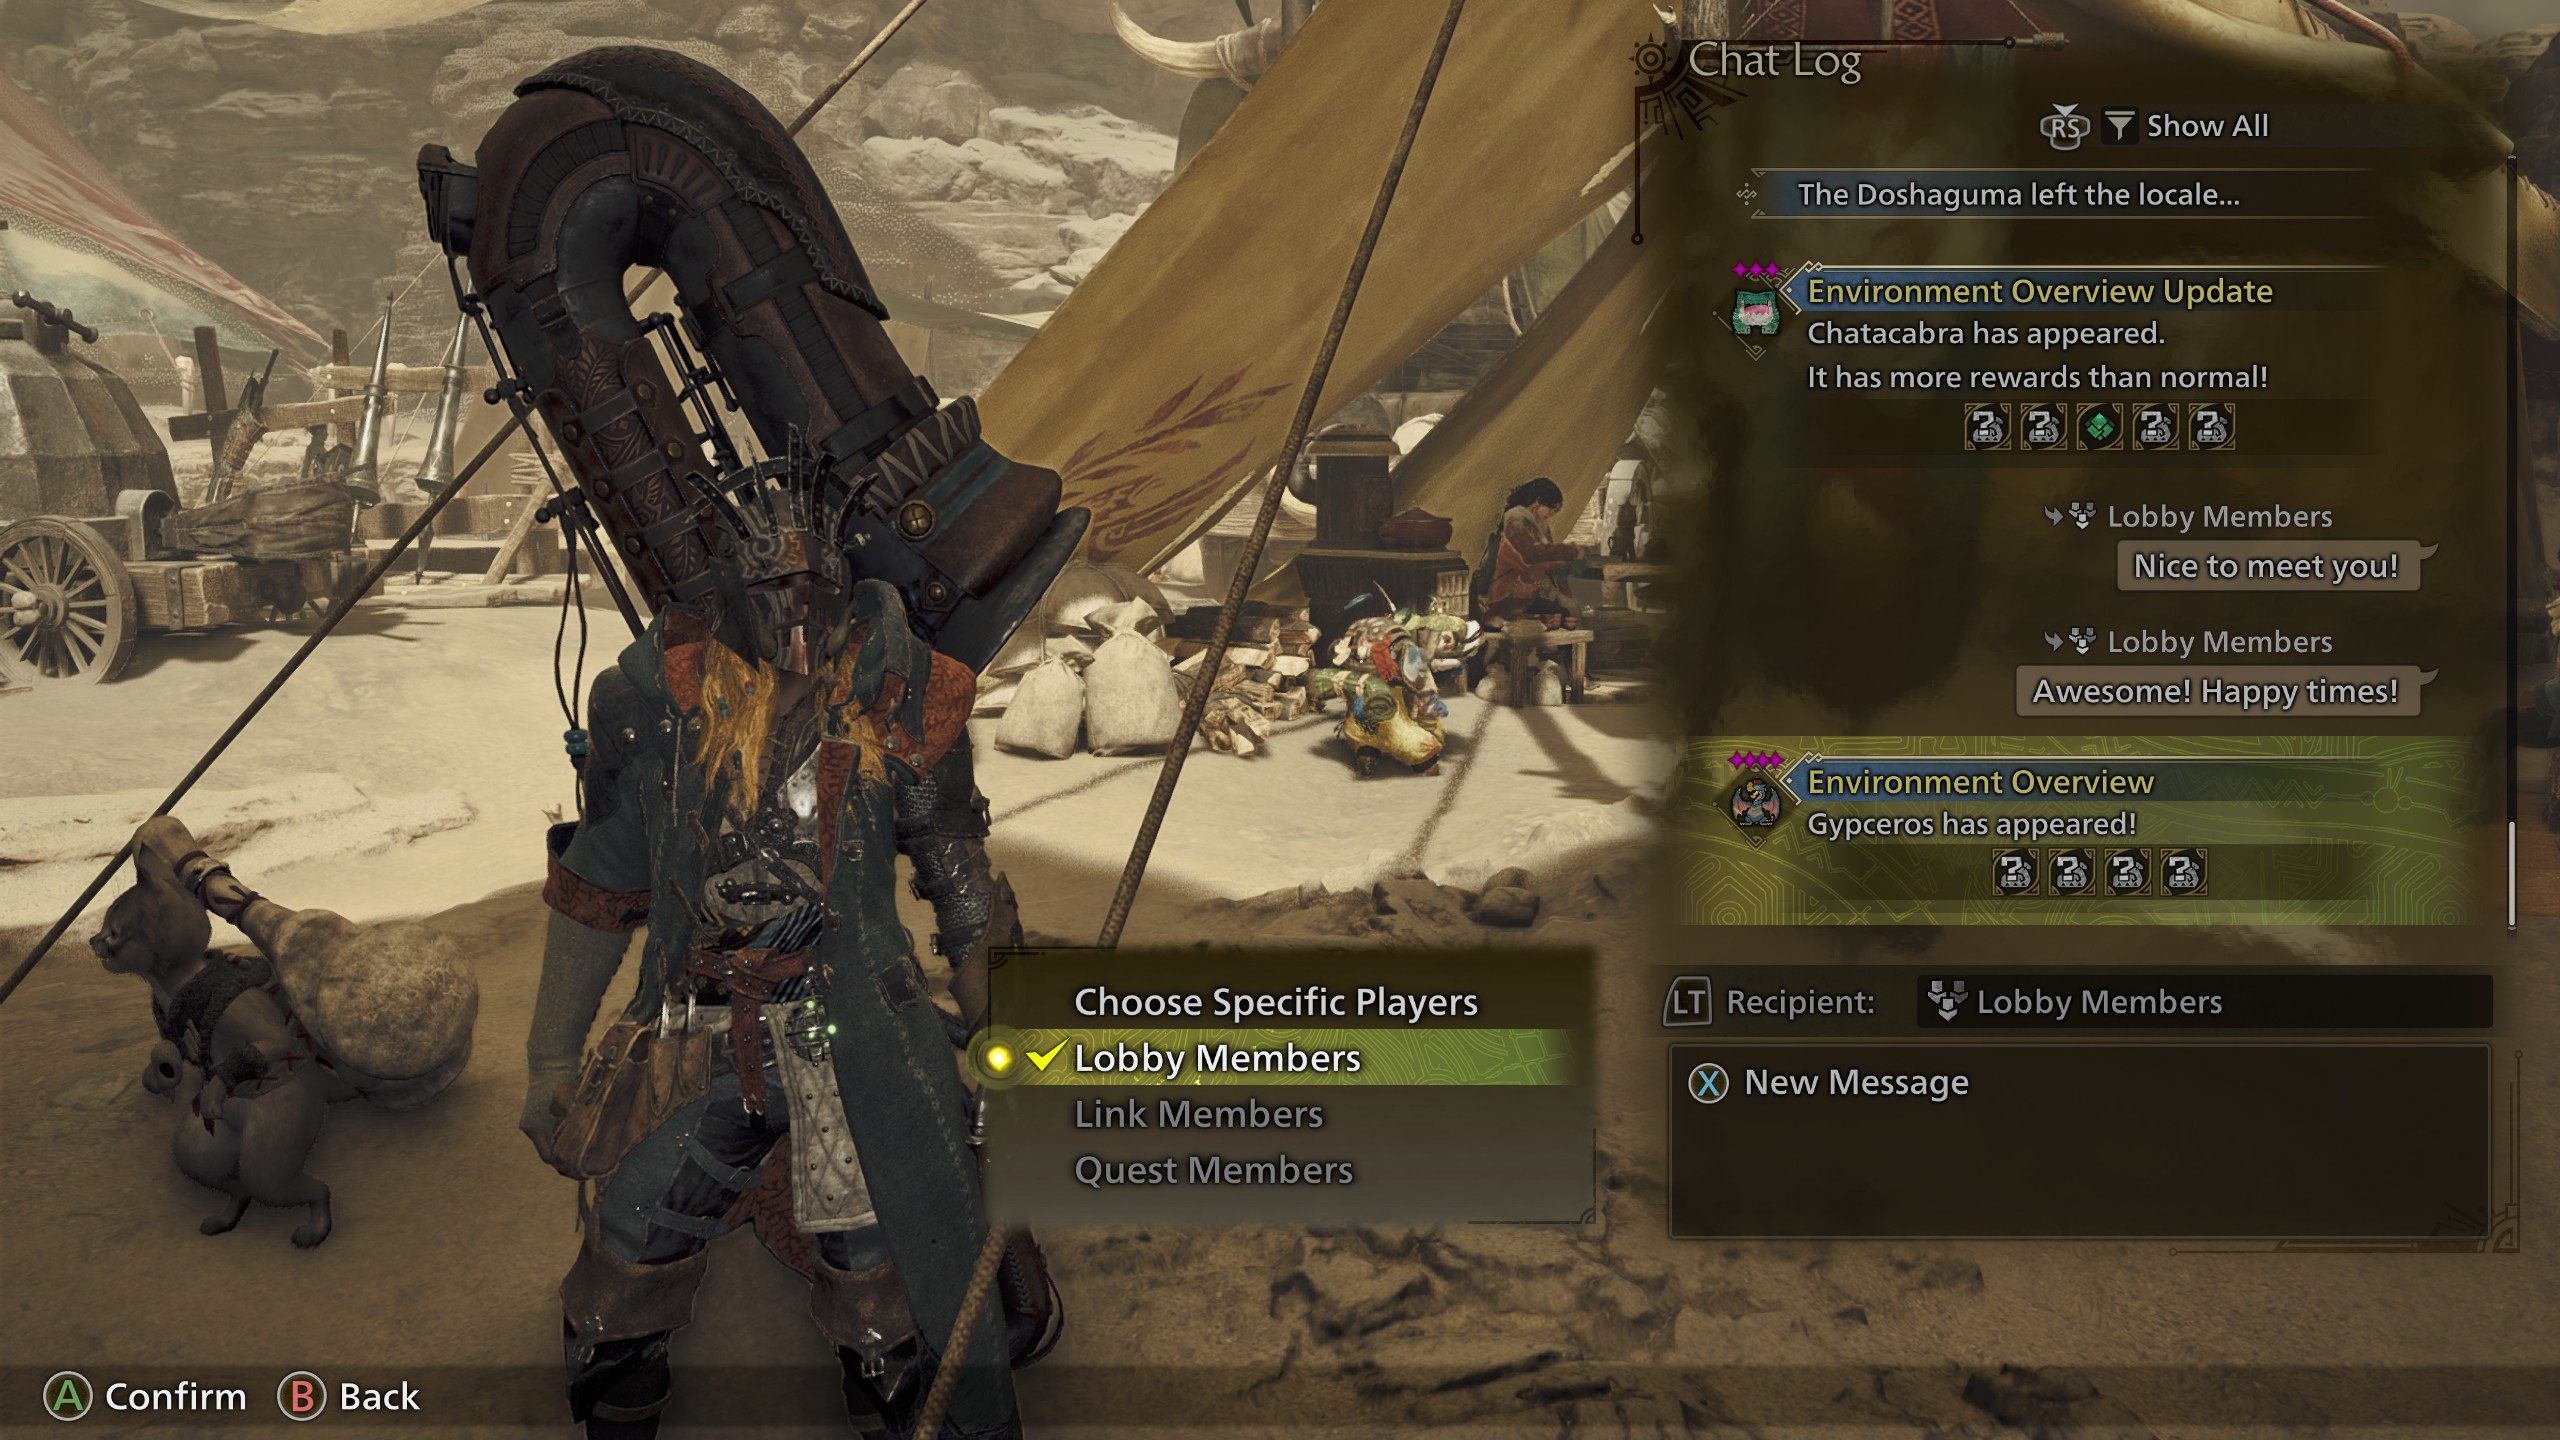
You can choose to set your message/sticker/shoutout recipients to Link Party Members only, by going to the Chat Log, pressing the button indicated next to Recipient, and setting it to Link Members.
You can bring up the Voice Chat screen by going to the Start Menu → Communication (4th tab) → Voice Chat. In this screen you can see who's in the voice chat, and you can mute/unmute people.
Exploring with Environment Links
An environment link is an extra, optional experience for players that are already in a link party. An environment link allows the group to freely explore the open world together without posting a quest.
What's so special about that? Well, every Monster Hunter Wilds player has their own instance of the game world (their own environment) which means your in-game day/night cycle and weather pattern and wild monsters will be different from your friends. You can't normally walk out of base camp into the open world with others, because all of your environments will be desynced from each other. This is where the environment link comes in. All members of an environment link temporarily join the host's instance of the world. The group can freely roam the world with no time limit and with no requirement to be in a pre-made quest. Environment links are great for doing gathering runs, or field surveys (fights with random monsters you find in the world), or generally hanging out.
However, it also comes with restrictions. You can only form an environment link with the players in your current link party. In other words, to make an environment link you always have to make a group with a link party, then form an environment link with that group. Also, only the host of the environment link can post quests.
Creating an Environment Link
As mentioned before, you can only create an environment link after you've already formed a Link Party. Follow the instructions in the previous section Team Up with Link Parties and che