 Day One Fixes
SolvedHow-toUpdated
Megabonk: What Stuff Does and How to Bonk Your Way to Them
Short answer
My Educational Guide About Bonk. A guide of the basics of Megabonk with help from friends and comments of other players. Includes (almost all) pictures of Interactables, Powerups, Characters, Weapons, Tomes, Items, and some Enemies. Pictures thanks to Friends, Me, and Quentin Corvus.
Steam Community guide by IcyCyborg.
Basics
This guide will mostly be about the different items and stuff you can encounter, and what I have learned so far. There will be spoilers for the characters, weapons, tomes, items, and other sections since I am including pictures of them and what they do. Keep in mind what you unlock for Weapons/Tomes/Items you can only disable once you buy the Toggler (Requires 40 purchased unlocks) so make sure you need them or you'll always have them be able to show up in runs (Examples of this are the items Kevin and Leeching Crystal which can impact your run a lot). I've also linked other guides, dev notes/patches, websites, and YouTubers for relevant information.
*
You'll see this symbol above each specific Interactables, Stats, Characters, Weapons, Tomes, Items, and Enemies used to unlock quests or required to unlock a character. These specific quests will also be shown in the Grouped up Unlocks section.
Xp Gem Colors and What Amount they Combine At
(Xp Gems base worth before Xp Gain Bonuses)
Blue 1
Purple 1 (Xp Dropped from Echo Shard Item)
Gold 10
Red 50?+ (More Rare with them Harder to Combine)
Is Rank and Run Count Important
With every run you do the run counter for that character goes up (and the run count for that Tier) and so does their Rank depending on how well the run went (Only impacts character skin quests for each character of reach Rank 100 and a Star by that character, otherwise it's decorative just to show how well you've done with the character). Rank goes up based on how high level you get in a run.
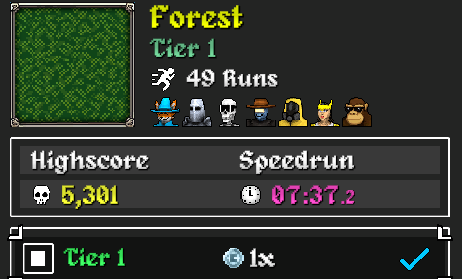
Any character you use that completes a Tier will be shown as a character icon when looking at the list of Tiers before you start a run. (Image Example)
Useful Controls
The R key, when held, will also quickly restart if you just get a bad start. (Also can be used on the end stats screen of your run)
The slide (CTRL Key) will help you a lot with some of your slower characters, helping you build up speed downhill. Just make sure you don't speed past what you need, or you have to run back. (Also, if you need to escape while being attacked, sliding increases knockback done to you but don't try this with a glass cannon build.)
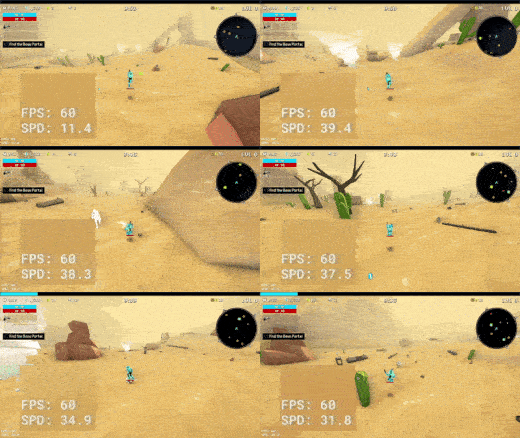
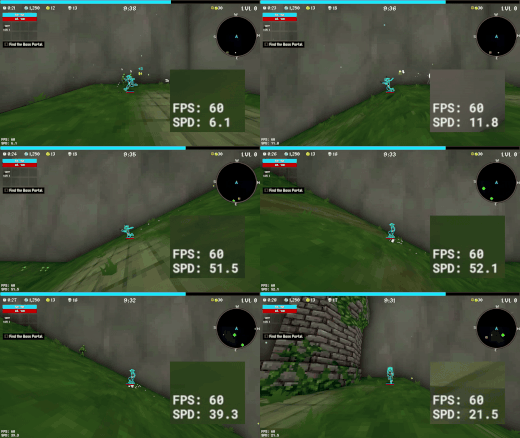
If you jump into a slide on a good slope/object you can get very far and fast (going from base 10 SPD up to 35-60 SPD depending on the slope angle and length), especially with Extra Jumps. It is very easy to chain slides in the Desert but the Forest has a lot more dead ends/obstacles resulting in shorter sliding distances if you don't have enough Extra Jumps/Jump Height/Movement Speed.
Accidentally Hitting Space Bar during Level up
Changing input delay can help (according to Chrispy https://steamcommunity.com/app/3405340/discussions/0/598540711282157319/ ) and you can also change settings so number keys can be used to select options if you keep selecting the wrong one (Settings - Controls - General Select Upgrades with Number Keys, doesn't prevent spacebar from selecting when turned on/off).
There are 2 guides on fast movement
This one is about just how to get yourself fast for Megabonk here by sev, and this one is more about B Hopping and the fundamentals/history of it here by Grommet.
(sev mentions in his guide about how you can enable a setting to see speed. Settings - Game - Other - Debug Speed, and how moving diagonally is faster.)
What is Banish/Skip/Refresh/Toggler?
When you unlock Banish, it can be very useful because it will allow you to prevent seeing an upgrade/item again in a run. For example, if you are Calcium, getting an item that helps you when standing still when you are all about movement is useless, so you can banish it so you don't get the item and won't see it for the rest of the run (For Tier 3 runs where you have all your Weapons and Tomes slots filled with low luck it might be best to banish any items you know you won't need anymore). Skip lets you avoid picking the option (you get nothing) but doesn't stop it from being in the run if you run out of Banishes, while Refresh lets you see different options and is commonly used when trying to go for a specific Weapon/Tome on level up.
Also, the Toggler can be pretty good once you unlock it and buy it from the shop. With it, you can enable/disable what you want for runs. You can do this through the Unlocks section, but keep in mind you can't toggle the starting items/weapons/tomes you got without unlocks (You can still Banish/Skip them during runs though, V1.0.17 Allowed Silver Tome to be Toggleable). Helps when you are trying to plan specific runs where certain things might hinder it.
Rarity
Rarity goes in the order of Common (Green), Uncommon (Blue with Weapons/Tomes/Shrine), Rare (Blue for Items/Purple for Weapons/Tomes/Shrine), Epic (Purple for Items/Red for Weapons/Tomes/Shrine), and Legendary (Yellow).
It's best to pick higher Rarity on level up for Weapons/Tomes when you can with them giving way more stats then their lower tier equivalents.
Getting Duplicate Items
Some items that give boosts to stats with a % may be lessened as your stats increase. This has been shown for armor % and evasion %, more then other stats. Items with no % but a set number stat increase will always go up the same, unless unique (Some more unique items have been shown to not stack right and others are hard to test due to RNG).
**
When (not if cause I will) get something wrong, a patch changes something, or you figure out something useful any and all info in the comments are welcome so I can add further to the guide. I enjoy adding to it and welcome additions unless other guides have included info already/better then I have then I'll just link to them and include them in the "Links and Guides" section.**
V1.0.41 Changes
New Content
-New Map
Graveyard
-New Character
Spooky Steve
-New Weapon
Scythe
-New Items
Old Mask, Pumpkin, Bob's Light, Snek, Pot (stainless steel)
-New Enemies and Bosses
Big Bob, Etc
-New Achievements and challenges
Late Game FPS Improvements
Couple Bug Fixes
"New Game Settings" - Extra info / Animation Toggles / Silver Pot Toggle
Dicehead, Amog, and Calcium Buff
Noelle Nerf
Chunkers +1 Projectile
Cursed Grabbies proc per tic limit 250
Poison Flask starting projectile speed increased 12 -> 16
Dragons Breath Buffed a lot
Max Silver Multiplier 8x in Final Swarm instead of 16x. (Dev isn't sure what to use excess silver for still)
Flying Meta Massively Nerfed
F10 console button for setting seeds and other commands.
Will add any further dev posts/update info in the Previous Updates section, and put just the recent update info here.


First Runs
**At the start, your main goal is to focus on getting strong enough in your run to be able to get to the boss teleporter and beat the boss before the time limit reaches zero, you get final swarmed, and die very quickly (The final swarm has no end, you live till you die). You will also want to finish quests to unlock cool Characters, Weapons, Tomes, and Items. **
**Selecting Tiers / Run Size **
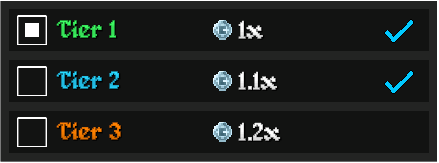
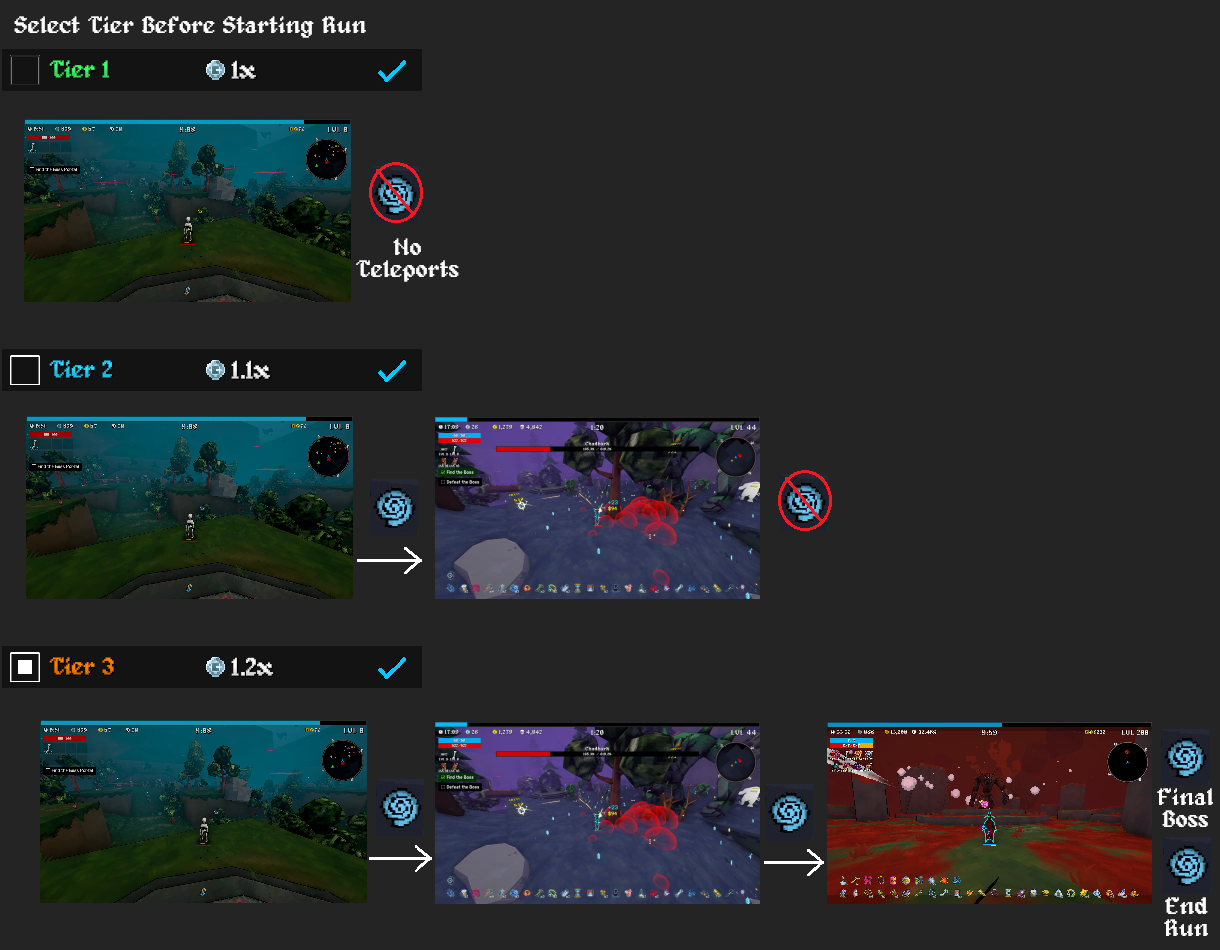
The Tier you select when starting a run is how many Stages (Areas/Maps you teleport/portal between) you have in your run. Tier 1 is one area, Tier 2 you have 2 areas, and Tier 3 has 3 and Final Boss. Map Tier difficulty goes from 0.75x, 0.95x, 1.1x (According to megabonk_research[github.com]). Picture example of UI for selecting Tier before starting a run.
What Should You do First
Check Unlocks/Quests (Once Unlocked) to see if you want to do any particular runs to get specific things unlocked.
The main prep you do for beating the boss with your limited time is:
Picking up Xp shards (goes from (1) Blue/Purple, (10) Gold, and (50 and Up) Red shards when they combine) to level up to acquire Weapons/Tomes on level up by defeating enemies/pots or magnets to pick them up for you (Can sometimes be good to avoid picking them up if you can increase their value with Xp Gain Stat Increases or find a Magnet to do it for you but they don't seem to despawn but wander over to other Xp to combine, Info thanks to Darker).
Get Gold from enemies, pots, and difficulty shrines (Exact gold count from it varies) so you can get items from chests or shady guys to make your builds have some good stats and other bonuses.
Increasing Difficulty through charge shrines, items, or difficulty shrines. You will need it increased to make more enemies spawn for more Xp and Gold, since enemy spawn count doesn't increase over time normally (Enemies do get harder as you progress though portals of long runs and Boss Hp does seem to scale but not on run time (Info thanks to Darker) might be scaled on difficulty or something else). If you don't increase it at all enemies might be easy to kill but won't spawn frequent enough to provide you the Gold/Xp to get you prepared and strong enough for the next area's harder enemies.
Find a balance of difficulty to be with enemies killed in a few seconds without swarms wiping you out, so you can get the best kills per second for Xp/Gold.
Acquiring Items/Stats through rare elite/enemy/boss drops, purchasable/free chests, shrines, and shady guys.
Prepare yourself when Minibosses and Swarms spawn when you least expect them with enough movement to dodge them or enough Weapons, Projectiles, AOE, or Damage to take care of them.
Making sure you have a balanced and/or survivable build to beat Bosses and fight Final Swarm long enough to prepare and get strong enough for the next Stage/Area (If you have the next Tier unlocked and selected) to unlock the next Tier or to get to and beat the Final Boss.
What Spawns and When it Happens
The first Mini Boss spawns at 7:00 for Stage 1 & 2, and 6:30 for Stage 3, with the 2nd one spawning at 2:00 for Stage 1 & 2, and 3:00 for Stage 3.
Swarms happen at 6:00 Stage 1 & 2, 5:30 for Stage 3, 4:00 for Stage 3, 3:00 Stage 1 & 2, Final Swarm 0:00, Black Ghosts at -1:00, Purple at -6:00, and Red at -12:00.
What Things to Look for Besides Interactables
These 3 are worth looking for with Blue Skeletons dropping a guaranteed level up and Gold Skeletons dropping Gold. They will run away and despawn shortly after being hit. (Seems to spawn randomly, but difficulty might increase spawn chance. They do not spawn after Final Swarm starts.)
The crown shows if an enemy is Elite they are stronger but drop better Xp and have a chance to drop free item chests (Free chests do NOT despawn and the exact chance is unknown for free chest drops from Elites. Might only be first Elite of a given type to have guaranteed type but unknown exactly, info thanks to dln385).



Tiers and Teleporters 101
Progressing Through Tiers/Teleporters
Image example of what you can and can't encounter on each Tier you Select for a run.
After beating the Stage Boss (All Xp at time of boss death will go to you like you picked up a magnet), the Teleporters only let you get to the next level if you have unlocked and are in that tier.
For example, in Tier 1, you can beat the Stage Boss at the teleporter but not teleport, then eventually die to final swarm.
Playing in** Tier 2** you do Tier 1's Stage with its Stage Boss then the teleporter lets you teleport to the next Stage that is visually different, from there you fight in this next area and beat its Stage Boss to unlock Tier 3, but you cannot teleport to the 3rd Stage/Final Boss in Tier 2. (If you reach Rank 100 for a character it gets you a star on that character, info thanks to Darker/Argos)
Playing in Tier 3 you go through Tier 1 & 2's Stages with Stage 2 teleporter now letting you go to Stage 3 once its Stage Boss killed through the teleporter, 3rd Stage is also visually different. When you activate the Stage 3 teleporter it doesn't spawn a boss it teleports to the boss arena and doesn't magnet the Xp to you so don't use the teleporter until you are confident in your level and strength with grinding the Final Swarm safely (Also make sure your Primary weapon is strong enough for the Boss) It will start the Boss Fight with 10 minutes on the clock.
If you don't manage to find the teleporter in the time limit endless waves of enemies will begin to spawn, the longer you last the faster, stronger, and more of them will spawn while you get a bonus to silver gain. This can be good for some extra Xp gain before going to the next area as long as you are sure you can survive them long enough and won't get thrown around from the teleporter.
Each Tier's Stage is 1 minute less then the last going from 10, 9, and 8 minutes.
If a run is going well you might want to trigger teleporter around 2:15-1:20 mark around the time you are fighting or after fighting the miniboss. If your run isn't going well then just make sure to use shrines/chests before you trigger the boss and fight them while killing enemies for Xp, just keep in mind once the Stage Boss dies you lose your remaining time before final swarm and get a 10 second head start before Final Swarm starts.
If you beat the Boss after the timer hits 0 (some challenges will just kill you at 0 like the speedrun challenges) you don't get the 10 second grace period but as long as you kill the Boss Xp still goes to you like you triggered Succ Shrine/Magnet.
Finding the Teleporter
It may be hard to find sometimes with how large the map is or how easily the terrain in the forest can block the view of it. There are some tricks to make it more easy to find.
About roughly half the size diameter your minimap shows, the teleporter also has a ring of some swirling red winds, and a bit above and below the teleporter too. These red swirling winds can be small and disappear as quickly as they appear, so they can be easy to miss sometimes from a distance.
If you see a teleporter in the distance, make sure to get within map distance of it, and it will stay marked on your map as a red arrow (Bosses will also show as a red arrow outside of minimap range, and they will teleport closer if far away for long enough).
In the Desert, the map can feel larger, but with the lack of elevated areas and trees, it can be a lot more easy to spot.
This guide can also help.
https://steamcommunity.com/sharedfiles/filedetails/?id=3597400492
**Map Size and How Long it Takes to Circle/Spiral Around **
Keep in mind Forest is a lot Easier to Search then Desert calculation-wise but Desert is more flat so there are more opportunities for it to be seen within your vision. This is old Info before we got a Map so we could see where we have been making it easier.
(Blocks are the general square shaped section of the terrain in the forest)
Tier 1 & 2 Forest Stage is 15 x 15 blocks totalling 225 blocks total (Forest Tiers 3 last area is 16 x 16), and the teleporter's red wind has a diameter of 4-5 roughly with your minimap being 5 blocks in diameter. So if you circle the map while keeping 2 blocks away (assuming you get the corners fully incase its in the very corner) from the walls thats 40 blocks to go that full distance which would cover 200 blocks. Just leaving going to the very center covering the remainng 25 blocks. The minimum distance needed to cover the whole map if you started from the center and counting your starting block would be 45 blocks. If you use Sir Oofie and have no obstacles/elevation in the way, do no sliding, diagonal movement boost, jumping speed boost, speed items, or enemies in your way with just base movement speed walking you get 1 block in 7 seconds. If you did 45 blocks with 1 block per 7 seconds it would take 5 minutes and 15 seconds.
Desert Tier 1 Stage (Didn't check other tiers size yet) is roughly 22 x 22 blocks (484 blocks total). So if you do the same method above you would cover 340 blocks just circling 2 blocks from the walls leaving you with 144 in the center (12 x 12 area). If you are doing Megachad with 1 block in 7 seconds speed it would take you 7 minutes to cover 60 blocks going just around the outer edges of the map while being 2 blocks away from the walls (not taking into account any other variables). This sounds bad but keep in mind you can normally double your speed sliding/diagonal moving/jump sliding techniques reducing this to 3 1/2 minutes (I tested and was able to circle the walls in 3 1/2 minutes with Megachad) leaving you with 6 1/2 minutes for the remaining center of 144 blocks. (Keep in mind this is not accounting for if the teleporter was 7 blocks from the wall which would enable you to see its red winds while going through this search area). If you didn't see the red winds touching the border of the area you searched it would be inside a 8 x 8 (64 total) blocks search area in the center.
With vision being roughly 7-8 blocks in length going to the very center and looking around the red winds would be visible, if it isn't those last spots it could be around the middle between your searched walls and the center if the red winds/teleporter were hard to see.
If you're also looking towards the center (with 7 block sight roughly, assuming no sandstorms, no building blocking vision, and not looking for red wind but the teleporter itself) while circling 2 blocks from the walls you can really increase your search area to 480 leaving the center 4 blocks.
If you are looking just from those 4 center blocks (with 7 block sight roughly, assuming no sandstorms, no building blocking vision, you found the rough center, and not looking for red wind but the teleporter itself) you can see a circle (16 block diameter) of around 201 blocks around the map (roughly 41.53 percent of the map).
Where It Might Be More Likely to Spawn
There has been some testing that teleporters may have more chances to spawn at certain parts of the map more then others, this hasn't been fully confirmed so results may very (Info thanks to Zero).
For some testing I've done so far with Forest they tend to spawn on the North side of the map with it ranging between NW, and NE corners then towards the center North side. It still can spawn on SE/S sides but might be more rare.
With testing in the Desert they tend to spawn toward NW corner with it spawning towards W,NW,SW,N, and NE walls. It can spawn towards SE corner but unknown how rare it is for S to SE wall spots.
This might just be how the RNG for teleporters was at the time of testing so unknown if it stays the same.
Graveyard
The new area Gra