 Day One Fixes
SolvedHow-toUpdated
9 Kings Beginner Guides & Quest Walkthroughs
Short answer
New players can learn the fundamentals of 9 Kings—including building placement, adjacency rules, and quest strategies—using community beginner guides and walkthroughs.
Beginner Guide: What to Build and Why | 9 Kings
[music] >> Welcome guys to 9 Kings beginner guide. If you are new to the game, whether on PC or mobile, these tips should help you understand what to build, when to build it, and why it works. So, let's dive into the first one. Before you place anything, you have to understand adjacency. When a building affect adjacent plots, it means that they have to be on the sides. So, if I place a building in the middle, it's going to affect the one in these four areas, but not diagonally. So, the plots in the corners are not going to be affected by it. And that's also the reason why you want to build your other damaging plots or our your main plots in in other plots, which will be affected by a supporting buildings. So, one strong supporting building in the middle is going to affect all of them at once. Enemy King is attacking from the right side, so it's always best to put your base building, which he has to reach with his units, in one of these three plots, so it's furthest away. At the beginning, you are starting with only with nine plots unlocked, but later you are able to unlock another. So, at the end, it's the grid of 5x5, so total of 25 plots. And for the reason which I just described, I'm going to place a castle here. So, afterwards, when I place, for example, blacksmith here, it's going to affect the castle and also some other plots, which are going to be adjacent to it. It's very helpful if you build your supporting plots as soon as possible, so you have just more time uh for it to buff your other plots, but you should not forget about your base building, in this case, castle. Uh your base building, and that's with every king, is one of the strongest plots you have. And it's especially strong in the early years years. So, if you are struggling on some difficulty, it's always best to focus on the base building first and then level up other plots. Next thing to understand is that your turn is not just one card. [music] Uh your turn ends when you have two cards in your hands and you can play basically unlimited number of cards during one single turn. That means you should look at the whole hand and think how much you can do before you reach the last two cards. In this case, I'm able to use clone to get another blacksmith and I still have four cards, so I can play two another. It doesn't need to be blacksmith. Getting comfortable with this makes a turn feel much less restrictive. You will start seeing a sequence of plays instead of just choosing one card and moving on. Who you fight matters more than just surviving to the next battle. It also shapes the cards you can get afterwards. So, uh when you win that year's battle, you are going to receive a card or you can choose a card from the king you just defeated. When you lose, you get a card from your own king. So, if you are looking for a card from another king, uh that battle is part of your build plan. So, fighting a battle against some king is not just an obstacle, but it's also a way uh you can build your deck. Before we get into more build decisions, there are few settings I recommend changing. For normal play, I usually increase the speed of the combat to the maximum and you also want to enable and the options skip building pop-ups, so you are not going to see all the buffs of your supporting buildings, which is going to slow down your turns. It's also very helpful to enable auto attack of your base, so you don't need to target it manually. But in some cases, you want to slow down the time and disable it. There are, by the way, uh hot keys for those, so you are able to enable auto attack with a Q and speed of the game with uh numbers 1 2 3 above you. Sometimes you really want to use it >> [music] >> because in some cases you want to target the enemy units manually and in that case it's best to slow down the game to the lowest and disable the auto attack and [music] just target with the mouse. The next thing are the rerolls. Rerolls are one of the main ways how you can shape a run. They are really worth learning early. You can reroll the next enemy. You can reroll a reward of the cards. You can reroll a reward of the decrees. You can reroll a shop so you are able to find another card. You are able to reroll a type of the shop so the cards are going to to be from a different category. So for example these are supporting buildings and towers and if I reroll it, I have a units troops here. But in particular really do not overlook the option to reroll the next enemy king because that's the way how you can get a cards and how to avoid fights which are harder for your current setup. The cost matters though. The first reroll cost only 10 gold but then goes up by a 10 every time you use that one specific reroll. So for rerolling a king king it's going to go to 10 20 30 40 etc. Try to build around one main carry plot. If you had more troops in your base, the army would be very nice but it wouldn't be very effective. It's just better to focus on just one because of the scaling and the bonuses of the damage received from other supporting building and the cards. Other troops and other buildings which would deal damage like a towers, you should just use them for cards which require some kind of sacrifice to be able to buff your main plot even more. Choose your decrees very carefully. So save your rerolls or money for these occasions because they can help your build probably the most and you can have a great synergies between the decrees chosen and the units which you have on the battlefield. Maybe this is also a good time to look at the calendar because you are able to see the event calendar on the top of your screen. And except the Royal Council which I already mentioned, you are able to receive a blessing on year three. You have merchants on year 7, 19, and 31. So, you can spend all your remaining money you have at the end of the run at year 31. And then, really important one is also a rainbow army at year 17 and 27. Most of the supporting buildings are buffing all adjacent plots, but there are two which are behaving slightly differently. One of them is farm, and that one is targeting the random adjacent plot. So, you want to build it the next to the one which you want to focus during the run. And that way, it's going to buff only that one, not the other one. Use the same approach with the libraries. If a library touches two troop plots, the enchantments are split randomly between them. Your main carry can't end up getting only part of what you wanted, while the rest goes to a troop you are not really building around. On the other hand, if the other troop does not have any enchantment, it's not going to affect it, and all the buffs are going to be received only by the your main plot who already has some kind of enchantment like a steel coat. By the way, steel coat is probably the strongest defensive buff in the game, and you should probably focus on that one if you have a libraries. You also have to expect to lose some runs. Unfortunately, it is still a roguelite, so a failed run can still teach you why a layout did not work, which enemy you are not ready for, and leveling your kings is also going to unlock more perks. So, the games are going to be more interesting, and you will have more options how to win in the future runs. And let me tell you there are more perks you are able to unlock the more fun the game is going to become as you'll be able to play more different builds and with more interesting synergies and yeah, it's going to be great. You'll see. If you however have an opposite experience and you are able to destroy the enemies in your first games, that's normal as well because yeah, there are many more difficulties beyond the first one and the game is getting much and much harder over time and at the end you really are going to lose most of the games and you will even need to retry them many, many times to be able to defeat it at least once. Usually the normal run ends at year 33. After that you can continue to the endless. Officially also the endless version ends at year 99. So, yeah, there is not really much point to go further. My recommendation is just to beat the year 33 boss and the game and increase the difficulty. So, I hope these first few tips help you during your first games in The Nine Kings, guys and if you did like it, please do not forget to like the video as well and subscribe if you want to follow me. I cover Nine Kings a lot on my channel. I have more than 150 videos of The Nine Kings, most of them on the highest difficulty. I will be following this with an advanced guide where we'll go further into building a run that scales even better so you are able to defeat the higher difficulties more easily. Thanks for watching and I'll see you in the next one. Bye.
9 KINGS 1.0 Beginner Guide – Everything You Need To Know
Hello there and welcome. In this video, I got you a beginners's guide for Nine Kings. We're going to talk about everything you need to know to get yourself a successful start into the game. I'll be starting about every gameplay element, layout, and placement things, talking about kings and their perks and everything in between. First up, we are playing here a auto battler with a deck building base builder that's happening on a grid. Basically, we get to place down things on this grid and these interact each turn with one another and they defend our base from the attacking kings. We are always in war with different kings and what we are fighting is also contributing loot for us. More about that later. We have different types of cards and they all defend our base differently. They all interact differently. And there's a couple of bigger categories that we are working with. But generally speaking, we are doing here the very basic thing that you would expect. We're trying to kill those dudes faster than they can reach our castle. We're putting troops in between that block these fellas and kill them. and hopefully we will win each battle before they reach our castle. And that is how you want to set up each and every one of your um strategies. The moving parts you got for that are troops. The archers you've seen are already on the field. There's also turrets. These don't move out of the base and uh will defend your base by killing stuff, but they can't block. There's summoners, buildings or troops that spam new things onto the field. There's uh buffing buildings like you see here, the blacksmith under my cursor. There's enchantments like the steel coat you see here. These are affecting troops and altering their stats and the dares spells or tomes that give you direct manipulation over the battlefield. These are the elements that we are working with and combining them intelligent is the way how we are winning. Generally speaking, this is very very much a buff game. It pays off very much to specialize and invest heavily into one carry of sorts and then trying to stay alive so the strongest of your units can wipe off the enemy of the battlefield. The point here being though, and that's something I really want to emphasize and point out, there's a lot of different ways to reach that goal and a lot of different um strategies you can go for. And since the loot that you get is very very random, you will have to adapt on to what is happening on the road. Obviously, we can roll or our uh loot from time to time, but it always comes with a price and we always have to work around that. Few things that I want to um introduce in this sector because they're unique to nine kings. What we set up onto the battlefield is not really permanent as long as we have access to certain cards. Some kings have access to cards that just move troops over the battlefield. Some kings have access to troops that outright destroy things on the grid with beneficial side effects, of course. So that means every decision here is very meaningful because many of those items that destroy something on the battlefield, let's to take a look on the migration. This is affecting our movement of the troop. So it pays off most when we know how we put these down in the first place before we even drew that card. So that is meta knowledge that you will um find out over the course of the time. The most simple way though is to know that everything that acts every year in a buffing way should be stacked in a way that it does the most effect. So arrange your grid in a way that for example this blacksmith can buff four people because that's the maximized effect. When we look at things like here the farm which are a little bit more intricate, it buffs only one adjacent troop. So when we place it down here, it gives us each year one archer extra. But if we would be putting down another troop here, we would we would um roll a dice each turn and find out who gets that archer. It's better to put down something that doesn't even have troops on that slot. The game is full with many decisions like that, and I don't even want to take away the fun from you. One last very important point before we can leave this part of the guide though is the tier system. Each unit on the battlefield has naturally three tiers. Each building too. These tiers matter a lot. It makes a building much stronger. It makes a troop much more efficient. And generally speaking, getting one of your troops to tier three as fast as possible is one of the best ways to make sure that your build is resting on a solid foundation. On the opposite way, just spreading your budget thin in lots of tier one buildings is usually not resulting in as much as of a powerful build as specialization does. So this is very important and therefore all these upgrade shenanigans that exist in this game for example the wild card of the um king of nothing all these are very very meaningful and uh quality matters that's the bottom line here. Okay moving on to the next big thing of this video. The nine kings of this game. I already mentioned that this is very identity um forming but I want to go deeper than that. Each king has a set of nine cards allocated to their identity and that makes the um builds that we are building happen. Each king we are in war with drops their card whenever we win their fight. If we lose the fight, we only get to draw from our own uh foundation. That means we have a ton of different build options in each run. And the mixture, which enemies you face, is not only making the um the statement of what you're fighting, it's also making the statement of what you're looting. Most importantly though, each king has their own identity in how they play. The King of Nothing is really exactly like his name implies, not a specialist at all. He can do pretty much everything equally good that comes with his deck. But let's move out of this uh build real quick and um look at the other kings for that instance because it's that that's way more specialization on their end. The King of Spills is working with a roster that is all about enchantment and utilizing enchantments and buffing those uh and those things. The King of Greed is all about gold and utilizing gold at its fullest. They also come always with a sight splice of another element. The king of spills comes with an affinity to lightning. The king of greed comes with an affinity to speed. The king of blood comes with an affinity to hordes and self-exlosive things, but also with an affinity to stacking buffs. There is with every one of these one primary aspect and something in between those lines that interacts very well with other kings. Some kings are more generalistic in their compatibility. The King of Nature, for example, offers clone, which is a wonderful compatible card that you can put into basically any build. And some of them are more specialized. I think the King of Blood, for example, is in his um units that he offers very specialized. On the other hand, sacrifice and oblation are things that everybody can use on a general level. Very well. The point that I'm trying to make here is that you always will have to look at your main king that you've picked, their character and their identity. What are they primarily doing? The king of nomads, for example, doesn't even have a castle, but he's very troop ccentric. His castle is a troop. His whole plan is about moving troops and making them stronger and multiplying troops with various tricks. So there is always a different bottom line that you're following and you're looking at the tools that fit best to your current game plan. But there is also another little caveat hidden behind those things. Each of those kings does not only combine better or worse with other kings. They also fare better or worse against certain kings. The king of spells does have a different vulnerability troop-wise than the king of greed does. It's up to you to find out which one of your plans that you're playing or which one of your builds specifically is vulnerable against what uh what element. To give you a a very um specific example, the King of Stones Balliste and Trappers are really notoriously powerful against many of my favorite builds because they just pierce through big formations like butter. Many things apply and it's up to you to find out which king is current which are the weaknesses of my king and which are the the the kings that I'm beating easily does matter when we're deciding or war enemies. Now let's move on over to the next sector. The perks. Perks are what we receive for leveling up through the game and they divide into two different sectors. There's generalistic perks shown by this uh silverish color and there's class perks shown by the color of the king. [gasps] The bottom line here is these are your way to specialize your run. You have a a limited amount of slots on the grid just like on the battlefield. They really love to double down on the three on three grid here in a very very well-made manner. But this is where you formulate your plan on how you want to play. You can build this either very generalistic with traits that are check all traits traits um like the persistent one is a very excellent one or you go all into a very specific specialization for specific cards. Even the risk when the more specialized your build grows lies in the need of specific cards. If you specialize all into, let's say, for example, trebushchets, it would be a shame if you don't draw a trepete card. It would even ruin your entire run. You either okay with having to try it a few times, or what I would recommend more is you work with those rerolls. Rolls are your currency to force your build better into a certain direction. This is what they're good for. you should really use your gold for that as much as you can possibly um allow yourself to. The perk line is overall where you make your progression over the game. The game itself is always a very strategical thing where it's up to you how much you do with the cards that you got, but the perks allow you to specialize yourself into ideas that either work only really well with the perks or much better with those. So that's where you can do something new and try out things that you haven't tried out yet when you're playing longer. Moving on to the next part, the difficulties and the grind over the game. The difficulties you can select are more or less measuring how well you are optimizing your game's speed and how well you are optimizing the power ceiling of your current build. You have to do it faster and faster the higher the difficulties go. It becomes more easy the more perks you stack. But overall, it's really a lot about learning which combos are really, really powerful and which are not that much of a big deal. Certain runs I have really, I mean it like that, one in just one turn with a specific combination of effects that just tripled the amount of units. I had one time a mob that I was able to triple with a uh with a blessing in year 10 and that was the moment I actually won the game. [gasps] combos and synergies between cards and blessings and all those things are all meta knowledge. And by all means, the most important part for me personally is that this video leaves you with the wanting to try out things and experiment with a tower build that combines the king of stone with the king of nature's towers or with the king of nothing's towers. Really experiment around. There are so many possibilities with how that system works. Sure, there are a couple of best builds, if we want to call them like that, but the fun really arises by trying out what are the combos and what are the horrible synergies that I should have never tried out, but I did it anyway, so I now know it better. So, overall, the last point that I really want to um go into here when we are talking about difficulties and grinding through the game is learn those matchups. Learn which of those…
Tips & Tricks to Get Started in 9 Kings
Making a broken build in 9 Kings is awesome. You can wipe out the entire enemy army in fractions of a second, or maybe just obliterate their base before they even get to move. When you first start, things can be a little bit overwhelming. There's a lot of synergies to learn, especially because you need to learn not only your own faction, but the other eight kings as well. And so in today's video, I'm going to start a fresh game with no perks, just as if you booted up 9 Kings for the first time. I'm going to play through the entire 33-year period, and I'm going to explain my decision making as I go. All right, and so here we are starting out on the King of Nothing. Now the castle is our base. If enemy units reach this, we lose a life. Then we have soldier, paladin, and archer cards. These are units. They have their own stats and troop counts which you can increase. The farm and blacksmith are support buildings. Meanwhile, the scout tower is an offensive building. Wild card is a tome that levels up any other card, but you can't play this on a plot by itself. And steel coat is an enchantment. Use this to buff troops. All right, the first thing to note right here. These are the kings you're going to be fighting, which in this case is a Nothing Rebellion, though it always be the mirror match, greed, and nomads. Greed has a bunch of gold bonuses and speed bonuses. Nomad has flat buffs to units and some special troops like the mob, which gain troops whenever other troops do. The start of the game, there's a couple things to note. First of all, these treasure chests. If you unlock this plot, whether through purchasing it or a card effect, you gain access to one card from your faction. The more cards you have, the stronger you're going to be. Now up here you have the years. Currently it's on year one, which is a battle. But as you can see, a prophecy is going to be decreed on year three, a royal council on year five, and a merchant on year four. Keep track of these to know what's coming next. The first card you always place is your main base. Generally speaking, placing it further up is risky because if an enemy unit reaches it, you lose a life. But if you place it further back, you're not necessarily going to get as many synergies as if you placed it right here. So if I was playing a build where I wanted to make my castle as strong as possible, I'd want it in the center so that I get all four buffs. In this case, I think I'm going to plan for something else. So instead, I'll place it back left. That way, if I put a buff here or here, it will benefit from it, but it's not directly in the way. My starting cards are Paladin. Remember, this is a tanky melee troop of a lot of health, but not necessarily that much in terms of troop count. Farm, which every year adds one to the adjacent troop. Having a farm is really strong in the early game. Think about it this way. Going from three Paladins to four Paladins is a 33% damage buff. But if I went from 300 to 301, that's not so effective. So farms do fall off and you might want to replace it later. Last up, a wild card which I could use right now to upgrade my castle. But instead, I'm going to play the Paladin. This will start combat where I can then shoot enemy troops like so, and my troops also fight automatically. All right. So I'm being offered either a mob whenever other units gain troops, so of a mob, migration where I could move my Paladins around, or camp. When a card is placed on an empty plot, it buffs everything by 2%, which if you have a right setup, is really strong. But I don't have a particularly good setup for that given that it's nomads, greed, and nothing. And nothing and nomads are not particularly good at destroying cards. So instead, I'm going to take the mob because that synergizes well with my farm. And what I want to do is just place it down adjacent to the Paladins. And you know what? I'm going to put this on auto. I think my troops have got it anyway. So now, because I defeated Greed, I get one of their cards. I could take the Thief, but I already have two units, so I probably don't need another one. Or the Beacon, which when I place it down will continually buff the speed of both my base and my Paladins. Because this is year three, a blessing has been foretold. So I could take Reclamation and get a card by throwing a card into the pit. Or if I don't have any plans to discard stuff, I can reroll. This costs 10 gold. And now I'm stuck with this because I only have eight gold. Blessings are quite powerful, but not always super beneficial depending on how you roll and which tiles they select. So I'm going to put the Beacon down. This way it buffs my Paladins and my Castle. Then I'll just watch combat play out because I'm fighting the King of Nomads. I will get a Nomad card like so. And just like with rerolling the blessing, I can reroll this like that. In this case, I could take the Raptor and mount something up. Or I could take the Castle and just throw more stones. Since mobs are pretty weak on their own, but mobs plus Raptors are kind of okay, that's what I'm going to go with. And I'm specifically going to put it here. Since I placed it next to the mob, several mobs are recruited. And I'm going to take a Paladin card. I can use this to level my Paladins up. This year is also when I get to choose a royal decree. So I could get some gold or I could apply poison twice. I have no poison synergies. I don't have King of Nature. I don't have of Stone. This one's probably not a good option here. Or I could buff my towers, which I don't have offensive towers right now. I only have my castle, so that's not particularly good. Let's try rerolling. Second blessing event. It's actually pretty good, but supplies in the early game is insane. Especially since right now I only have cards from my king anyway. This gives me a huge card advantage, which I can immediately put to work. It also means I can play a bunch of cards which I otherwise wouldn't be able to. So I'm going to go ahead and put down this farm. That way it'll buff up my Paladins, which will create more mobs. Now I don't want to put a troop here because then the farm would have a chance to buff that instead of my Paladins. So instead I could put something like a scout tower. This will shoot at the enemy. Or I could leave that spot open because I might need it later. I'm also going to place down a blacksmith here. This way both the Paladin and Raptors gets buffs, which effectively buffs the mob as well because remember when the mob rides Raptors, their stats are summed. Since my turn ends when I get to two cards in my hand, my goal is going to be to play all the stuff that I want and hold on to the stuff like the soldier and the archer that don't really fit into my strategy. So that means putting down the Paladin like so, maybe buffing the mobs of a steel coat, leveling up my castle. You know what? I might actually put this down. There's a good chance I'll be able to sacrifice it later. And I'm even going to use the wild card to go ahead and level up the farm. That way I get even more Paladins and even more mobs. So now every year my units are going to start snowballing. Aha. So shields and swords. These are flat buffs which you can apply to your units. And in this case I'm going to take the swords. So if I applied it to the Paladins, they would gain health, and they'd gain 41% damage. That's because Paladins have a special passive where their damage buffs their health. If I applied it to the Raptors, it's a pretty significant damage gain. And the Mob, it's a pretty significant damage gain. But in terms of total damage output, the other thing to remember is these guys are probably going to stay alive. These guys are going to die on their own, but there's a lot more of them. So if my Raptors and my Paladins are a good enough front line, I absolutely want to buff the Mob. Now look, King agreed. This is where I might be able to do something. Okay, it's not offering it to me. And do I want to reroll? My blessing is still quite a few years away, so I'd say no. And I'm going to take a beacon here because I can use that for a continued attack buff. Since I don't have 30 gold, sadly I can't buy anything in the shop. So time to exit. But since I have the card advantage from supply earlier, that's not as big of a deal as it might otherwise be. So I play the beacon onto the next year. This is where I'm fighting again the mirror match, King of Nothing. Still crushing stuff, not too worried. All right. I'm going to grab the blacksmith so those buffs continue to accumulate. And next year, I get to choose a king to declare war on. And that's where having extra game knowledge really matters. At first, you will not know which kings are important to declare war on or important to make peace with. As you play more, you can find some really cool stuff because this not only gives you a new enemy, but it also adds new cards to the pool. So with the King of Time, I could gain the portal card, which would actually send my kingdom back in time, allowing me to replay turns. With the King of Spells, I could get a bunch of enchantments that further buff my troops. Also, in terms of card destruction, King of Spells does have a card. But in this case, I'm going to go King of Time. And again, cuz I have another Swords, I could use it on the mob, I could use it on the Paladins. I'm going to use it on the Raptor system. There we go. And now I wipe out the King of Greed, no problem. And I get offered a mortgage, which is really unfortunate because I'd really like to immediately pop that, but I probably shouldn't because I should probably go down to 30 gold. So I'm going to reroll once and reroll again and take the castle. And let's see. Do that. The battle will start. I will get nine gold from the battle. I will get to select a King of Time card. There we go. I will select the portal. And now I have 270 gold, which means next time I get to the shop, I will be able to buy whatever I want, and I can also reroll pretty freely. I'll put this down. In theory, if I could get it to a high enough level fast enough, I could use it to replay the prophecy. But I don't think that's going to happen, and I'd rather replay something else instead. Since I got all this gold, I can use the overinvest perk. This allows me to spend 30 gold to give a stat boost to any of my buildings or troops like this, basically making the Paladins super tanks. And as you can see, my units are currently well ahead of the opponent. As you get into the higher difficulties, it becomes more and more important to really focus in on maxing out your strongest units. On the lower difficulties, you can get away with multiple armies a lot more. Here I'm going to grab a wild card cuz I'm not 100% sure what I want, but I can use this on pretty much everything. I'm also offered a royal decree. So much like supplies I get to do that again. I don't really like any of the options offered here, so I'm going to reroll. Boot camp's an interesting one because it gives a massive multiplier for putting something down fairly late in the game. And I do have a spot that I'd like to delete and replace at some point. Because I have so much gold, technically it's probably better to reroll for something else. But for the sake of demonstration, let's take boot camp. And also, what else am I going to do? I am going to level my paladins up. There we go. So now they are level three, aka max level. This will get me hopefully another portal. All right. Portal is not being offered. Since I have boot camp though, I'm going to grab this warper and I'm just going to hold on to this card till later. Unfortunately, that does mean throwing out one of these cards. That's fine. I don't specifically need them anyway. And I'm just going to clean up this king of nomads. Again, still way ahead. Next, I get to expand my kingdom, unlock a new plot. And I'll take a mob to go ahead and…
Quest Mode Guide
Intro
This guide is a work in progress, though unlikely to ever be finished if I'm being honest (5/28/26). I intend to cover all Quests for a given King before moving on to the next, with the order being Nothing→Spells→Greed→Blood→Nature→Nomads→Stone→Progress→Time
All quests are given a difficulty rating 1-3 ★
1★: Easy and simple
2★: More challenging. Some amount of improv required
3★: Hard, gets their own section in the guide
While most quests can be beaten 90-100% of the time, not all can. Quests which are heavily dependent on RNG will have ✪ instead of ★
Keep in mind the difficulty ratings are estimates based on my experiences and what others in the community are saying. They may not match up perfectly with your experiences.
If you need help with a quest I haven't covered yet, feel free to leave a comment below or ask for help either on the Steam Discussions or in DIscord.
Quests
1. Nothing Revolt ★
Paladins are our best unit, and conveniently we start with some. Place them so that you can build 2 Blacksmiths that will buff both the Paladins and your Castle, and place one farm next to your Paladins.
Try to avoid leveling up the Paladins until after the first year in case the Freshmen decree shows up. Other good picks for a first decree are Supplies, Development, Sharp Blades, Feast, Overwork, and Wishing Well.
Get a Lvl 2 Farm, then level up your Paladins and Blacksmiths, then Lvl 3 Farm and finally Lvl 3 Castle. When the Tower arrives open up a plot of land next to the Paladins and add another Blacksmith.
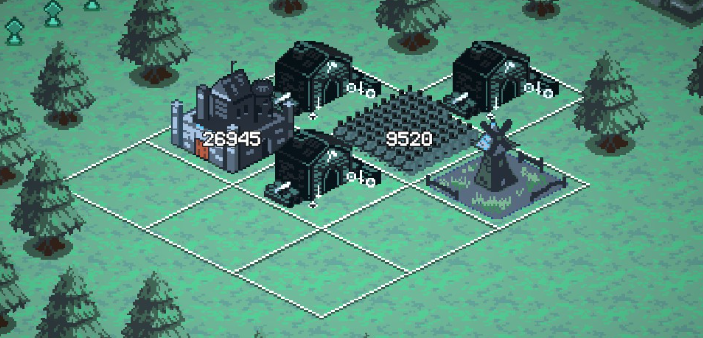
2. Broke as Hell ★
Soldiers are our best option here since we start with them in hand. Our goal will be to get Soldiers set up with 2 Farms and a Blacksmith, then later add a 2nd Blacksmith or Beacon.
Our 9 rerolls should be spent trying to get Overhaul from Progress or trying to get good decrees. The starting vaults are useless and perfect targets for Overhaul. Never waste rerolls on Greed's card loot or the enemy king. Good starting decrees include Overwork, Armory, Freshmen, Development, and Wishing Well.
Try to throw a couple stacks of Steel Coat onto your Soldiers at some point. Avoid declaring war on kings with AoE/Piercing attacks (Spells, Stone, Time).
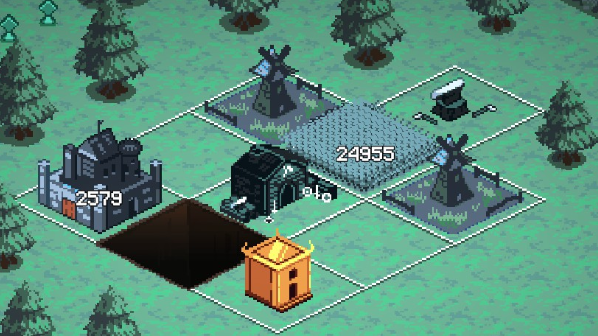
3. Colorfoe ★★
Ogres are a trap, they look good but start off too weak to be useful. Start by placing Scapegoats. Scapegoats take so long to kill that our Castle can handle the first couple years on its own. Try to let all the Goats die whenever possible to get the most gold. We can only reroll our first card loot once, so take the first good card we see. Cards we're looking for are:

- Shrine
- X-ray
- Gigantify
- Golem
- Razing
- Scapegoats (only Year 1)We want to upgrade our Scapegoats to get even more gold for rerolls. Once we have the gold for multiple rerolls, start going for Golem. Our goal is to get Golem then use Gigantify and later Osmosis to power it up to insane levels extremely quickly. If we get Supplies from Razing we can use Soldiers or Paladins instead.
4. Hunting Game ★★
Place Lvl 3 Archers next to the Blessing space, surrounded by 3 Forests. Place Boars on the Blessing space next turn. Prioritize getting a Farm next to the Boars and using Wildcard to upgrade the Forest next to them. Our goals long term are to get Lvl 3 Farms and a Lvl 3 Forest next to the Boars, then find other was to buff your units up.
Good decrees for this quest include Development, Overwork, Feast, Twinshot, Oddity, Eyeglass, Sharp Blades, Wishing Well, Agronomy. For the Merchant, don't bother buying any units and reroll for a different Merchant. The only good buildings are Portal, Farm, and Forest. For Tomes/Enchants there are lots of good cards. Steel Coat helps a ton against Nature late game, and Procreate is good for getting more Archers.
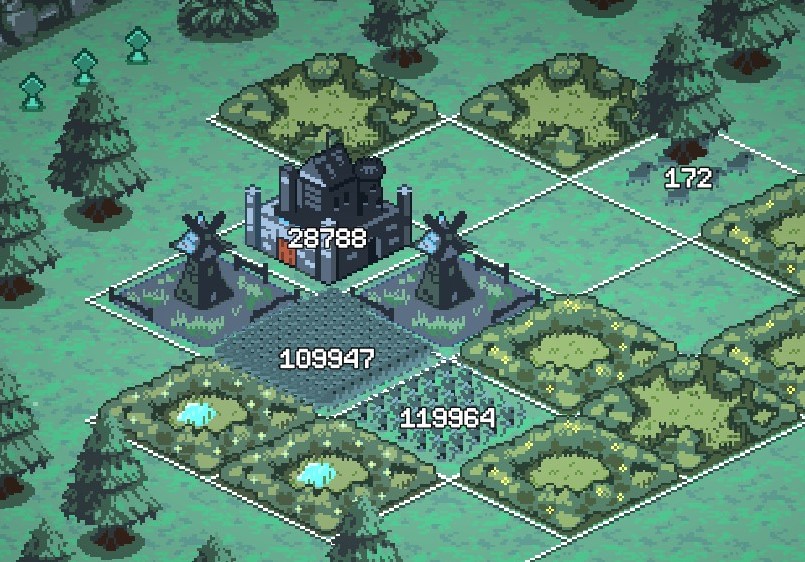
5. Farmlands ★
Place Soldiers on the blessing space, then upgrade a Farm around them. Avoid placing other units except to use with Sacrifice and Offering. When fighting Spells, grab Static if you don't already have it on your Soldiers, then Offering. Give your Soldiers Steel Coat, place a Library next to them once you have the Tower event, and just keep buffing the soldiers to win.
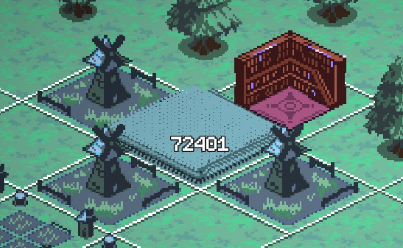
King of Nothing Continued
6. The Ridge ★★
While Razing one of our 3 tiles would be funny, don't do that (yet). Place Archers in the center tile, with the 2 Twinshot decrees we start with they're the best choice. Place your Soldier, then Wildcard your Castle twice. We want to try and keep the Archers level 1 until the first decree, in case we can grab Freshmen.
Try to place a Blacksmith between the Castle and Archers. When fighting Spells grab Static if you haven't already and Offering. Sacrifice your Soldier, or play something else to sacrifice for Offering, to get random Tome cards to boost your archers. The only good Nature cards are Procreate and Clone.
Try to declare war on Nomads. Their Migration card can be used to get the blessing effect for our Archers, and Swords are fantastic for boosting our low starting damage. Time is also a good choice of enemy for Regression and Rewind.
Go all in on buffing your Archers via Tomes and decrees. Eyeglass, Iron Fist, Refraction, Overwork, Armory, Oddity, are all good decrees to pick. Near the end of the run you can use Razing if you've held onto it, by that point you won't need all 3 plots.
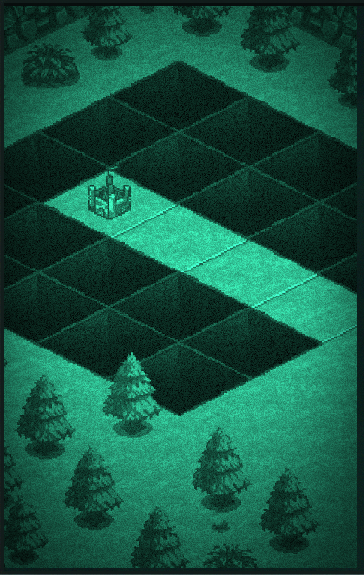
7. Royal Guard ★★
Start by placing Orbiters and a Library adjacent to your Paladins. For the first couple years before the rainbow fight never reroll more than once, we want to save our money. When fighting Spells we want Static if we don't already have it, then Offering. When fighting Time we want Regression or Rewind. When we fight the Rainbow army we want GIgantify. Shrine, Razing, Osmosis, and Temple are acceptable, and you can grab Golem if you have an Offering in hand.
Play Static on your Paladins as soon as you get it. If you get Offering, hold onto it until the rainbow fight. Play Regression on your Paladins whenever possible, they gain a ton of stats on level up, and hold onto Rewind until the Rainbow fight.
There are 3 ways to win this quest. The first is to get Gigantify and use Rewind to keep playing it on your Paladins over and over. The second is to use Regression on your Paladins and keep leveling them up, which will quickly make them extremely strong. Finally, with enough stacks of Static and Steel Coat you can do enough damage to win.
8. Furnaces ★
Starting by using both Wildcards on your Castle, then focus on upgrading your Blacksmiths and Wallmakers. After the Rainbow fight we ideally want X-ray or Shrine to level up a bunch of cards at once. Now you can Earthworks to get additional Wallmakers to level up. Keep in mind a Lv3 Wallmaker has as much health as 2 Lv2 Wallmakers. By the end of the run you want 4 Lv3 Wallmakers for a total of 9600 Health.
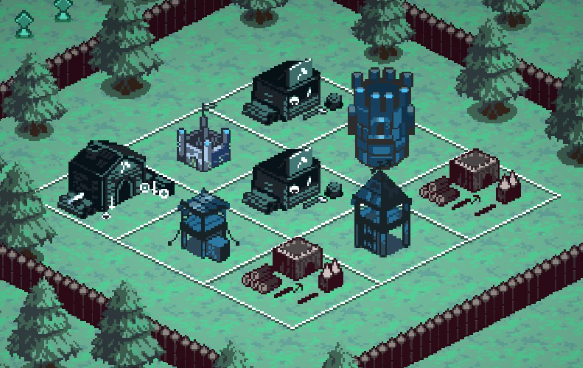
9. Nothing Total War ★★
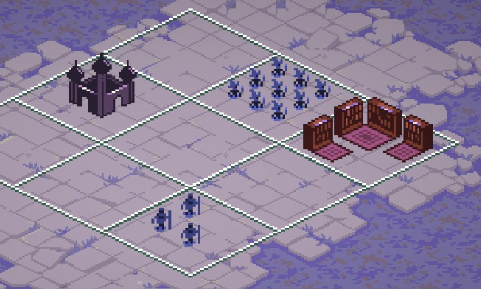
Start with the setup shown on the right. Use Wildcard and Steel Coat on the Paladins and upgrade your Castle to level 2. The Archers are there to eventually sacrifice with Overhaul or Offering.
Total War quests are very random, so you'll want to reroll a lot to try and get good cards. Avoid rerolling any card loot more than once, we don't want to spend 20 on a reroll. Never reroll the enemy king unless it's Stone. Stone has no cards we want and should be avoided. We'll be mostly relying on Paladins to carry us, so always look for cards that can be used to buff them. Good cards to grab include Offering, Beacon, Overinvest, Carnage, Clone, Procreate, Camp, Overhaul, Regression, and Rewind. Try to get a Camp, Beacon, or Blacksmith set up in the top corner. The best decrees to grab are Feast, Sharp Blades, Oddity, Wishing Well, and Overwork.
No matter what, you're going to need to improvise on this one.
King of Spells
Spells has a phenomenal deck, with Shaman and Spire being the only bad cards. Offering is the best card in the game, and Static is an amazing damage dealer early game.
Re-enchant and Athenaeum are good if you're using Wizards but otherwise nothing special. Static Fields is great if your Citadel is your main damage dealer. Glass Staffs is only good early on. Spiremania and Abracadabra are just never worth taking.
10. Incantation ★
Play Precision, Adrenaline, and Combustion on your Wizards, while playing Carnage and Steel Coat on the Warlocks. Throw out the remaining Enchantments. They're not as good, and if we apply them the libraries might copy them instead of something useful.
Use Procreate on the Warlocks and Regression on the Wizards. Use Overhaul, Offering, and Rewind basically whenever possible.
11. Gigantifield ★
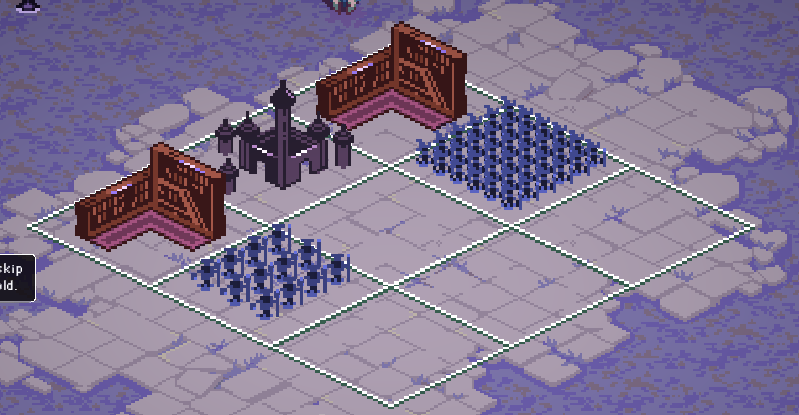
Throw Combustion on the Ogres. We start with Wishing Well and a ton of gold, so reroll your first loot until you get Offering. Immediately discard it to get 3 back, and use them on your Spire, Library, and Wizards. Your Ogres now get +20% stats every turn, and you should have some Tomes you can use to power them up, letting them easily sweep the entire quest.
12. Rite ★★
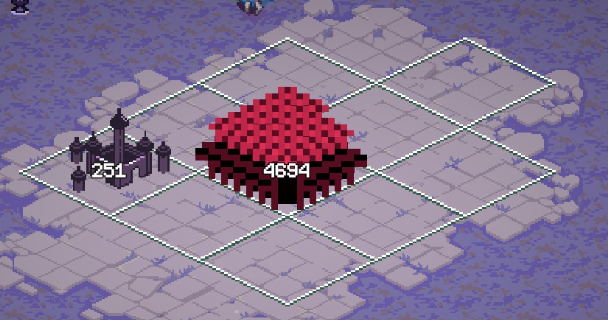
If you run out of things to sacrifice you'll be in trouble. Try to always use Offering on low level plots and save the high level ones for Earthworks. If you've got 4+ plots that you can sacrifice then you can afford to use Overhaul. Sacrifice isn't as good and should rarely be used.
We have 2 wincons, with the first being Supplies. If you can get Supplies you can throw down some Wizards and Warlocks and power them up for the rest of the run to carry you. Otherwise our focus is the Gacha machine. Using Earthworks on the broken Gacha will get us 2 normal Gacha cards to use. With Gachas we can get Slimes for infinite sacrifices, Golems for a unit that scales extremely fast with tomes, Temple to power up our Citadel, or Razing to get more decrees.
13. Spells Revolt ★
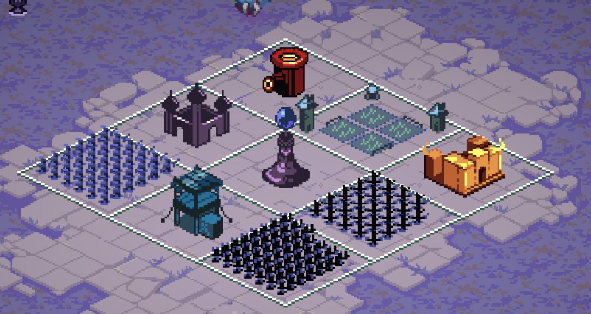
Remember Incantation? Yeah basically do that. Set up a single Wizard with Combustion and multiple libraries, and a Warlock to serve as distraction. Use Offering to get tomes like Swords and Procreate to get even stronger.
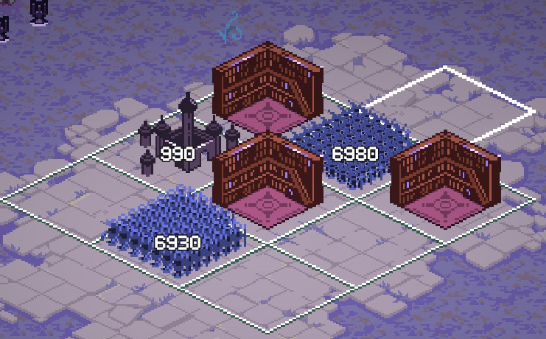
14. Northlands ★
Remember Incantation and Spells Revolt? Do the same thing again. Set up a Wizard with Combustion and a couple libraries, use Warlocks and Raptors to stall and distract the enemy, and use Offering when everything is max level. Slightly harder than Spells Revolt in my experience but still easy if you get a decent decree.
15. The Great Library ★
Ok here me out, what if we did Wizards+Combustion+Library again? The Libraries are all set up for us this time. Place Wizards in the center and throw on Combustion,. Try to get Wizards or Warlocks as your first card loot, then buy something from the merchant you can use as a sacrifice for Offering.
16. Spired ★★
First, place a Warlock on one of the lower two tiles. Second, the devs pulled a trick on us. All the Spires we start with have increased damage compared to a normal spire, but the bottom one has been buffed the most. Use Offering on the other 3 Spires.
Use any Swords you get on your Spire, and any Shields on the Warlock. Use at most 1 Migration to move the Warlock, then use all your remaining tomes to buff your Warlocks and Spire. There's a decent chance you'll be able to loop Rewind+Offering a few times and play some extra cards.
As soon as possible, play a Camp between your Spire, Citadel, and Warlock. Try to get it to Lvl 3 quickly. From now on you want to use Overinvest, Swords, Shields, Migration, Procreate, Clone, and Offering as much as possible to buff your Citadel and Spire while also raising your Warlocks HP. Feel free to spam Beacons Camps Raptors whatever on the empty plots to trigger your main Camp.
In terms of Decrees, Poison Thorns and Spiremania, while normally not worth grabbing, are great here. Feast, Overwork, Eyeglass, Sharp Blades, Oddity, Supplies, and Wishing Well are all great as usual.
When you reach the final year, reroll if you're matched against King of Greed. Greed's Champion will 1-shot your units one at a time, nothing our Spire can do to prevent that. Nomad's Champion is notorious for shredding troops, but if you've buffed your Warlocks and Spire enough you'll be able to survive the damage.
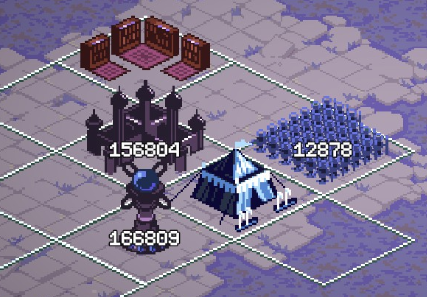
17. Feeble Army ★
Back to combustion Wizards. Sacrifice all the Wizards except the one located in the top left on the blessing tile. Grab Steel Coat and Combustion, apply them both, stack Libraries, and use Offering whenever you get a chance.
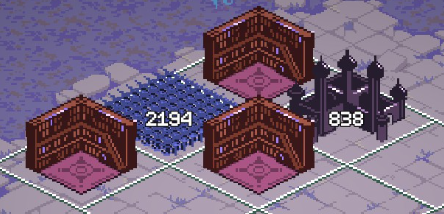
18. Spells Total War ★★
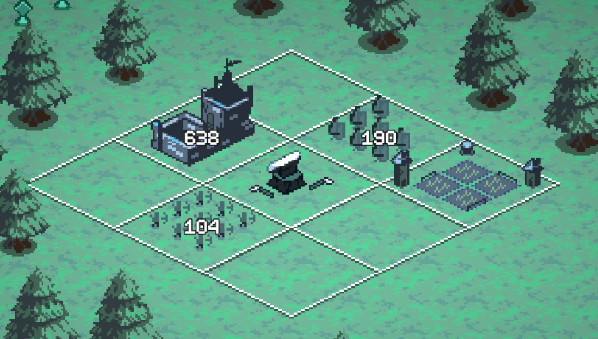
More Combustion Wizard spam. Set up your units as pictured on the right here to get benefits from the blessing. Use Offering on your Spire and then use the tomes you get. Our goal is the same as always, turn your Warlocks into bulky distractions and Wizards into glass cannons.
The best cards to get are easily Offering, Overhaul, Procreate, Steel Coat, and Rewind. Procreate should be used on your Warlocks, and Steel Coat on your Wizards. Use the other cards to get multiple libraries set up and level everything up.
As with any Total War quest, some improv will be required. Focus on finding ways to level up early on, then setting up your Libraries, then grabbing tomes to buff your units.
King of Greed
Greed's cards are all about money, making it and using it. Your base is powerful but struggles against large groups, Dispenser is a good card but takes time to get going, Beacon is a fantastic support building, and Overinvest is a great stat boost for any unit or tower. Midas Touch and Vault are mostly useless in quest mode.
Thiefs have a small niche in being an above average unit for stalling the enemy, since they teleport behind the enemy front line forcing them to turn around and run backwards, but they aren't great. Mercenaries are unique in that they don't gain more units on level up, but their unit count is adjusted based on the amount of gold you have. While they gain a decent amount of stats on level up, its nothing special. What this means is 2 Lvl 1 Mercs is almost always better than 1 Lvl 2 Merc.
Your Greed decrees are bad. You don't need or want them.
Autofire should be turned on 95% of the time. It makes the Palace target golden enemies to get you the most gold per battle, which we want, because we're playing Greed.
19. Shopping Spree ★★
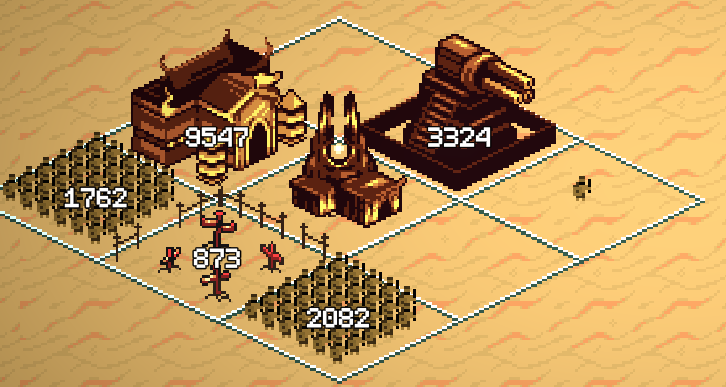
Start by tossing your Beacon next to the Palace. This quest might feel random, but since every shop gives us 6 cards to pick from its not that bad. The main cards we're looking for are Mercenaries, Palace, Dispenser, Cemetery, Wildcard, Clone, Offering, Rewind, and Earthworks. We want to upgrade our Palace and get a Dispenser out as soon as possible. Spam Lvl 1 Mercenaries to stall, and stick a Cemetery next to them.
Use Earthworks to split Lvl 2/3 Mercenaries into multiple groups. Clone can be used to get more Mercenaries or level up your Palace, Wildcard should be used on the Palace or Mercs, and Offering and Rewind are there to give you more good cards to use.
You can reroll the type of Merchant you get. Only do this if you get a Troop merchant and he doesn't offer Mercs. Rerolling the cards offered should only be done on the Building merchant to ensure we get a Dispenser. If there's nothing good offered, remember you don't have to buy something, you can just save your money for later.
20. Fugitive ★★★
Rainbow Battles
Runs always have 2 fights against the Rainbow army which let you pick special, powerful cards as loot. In Fugitive, these 2 fights take place in Years 17 and 27. We start the quest in Year 18, and our first fight is always against Time. We can grab a portal as loot from the first fight, buy something to level it up with at the shop, then immediately place it and activate it. Doing this will send us back to Year 17 and earn us a Rainbow card.
The best cards we can possibly get as loot are Gigantify and Shrine. Gigantify we use with Rewind to massively buff a unit and breeze through the quest, while Shrine can be used to activate more portals, letting us go back in time and replay Year 17 several times.
Rerolling the Merchant
A recent update added the ability to reroll the type of Merchant you get, making this quest more consistent. You can easily afford to reroll 3-4 times to get the shop you want. Any type of shop can work, so rerolling is unnecessary, but different shops require different strategies.
1st Strategy - Building or Tome Shop
Place your Imps, discard the Amplifier, then when you win the first fight reroll until you get a Portal. Now we want the Building or Tome Shop. Look for Portal in the building shop, and Wildcard, Clone, and Rewind in the tome shop. These cards will let us make a level 3 portal immediately. Buy another 2 cards just to fill your hand and guarantee you can play everything else. Try to have at least 200 gold left over.
Place the portal, level it up and activate it, then fight the Rainbow army. Reroll your loot for Gigantify and use it on your Imps. Alternatively, grab Shrine to let you quickly level up a portal or two and retry the fight. Whenever we fight Time now, we want to reroll for Rewind. Use Rewind, get Gigantify back, use it on Imps, repeat until win.
Never fight Blood. They don't have cards we want and their high unit count makes them dangerous. Make peace with Blood when you can. When fighting Nomads, grab Raptors and place them next to your Imps. Raptors are an amazing mount, and their charge attack is incredibly strong.
2nd Strategy - Troop Shop
Place your Imps in a corner, discard the Amplifier, then when you win the first fight reroll until you get a Portal. In the shop, we want 2-3 Raptors and 2-3 Orbiters. If you're struggling to get Orbiters, Ballistas also work. Ideally we get 5 total Raptors/Orbiters, then buy 2 more cards so we can play everything in our hand.
Place the Portal diagonal to your Palace, next to the Imps. Place the Raptors/Orbiters (whichever you only have 2 of) diagonal to the Palace as well, and the other one should be placed next to it. Use Swords on the level 1
What players say
Beginner Guide: What to Build and Why | 9 Kings
Experienced 9 Kings players, I know, this is the very basics! 😄 The full release is out today and lots of people are starting from scratch, so this one's for them. Don't worry, the hard runs keep coming, plus an advanced guide soon. But when you are already here and reading this, what's one tip you'd give someone brand new, what's the thing you were struggling with early on? Leave it below, it'll help them a lot! Thanks!
SkuubTag
And really focus on the passives of the units
kevinparadolt
I remember first time playing it i focus too much i mean it literally on soldiers and start try increases it number much as possible
QazPoi-v9i
Thank you very much for the guide. My question is how to level up the kings faster or better said. How do i unlock the perks specially the rainbow ones because i don't have them all for SP in MP i have some perks that i actually want for SP as well but i keep getting clapped at the king difficulty 😅
jojodio8467
9 KINGS 1.0 Beginner Guide – Everything You Need To Know
Good video, seems like nice game to try :) Take care Ic0n!
krzysztofkalinowski2998